User:Grayson/Sandbox: Difference between revisions

From Redemption Wiki
Jump to navigation Jump to search
No edit summary
m (Reverted edits by Grayson (talk) to last revision by Bl1tz)
Tag: Rollback
Line 1: Line 1:
[[File:Arcade Header.png|center|600x600px]]<center><tabber>
<center>
|-|About=
[[File:Page-title-money-making.jpg|center|800px]]'''This page is a compilation of only the few most popular ways of making money. Of course, whether it be merching or something else entirely, there are plenty of ways to make money which haven't been listed.'''
'''What is the Arcade?'''
'''Get creative, and forge your own path!'''
 
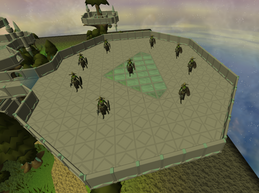
The Arcade is a mini game with 1-55 waves of npcs & boss’s depending which difficulty you chose. <br>
With each not only getting incredibly more challenging the higher the difficulty , but the rewards becoming much better. <br>
For every Arcade you complete you will receive [[Arcade Token]]‘s which can be spent at the Arcade Reward shop, with each difficulty rewarding different amounts! <br>
(Higher Donation rank in game will increase [[Arcade Token]]'s per arcade completed) <br>
This shop has everything from pets like the [[Ultron Pet]], to raw cash, and jewelry like the [[Emperor's Necklace]], + [[ Emperor's Ring]]. <br>


'''Locations'''
 
There are two ways to get to the arcade. The first method is teleporting home and running into the west activity hub (shown below). <br>
The second method is simply typing ::arcade in-game, which will take you straight there. <br>
 
 
[[File:Aracade_shop_map_new.png|center|250x250px]]
 
 
'''Rewards:'''
 
[[File:Arcade_shop2.png|center|500x500px]]
 
 
{| class="wikitable dropstable mw-collapsible mw-collapsed rdtable" style="text-align:center" cellpadding="2" cellspacing="0" data-expandtext="show" data-collapsetext="hide"
|-
! colspan="10" style="min-width:250px" |Arcade Reward Shop Prices
|-
! scope="col" style="text-align:center;" |''Image''
! scope="col" style="text-align:center;" |''Name''
! scope="col" style="text-align:center;" |''Price''
|-
|style-"text-align:center;" |
|style="text-align:center;" |[[Box Of Wisdom]]
|style="text-align:center;" |25,000 Arcade Tokens
|-
|style-"text-align:center;" |[[File:Arcade Ring 1(2).png]]
|style="text-align:center;" |[[Arcade Ring]]
|style="text-align:center;" |150,000 Arcade tokens
|-
|style-"text-align:center;" |[[File:Knuckles_pet.png]]
|style="text-align:center;" |[[Knuckles Pet]]
|style="text-align:center;" |5,000 Arcade tokens
|-
|style-"text-align:center;" |[[File:Link Sword.png]]
|style="text-align:center;" |[[Link Sword]]
|style="text-align:center;" |50,000 Arcade tokens
|-
|style-"text-align:center;" |[[File:LinkHatEquipped.png]]
|style="text-align:center;" |[[Link hat]]
|style="text-align:center;" |50,000 Arcade tokens
|-
|style-"text-align:center;" |[[File:LinkTunic.png]]
|style="text-align:center;" |[[Link tunic]]
|style="text-align:center;" |50,000 Arcade tokens
|-
|style-"text-align:center;" |[[File:LinkLeggings.png]]
|style="text-align:center;" |[[Link leggings]]
|style="text-align:center;" |50,000 Arcade tokens
|-
|style-"text-align:center;" |[[File:Crash bandicoot pet.png]]
|style="text-align:center;" |[[Crash Bandicoot pet]]
|style="text-align:center;" |50,000 Arcade tokens
|-
|style-"text-align:center;" |[[File:Space Invader Pet.png]]
|style="text-align:center;" |[[Space Invader Pet]]
|style="text-align:center;" |10,000 Arcade tokens
|-
|style-"text-align:center;" |[[File:Pacman Jr.png]]
|style="text-align:center;" |[[Pacman jr Pet]]
|style="text-align:center;" |15,000 Arcade tokens
|-
|style-"text-align:center;" |[[File:Oblivion Scythe.png]]
|style="text-align:center;" |[[Oblivion Scythe]]
|style="text-align:center;" |100,000 Arcade tokens
|-
|style-"text-align:center;" |[[File:Oblivion Platelegs.png]]
|style="text-align:center;" |[[Oblivion Platelegs]]
|style="text-align:center;" |25,000 Arcade tokens
|-
|style-"text-align:center;" |[[File:Oblivion Platebody.png]]
|style="text-align:center;" |[[Oblivion Platebody]]
|style="text-align:center;" |25,000 Arcade tokens
|-
|style-"text-align:center;" |[[File:Batman Mask.png]]
|style="text-align:center;" |[[Batman Mask]]
|style="text-align:center;" |25,000 arcade tokens
|-
|style-"text-align:center;" |
|style="text-align:center;" |[[Thor's Hammer]]
|style="text-align:center;" |25,000 arcade tokens
|-
|style-"text-align:center;" |[[File:Captain America Shield.png]]
|style="text-align:center;" |[[Captain America Shield]]
|style="text-align:center;" |25,000 arcade tokens
|-
|style-"text-align:center;" |[[File:Spiderman Mask.png]]
|style="text-align:center;" |[[Spiderman mask]]
|style="text-align:center;" |25,000 arcade tokens
|-
|style-"text-align:center;" |[[File:Spiderman Body.png]]
|style="text-align:center;" |[[Spiderman Body]]
|style="text-align:center;" |25,000 arcade tokens
|-
|style-"text-align:center;" |[[File:Spiderman Legs.png]]
|style="text-align:center;" |[[Spiderman Legs]]
|style="text-align:center;" |25,000 arcade tokens
|-
|style-"text-align:center;" |[[File:Captain's America Mask.png]]
|style="text-align:center;" |[[Captain's America Mask]]
|style="text-align:center;" |25,000 arcade tokens
|-
|style-"text-align:center;" |
|style="text-align:center;" |[[Captain's America Body]]
|style="text-align:center;" |25,000 arcade tokens
|-
|style-"text-align:center;" |[[File:Captain's America Legs.png]]
|style="text-align:center;" |[[Captain's America Legs]]
|style="text-align:center;" |25,000 arcade tokens
|-
|style-"text-align:center;" |[[File:Spiderman Noir Mask.png]]
|style="text-align:center;" |[[Spiderman Noir Mask]]
|style="text-align:center;" |25,000 Arcade Tokens
|-
|style-"text-align:center;" |[[File:Spiderman Noir Body.png]]
|style="text-align:center;" |[[Spiderman Noir Body]]
|style="text-align:center;" |25,000 Arcade Tokens
|-
|style-"text-align:center;" |[[File:Spiderman Noir Legs.png]]
|style="text-align:center;" |[[Spiderman Noir Legs]]
|style="text-align:center;" |25,000 Arcade Tokens
|-
|style-"text-align:center;" |[[File:Ultron Pet.png]]
|style="text-align:center;" |[[Ultron Pet]]
|style="text-align:center;" |200.000 Arcade Tokens
|-
|style-"text-align:center;" |[[File:Thanos Pet.png]]
|style="text-align:center;" |[[Thanos Pet]]
|style="text-align:center;" |75,000 Arcade Tokens
|-
|style-"text-align:center;" |[[File:Emperor's Necklace.png]]
|style="text-align:center;" |[[Emperor's Necklace]]
|style="text-align:center;" |1.200,000 Arcade Tokens
|-
|style-"text-align:center;" |[[File:Platinum.png]]
|style="text-align:center;" |[[Platinum Coin| Platinum Coin (1B)]]
|style="text-align:center;" |200,000 Arcade Tokens
|-
|style-"text-align:center;" |[[File:Emperor's Ring Equipped.png]]
|style="text-align:center;" |[[Emperor's Ring]]
|style="text-align:center;" |900,000 Arcade Tokens
|-
|style-"text-align:center;" |
|style="text-align:center;" |[[Mine-sweeper Box]]
|style="text-align:center;" |250,000 Arcade Tokens
|-
|style-"text-align:center;" |[[File:Extra Hour Pass.png]]
|style="text-align:center;" |[[Extra Hour Pass]]
|style="text-align:center;" |1,000 Arcade Tokens
|-
|style-"text-align:center;" |[[File:Mega Lottery Box.png]]
|style="text-align:center;" |[[Mega Lottery Box]]
|style="text-align:center;" |50,000 Arcade Tokens
|-


|-|Regular Mode=
Because there are a variety of different levels in the Arcade nowadays (Regular, Extreme & Avengers), people sometimes mistake the regular Arcade for being easy. <br>
 
'''The Regular Arcade requires high-end gear and multiple healing items in order to be beaten.''' <br>
 
 
Most people will be playing the Arcade for it's top prize upon completion: [[Infernal Cape|The Infernal Cape]] . <br>
It's an extremely powerful hybrid cape popular among many users. <br>
 
You also gain [[Arcade Token]]'s for playing any mode of the arcade minigame <br>
; in regular mode, you get one token per wave number, which add cumulatively. <br>
 
{{color|red| If you duo this mode, you only get Arcade tokens as a reward}} <br>
 
'''For example:''' <br>
 
Wave 1: 1 token <br>
 
Wave 2: 1+2 tokens, so 3 tokens. <br>
 
Wave 3: 1+2+3 tokens, so 6 tokens in total, and so on. <br>
 
'''There are multiple sections in the arcade's wave system, ranging from beginners' waves to dream waves. Each of these sections awards bonus tokens upon completion:''' <br>
 
The beginner waves are Waves 1-20.  , Experienced waves are Waves 21-30. , Advanced waves are Waves 31-40. , Dream waves are Waves 41-50. <br>


{| class="wikitable dropstable mw-collapsible mw-collapsed rdtable" style="text-align:center" cellpadding="1" cellspacing="0" data-expandtext="show" data-collapsetext="hide"
|-
! colspan="5" style="text-align:center;" | Recommended Mage Gear
|-
! colspan="1" style="text-align:center;" |Equipment
Gear
! colspan="1" style="text-align:center;" |Mid-Gear
! colspan="1" style="text-align:center;" |End-Game Gear
|-
|style="text-align:center;" | Aura
|style="text-align:center;" | [[File:Auras.png|30px]] [[Auras|Mystic Lvl 3-4]]
|style="text-align:center;" | [[File:Kaiser Aura.png|30px]] [[Kaiser Aura]]
|-
|style="text-align:center;" | Pocket
|style="text-align:center;" | [[File:Stone_of_Power.png|30px]] [[Stone of Power]]
| [[File:Book of Heaven.png|30px]] [[Book of Heaven]] [[File:Book of Hell.png|30px]] [[Book of Hell]] <br>
|-
|style="text-align:center;" | Necklace
|style="text-align:center;" | [[File:Trix Amulet (i).png|30px]][[Trix Amulet (i)]]
|style="text-align:center;" | [[File:Kaiser Necklace.png|30px]] [[Kaiser Necklace]]
|-
|style="text-align:center;" | Helmet
|style="text-align:center;" | [[File:Space Virtus Helm.png|30px]] [[Space Virtus Helm]]
|style="text-align:center;" | [[File:Artic Guardian Hat.png|30px]] [[Artic Guardian Hat]]
|-
|style="text-align:center;" | Body
|style="text-align:center;" | [[File:Space Virtus Body.png|30px]] [[Space Virtus Body]]
|style="text-align:center;" | [[File:Artic Guardian Robe Top.png|30px]] [[Artic Guardian Robe Top]]
|-
|style="text-align:center;" | Legs
|style="text-align:center;" | [[File:Space Virtus Legs.png|30px]] [[Space Virtus Legs]]
|style="text-align:center;" | [[File:Artic Guardian Robe Bottoms.png|30px]] [[Artic Guardian Robe Bottoms]]
|-
|style="text-align:center;" | Belt
|style="text-align:center;" |
|style="text-align:center;" | [[File:Sigil of Power.png|30px]] [[Sigil of Power]]
|-
|style="text-align:center;" | Mainhand
|style="text-align:center;" | [[File:Sanguinesti Staff (i).png|30px]] [[Sanguinesti Staff (i)]]
|style="text-align:center;" | [[File:Staff of Awakening.png|30px]] [[Staff of Awakening]]
|-
|style="text-align:center;" | Offhand
|style="text-align:center;" | [[File:Ancient Wyvern Shield.png|30px]] [[Ancient Wyvern Shield]]
|style="text-align:center;" | [[File:SharkFist Mage Offhand.png|30px]] [[SharkFist Mage Offhand]]
|-
|style="text-align:center;" | Cape
|style="text-align:center;" | [[File:Tribrid Infernal Cape.png|30px]] [[Tribrid Infernal Cape]]
|style="text-align:center;" | [[File:Demon Cape.png|30px]] [[Demon Cape]]
|-
|style="text-align:center;" | Arrow
|style="text-align:center;" | [[File:Thepowerstone.png|30px]] [[The Power Stone]]
|style="text-align:center;" | [[File:Elemental Ward Fury.png|30px]] [[Elemental Ward Fury]]
|-
|style="text-align:center;" | Boots
|style="text-align:center;" | [[File:Ultimate Mage Boots.png|30px]] [[Ultimate Mage Boots]]
|style="text-align:center;" | [[File:Draconic Magic Boots.png|30px]] [[Draconic Mage Boots]]
|-
|style="text-align:center;" | Gloves
|style="text-align:center;" | [[File:Ultimate Mage Gloves.png|30px]] [[Ultimate Mage Gloves]]
|style="text-align:center;" | [[File:Ultimate Cerberus Gloves.png|30px]] [[Ultimate Cerberus Gloves]]
|-
|style="text-align:center;" | Ring
|style="text-align:center;" | [[File:Brimstone Ring Equipped.png|30px]] [[Brimstone Ring]]
|style="text-align:center;" | [[File:Kaiser Ring.png|30px]] [[Kaiser Ring]]
|-
|style="text-align:center;" | Pet(s)
|style="text-align:center;" | [[File:Thanos Pet Icon.png|30px]] [[Thanos Pet]]
|style="text-align:center;" | [[File:Shadow Drake.png|30px]] [[Shadow Drake]]
 
|}
 
{| class="wikitable dropstable mw-collapsible mw-collapsed rdtable" style="text-align:center" cellpadding="1" cellspacing="0" data-expandtext="show" data-collapsetext="hide"
|-
! colspan="5" style="text-align:center;" | Recommended Melee Gear
|-
! colspan="1" style="text-align:center;" |Equipment
! colspan="1" style="text-align:center;" |Mid-Gear
! colspan="1" style="text-align:center;" |End-Game Gear
|-
|style="text-align:center;" | Aura
|style="text-align:center;" | [[File:Auras.png|30px]] [[Auras|Berserker Lvl 3-4]]
|style="text-align:center;" | [[File:Kaiser Aura.png|30px]] [[Kaiser Aura]]
|-
|style="text-align:center;" | Pocket
|style="text-align:center;" | [[File:Stone_of_Power.png|30px]] [[Stone of Power]] <br>
|style="text-align:center;" | [[File:Book of Heaven.png|30px]] [[Book of Heaven]] [[File:Book of Hell.png|30px]] [[Book of Hell]]
|-
|style="text-align:center;" | Necklace
|style="text-align:center;" | [[File:Trix Amulet (i).png|30px]] [[Trix Amulet (i)]]
|style="text-align:center;" | [[File:Kaiser Necklace.png|30px]] [[Kaiser Necklace]]
|-
|style="text-align:center;" | Helmet
|style="text-align:center;" | [[File:Justiciar faceguard.png|30px]] [[Justiciar faceguard]]
|style="text-align:center;" | [[Silent Death Helm]]
|-
|style="text-align:center;" | Body
|style="text-align:center;" | [[File:Justiciar chestguard.png|30px]] [[Justiciar chestguard]]
|style="text-align:center;" | [[Silent Death Body]]
|-
|style="text-align:center;" | Legs
|style="text-align:center;" | [[File:Justiciar legguards.png|30px]] [[Justiciar legguards]]
|style="text-align:center;" | [[Silent Death Legs]]
|-
|style="text-align:center;" | Belt
|style="text-align:center;" |
|style="text-align:center;" | [[File:Sigil of Power.png|30px]] [[Sigil of Power]]
|-
|style="text-align:center;" | Mainhand
|style="text-align:center;" | [[File:Arrav Sword.png|30px]] [[Arrav Sword]]
|style="text-align:center;" | [[File:Slayer Master Hammer (i).png|30px]] [[Slayer Master Hammer (i)]]
|-
|style="text-align:center;" | Offhand
|style="text-align:center;" | [[File:Arrav Shield.png|30px]] [[Arrav Shield]]
|style="text-align:center;" | [[File:SharkFist Melee Offhand.png|30px]] [[SharkFist Melee Offhand]]
|-
|style="text-align:center;" | Cape
|style="text-align:center;" | [[File:Tribrid Infernal Cape.png|30px]] [[Tribrid Infernal Cape]]
|style="text-align:center;" | [[File:Demon Cape.png|30px]] [[Demon Cape]]
|-
|style="text-align:center;" | Arrow
|style="text-align:center;" | [[File:The Power Fist.png|30px]] [[The Power Fist]]
|style="text-align:center;" | [[File:Elemental Ward Fury.png|30px]] [[Elemental Ward Fury]]
|-
|style="text-align:center;" | Boots
|style="text-align:center;" | [[File:Ultimate_Melee_Boots.png|30px]] [[Ultimate Melee Boots]]
|style="text-align:center;" | [[File:Draconic Melee Boots.png|30px]] [[Draconic Melee Boots]]
|-
|style="text-align:center;" | Gloves
|style="text-align:center;" | [[File:Ultimate_Brawler_Gloves.png|30px]] [[Ultimate Brawler Gloves]]
|style="text-align:center;" | [[File:Ultimate Cerberus Gloves.png|30px]] [[Ultimate Cerberus Gloves]]
|-
|style="text-align:center;" | Ring
|style="text-align:center;" | [[File:Brimstone Ring Equipped.png|30px]] [[Brimstone Ring]]
|style="text-align:center;" | [[File:Kaiser Ring.png|30px]] [[Kaiser Ring]]
|-
|style="text-align:center;" | Pet(s)
|style="text-align:center;" | [[File:Thanos Pet Icon.png|30px]] [[Thanos Pet]]
|style="text-align:center;" | [[File:Shadow Drake.png|30px]] [[Shadow Drake]]
|}
 
{| class="wikitable dropstable mw-collapsible mw-collapsed rdtable" style="text-align:center" cellpadding="1" cellspacing="0" data-expandtext="show" data-collapsetext="hide"
|-
! colspan="5" style="text-align:center;" | Recommended Range Gear
|-
! colspan="1" style="text-align:center;" |Equipment
! colspan="1" style="text-align:center;" |Mid-Gear
! colspan="1" style="text-align:center;" |End-Game Gear
|-
|style="text-align:center;" | Aura
|style="text-align:center;" | [[File:Auras.png|30px]] [[Auras|Augury Lvl 3-4]] 
|style="text-align:center;" | [[File:Kaiser Aura.png|30px]] [[Kaiser Aura]]
|-
|style="text-align:center;" | Pocket
|style="text-align:center;" | [[File:Stone_of_Power.png|30px]] [[Stone of Power]] <br>
|style="text-align:center;" | [[File:Book of Heaven.png|30px]] [[Book of Heaven]] [[File:Book of Hell.png|30px]] [[Book of Hell]]
|-
|style="text-align:center;" | Necklace
|style="text-align:center;" | [[File:Trix Amulet (i).png|30px]] [[Trix Amulet (i)]]
|style="text-align:center;" | [[File:Kaiser Necklace.png|30px]] [[Kaiser Necklace]]
|-
|style="text-align:center;" | Helmet
|style="text-align:center;" | [[File:Space Pernix Mask.png|30px]] [[Space Pernix Set|Space Pernix Hat]]
|style="text-align:center;" | [[File:Doomblade Cowl.png|30px]] [[Doomblade Cowl]]
|-
|style="text-align:center;" | Belt
|style="text-align:center;" |
|style="text-align:center;" | [[File:Sigil of Power.png|30px]] [[Sigil of Power]]
|-
|style="text-align:center;" | Body
|style="text-align:center;" | [[File:Space Pernix Body.png|30px]] [[Space Pernix Set|Space Pernix Body]]
|style="text-align:center;" | [[File:Doomblade Spaulders.png|30px]] [[Doomblade Spaulders]]
|-
|style="text-align:center;" | Legs
|style="text-align:center;" | [[File:Space Pernix Legs.png|30px]] [[Space Pernix Set|Space Pernix Legs]]
|style="text-align:center;" | [[File:Doomblade Pants.png|30px]] [[Doomblade Pants]]
|-
|style="text-align:center;" | Mainhand
|style="text-align:center;" | [[File:Poison Lotus Crossbow.png|30px]] [[Poison Lotus Crossbow]]
|style="text-align:center;" | [[File:Ultimate Raksha Crossbow.png|30px]] [[Ultimate Raksha Crossbow]]
|-
|style="text-align:center;" | Offhand
|style="text-align:center;" | [[File:Poison Lotus Crossbow Offhand.png|30px]] [[Poison Lotus Offhand Crossbow]]
|style="text-align:center;" | [[File:SharkFist Range Offhand.png|30px]] [[SharkFist Range Offhand]]
|-
|style="text-align:center;" | Cape
|style="text-align:center;" | [[File:Tribrid Infernal Cape.png|30px]] [[Tribrid Infernal Cape]]
|style="text-align:center;" | [[File:Demon Cape.png|30px]] [[Demon Cape]]
|-
|style="text-align:center;" | Arrow
|style="text-align:center;" | [[File:The Power Arrow.png|30px]] [[The Power Arrow]]
|style="text-align:center;" | [[File:Elemental Ward Fury.png|30px]] [[Elemental Ward Fury]]
|-
|style="text-align:center;" | Boots
|style="text-align:center;" | [[File:Ultimate Range Boots.png|30px]] [[Ultimate Range Boots]]
|style="text-align:center;" | [[File:Draconic Range Boots.png|30px]] [[Draconic Range Boots]]
|-
|style="text-align:center;" | Gloves
|style="text-align:center;" | [[File:Ultimate Ranger Gloves.png|30px]] [[Ultimate Ranger Gloves]]
|style="text-align:center;" | [[File:Ultimate Cerberus Gloves.png|30px]] [[Ultimate Cerberus Gloves]]
|-
|style="text-align:center;" | Ring
|style="text-align:center;" | [[File:Brimstone Ring Equipped.png|30px]] [[Brimstone Ring]]
|style="text-align:center;" | [[File:Kaiser Ring.png|30px]] [[Kaiser Ring]]
|-
|style="text-align:center;" | Pet(s)
|style="text-align:center;" | [[File:Thanos Pet Icon.png|30px]] [[Thanos Pet]]
|style="text-align:center;" | [[File:Shadow Drake.png|30px]] [[Shadow Drake]]
|-
 
|}
 
|-|Extreme Mode=
 
'''CONGRATULATIONS!''' <br>
 
You've finished the normal Arcade mode. You can now play the Extreme Arcade Mode!!! <br>
 
Keep in mind that in order to play the Extreme Mode, you'll need to sacrifice an [[Infernal Cape]] before '''each run'''! <br>
 
The first 50 waves of the extreme arcade are identical to those of the regular arcade, With 5 extra mobs/boss's at the end <br>


'''Rewards:'''
 
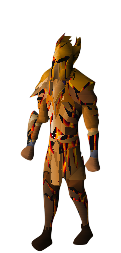
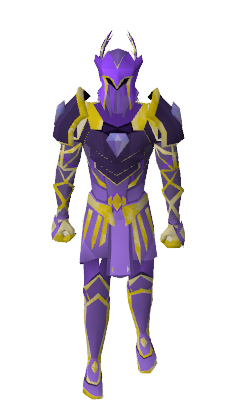
Now once you finish the Extreme Arcade you will be given either the [[Infernal Melee Cape]], [[Infernal Range Cape]], or the [[Infernal Mage Cape]]. Note that you are unable to choose and the capes are given randomly. <br>
 
[[Infernal Melee Cape]]
[[File:Infernal_Melee_Char.png|50px|caption]] [[Infernal Mage Cape]] [[File:Infernal_Mage_Char.png|100px]] [[Infernal Range Cape]] [[File:Infernal_Range_Char.png|45px]] <br>


Not only that, but if you are able to acquire ''all three'' styles of capes, you can combine them and form a '''top-end slot cape''': The [[Tribrid Infernal Cape]].  <br>
 
 
[[Tribrid Infernal Cape]] <br>
 
[[File:Tribrid Infernal Cape Equipped.png|center|50px|caption]] <br>


Along with the capes, you'll be rewarded tokens upon completion based on your donated rank. If you die before completing the extreme arcade, the tokens awarded follow the same formula as in the regular mode. <br>
'''Regular-Extreme:''' <br>
 
3300 Tokens
 
'''[[Sponsor]]:''' <br>
 
4060 Tokens <br>
 
'''[[Executive]]:''' <br>
 
4800 Tokens <br>
 
'''[[Platinum]] Members:''' <br>
6275 Tokens <br>
 
{| class="wikitable dropstable mw-collapsible mw-collapsed rdtable" style="text-align:center" cellpadding="1" cellspacing="0" data-expandtext="show" data-collapsetext="hide"
|-
! colspan="5" style="text-align:center;" | Recommended Mage Gear
|-
! colspan="1" style="text-align:center;" |Equipment
Gear
! colspan="1" style="text-align:center;" |Mid-Gear
! colspan="1" style="text-align:center;" |End-Game Gear
|-
|style="text-align:center;" | Aura
|style="text-align:center;" | [[File:Auras.png|30px]] [[Auras|Mystic Lvl 3-4]]
|style="text-align:center;" | [[File:Kaiser Aura.png|30px]] [[Kaiser Aura]]
|-
|style="text-align:center;" | Pocket
|style="text-align:center;" | [[File:Stone_of_Power.png|30px]] [[Stone of Power]]
| [[File:Book of Heaven.png|30px]] [[Book of Heaven]] [[File:Book of Hell.png|30px]] [[Book of Hell]] <br>
|-
|style="text-align:center;" | Necklace
|style="text-align:center;" | [[File:Trix Amulet (i).png|30px]][[Trix Amulet (i)]]
|style="text-align:center;" | [[File:Kaiser Necklace.png|30px]] [[Kaiser Necklace]]
|-
|style="text-align:center;" | Helmet
|style="text-align:center;" | [[File:Space Virtus Helm.png|30px]] [[Space Virtus Helm]]
|style="text-align:center;" | [[File:Artic Guardian Hat.png|30px]] [[Artic Guardian Hat]]
|-
|style="text-align:center;" | Body
|style="text-align:center;" | [[File:Space Virtus Body.png|30px]] [[Space Virtus Body]]
|style="text-align:center;" | [[File:Artic Guardian Robe Top.png|30px]] [[Artic Guardian Robe Top]]
|-
|style="text-align:center;" | Legs
|style="text-align:center;" | [[File:Space Virtus Legs.png|30px]] [[Space Virtus Legs]]
|style="text-align:center;" | [[File:Artic Guardian Robe Bottoms.png|30px]] [[Artic Guardian Robe Bottoms]]
|-
|style="text-align:center;" | Belt
|style="text-align:center;" |
|style="text-align:center;" | [[File:Sigil of Power.png|30px]] [[Sigil of Power]]
|-
|style="text-align:center;" | Mainhand
|style="text-align:center;" | [[File:Sanguinesti Staff (i).png|30px]] [[Sanguinesti Staff (i)]]
|style="text-align:center;" | [[File:Staff of Awakening.png|30px]] [[Staff of Awakening]]
|-
|style="text-align:center;" | Offhand
|style="text-align:center;" | [[File:Ancient Wyvern Shield.png|30px]] [[Ancient Wyvern Shield]]
|style="text-align:center;" | [[File:SharkFist Mage Offhand.png|30px]] [[SharkFist Mage Offhand]]
|-
|style="text-align:center;" | Cape
|style="text-align:center;" | [[File:Tribrid Infernal Cape.png|30px]] [[Tribrid Infernal Cape]]
|style="text-align:center;" | [[File:Demon Cape.png|30px]] [[Demon Cape]]
|-
|style="text-align:center;" | Arrow
|style="text-align:center;" | [[File:Thepowerstone.png|30px]] [[The Power Stone]]
|style="text-align:center;" | [[File:Elemental Ward Fury.png|30px]] [[Elemental Ward Fury]]
|-
|style="text-align:center;" | Boots
|style="text-align:center;" | [[File:Ultimate Mage Boots.png|30px]] [[Ultimate Mage Boots]]
|style="text-align:center;" | [[File:Draconic Magic Boots.png|30px]] [[Draconic Mage Boots]]
|-
|style="text-align:center;" | Gloves
|style="text-align:center;" | [[File:Ultimate Mage Gloves.png|30px]] [[Ultimate Mage Gloves]]
|style="text-align:center;" | [[File:Ultimate Cerberus Gloves.png|30px]] [[Ultimate Cerberus Gloves]]
|-
|style="text-align:center;" | Ring
|style="text-align:center;" | [[File:Brimstone Ring Equipped.png|30px]] [[Brimstone Ring]]
|style="text-align:center;" | [[File:Kaiser Ring.png|30px]] [[Kaiser Ring]]
|-
|style="text-align:center;" | Pet(s)
|style="text-align:center;" | [[File:Thanos Pet Icon.png|30px]] [[Thanos Pet]]
|style="text-align:center;" | [[File:Shadow Drake.png|30px]] [[Shadow Drake]]
 
|}
 
{| class="wikitable dropstable mw-collapsible mw-collapsed rdtable" style="text-align:center" cellpadding="1" cellspacing="0" data-expandtext="show" data-collapsetext="hide"
|-
! colspan="5" style="text-align:center;" | Recommended Melee Gear
|-
! colspan="1" style="text-align:center;" |Equipment
! colspan="1" style="text-align:center;" |Mid-Gear
! colspan="1" style="text-align:center;" |End-Game Gear
|-
|style="text-align:center;" | Aura
|style="text-align:center;" | [[File:Auras.png|30px]] [[Auras|Berserker Lvl 3-4]]
|style="text-align:center;" | [[File:Kaiser Aura.png|30px]] [[Kaiser Aura]]
|-
|style="text-align:center;" | Pocket
|style="text-align:center;" | [[File:Stone_of_Power.png|30px]] [[Stone of Power]] <br>
|style="text-align:center;" | [[File:Book of Heaven.png|30px]] [[Book of Heaven]] [[File:Book of Hell.png|30px]] [[Book of Hell]]
|-
|style="text-align:center;" | Necklace
|style="text-align:center;" | [[File:Trix Amulet (i).png|30px]] [[Trix Amulet (i)]]
|style="text-align:center;" | [[File:Kaiser Necklace.png|30px]] [[Kaiser Necklace]]
|-
|style="text-align:center;" | Helmet
|style="text-align:center;" | [[File:Justiciar faceguard.png|30px]] [[Justiciar faceguard]]
|style="text-align:center;" | [[Silent Death Helm]]
|-
|style="text-align:center;" | Body
|style="text-align:center;" | [[File:Justiciar chestguard.png|30px]] [[Justiciar chestguard]]
|style="text-align:center;" | [[Silent Death Body]]
|-
|style="text-align:center;" | Legs
|style="text-align:center;" | [[File:Justiciar legguards.png|30px]] [[Justiciar legguards]]
|style="text-align:center;" | [[Silent Death Legs]]
|-
|style="text-align:center;" | Belt
|style="text-align:center;" |
|style="text-align:center;" | [[File:Sigil of Power.png|30px]] [[Sigil of Power]]
|-
|style="text-align:center;" | Mainhand
|style="text-align:center;" | [[File:Arrav Sword.png|30px]] [[Arrav Sword]]
|style="text-align:center;" | [[File:Slayer Master Hammer (i).png|30px]] [[Slayer Master Hammer (i)]]
|-
|style="text-align:center;" | Offhand
|style="text-align:center;" | [[File:Arrav Shield.png|30px]] [[Arrav Shield]]
|style="text-align:center;" | [[File:SharkFist Melee Offhand.png|30px]] [[SharkFist Melee Offhand]]
|-
|style="text-align:center;" | Cape
|style="text-align:center;" | [[File:Tribrid Infernal Cape.png|30px]] [[Tribrid Infernal Cape]]
|style="text-align:center;" | [[File:Demon Cape.png|30px]] [[Demon Cape]]
|-
|style="text-align:center;" | Arrow
|style="text-align:center;" | [[File:The Power Fist.png|30px]] [[The Power Fist]]
|style="text-align:center;" | [[File:Elemental Ward Fury.png|30px]] [[Elemental Ward Fury]]
|-
|style="text-align:center;" | Boots
|style="text-align:center;" | [[File:Ultimate_Melee_Boots.png|30px]] [[Ultimate Melee Boots]]
|style="text-align:center;" | [[File:Draconic Melee Boots.png|30px]] [[Draconic Melee Boots]]
|-
|style="text-align:center;" | Gloves
|style="text-align:center;" | [[File:Ultimate_Brawler_Gloves.png|30px]] [[Ultimate Brawler Gloves]]
|style="text-align:center;" | [[File:Ultimate Cerberus Gloves.png|30px]] [[Ultimate Cerberus Gloves]]
|-
|style="text-align:center;" | Ring
|style="text-align:center;" | [[File:Brimstone Ring Equipped.png|30px]] [[Brimstone Ring]]
|style="text-align:center;" | [[File:Kaiser Ring.png|30px]] [[Kaiser Ring]]
|-
|style="text-align:center;" | Pet(s)
|style="text-align:center;" | [[File:Thanos Pet Icon.png|30px]] [[Thanos Pet]]
|style="text-align:center;" | [[File:Shadow Drake.png|30px]] [[Shadow Drake]]
|}
 
{| class="wikitable dropstable mw-collapsible mw-collapsed rdtable" style="text-align:center" cellpadding="1" cellspacing="0" data-expandtext="show" data-collapsetext="hide"
|-
! colspan="5" style="text-align:center;" | Recommended Range Gear
|-
! colspan="1" style="text-align:center;" |Equipment
! colspan="1" style="text-align:center;" |Mid-Gear
! colspan="1" style="text-align:center;" |End-Game Gear
|-
|style="text-align:center;" | Aura
|style="text-align:center;" | [[File:Auras.png|30px]] [[Auras|Augury Lvl 3-4]] 
|style="text-align:center;" | [[File:Kaiser Aura.png|30px]] [[Kaiser Aura]]
|-
|style="text-align:center;" | Pocket
|style="text-align:center;" | [[File:Stone_of_Power.png|30px]] [[Stone of Power]] <br>
|style="text-align:center;" | [[File:Book of Heaven.png|30px]] [[Book of Heaven]] [[File:Book of Hell.png|30px]] [[Book of Hell]]
|-
|style="text-align:center;" | Necklace
|style="text-align:center;" | [[File:Trix Amulet (i).png|30px]] [[Trix Amulet (i)]]
|style="text-align:center;" | [[File:Kaiser Necklace.png|30px]] [[Kaiser Necklace]]
|-
|style="text-align:center;" | Helmet
|style="text-align:center;" | [[File:Space Pernix Mask.png|30px]] [[Space Pernix Set|Space Pernix Hat]]
|style="text-align:center;" | [[File:Doomblade Cowl.png|30px]] [[Doomblade Cowl]]
|-
|style="text-align:center;" | Belt
|style="text-align:center;" |
|style="text-align:center;" | [[File:Sigil of Power.png|30px]] [[Sigil of Power]]
|-
|style="text-align:center;" | Body
|style="text-align:center;" | [[File:Space Pernix Body.png|30px]] [[Space Pernix Set|Space Pernix Body]]
|style="text-align:center;" | [[File:Doomblade Spaulders.png|30px]] [[Doomblade Spaulders]]
|-
|style="text-align:center;" | Legs
|style="text-align:center;" | [[File:Space Pernix Legs.png|30px]] [[Space Pernix Set|Space Pernix Legs]]
|style="text-align:center;" | [[File:Doomblade Pants.png|30px]] [[Doomblade Pants]]
|-
|style="text-align:center;" | Mainhand
|style="text-align:center;" | [[File:Poison Lotus Crossbow.png|30px]] [[Poison Lotus Crossbow]]
|style="text-align:center;" | [[File:Ultimate Raksha Crossbow.png|30px]] [[Ultimate Raksha Crossbow]]
|-
|style="text-align:center;" | Offhand
|style="text-align:center;" | [[File:Poison Lotus Crossbow Offhand.png|30px]] [[Poison Lotus Offhand Crossbow]]
|style="text-align:center;" | [[File:SharkFist Range Offhand.png|30px]] [[SharkFist Range Offhand]]
|-
|style="text-align:center;" | Cape
|style="text-align:center;" | [[File:Tribrid Infernal Cape.png|30px]] [[Tribrid Infernal Cape]]
|style="text-align:center;" | [[File:Demon Cape.png|30px]] [[Demon Cape]]
|-
|style="text-align:center;" | Arrow
|style="text-align:center;" | [[File:The Power Arrow.png|30px]] [[The Power Arrow]]
|style="text-align:center;" | [[File:Elemental Ward Fury.png|30px]] [[Elemental Ward Fury]]
|-
|style="text-align:center;" | Boots
|style="text-align:center;" | [[File:Ultimate Range Boots.png|30px]] [[Ultimate Range Boots]]
|style="text-align:center;" | [[File:Draconic Range Boots.png|30px]] [[Draconic Range Boots]]
|-
|style="text-align:center;" | Gloves
|style="text-align:center;" | [[File:Ultimate Ranger Gloves.png|30px]] [[Ultimate Ranger Gloves]]
|style="text-align:center;" | [[File:Ultimate Cerberus Gloves.png|30px]] [[Ultimate Cerberus Gloves]]
|-
|style="text-align:center;" | Ring
|style="text-align:center;" | [[File:Brimstone Ring Equipped.png|30px]] [[Brimstone Ring]]
|style="text-align:center;" | [[File:Kaiser Ring.png|30px]] [[Kaiser Ring]]
|-
|style="text-align:center;" | Pet(s)
|style="text-align:center;" | [[File:Thanos Pet Icon.png|30px]] [[Thanos Pet]]
|style="text-align:center;" | [[File:Shadow Drake.png|30px]] [[Shadow Drake]]
|-
 
|}
 
 
{| class="wikitable dropstable mw-collapsible mw-collapsed rdtable" style="text-align:center" cellpadding="1" cellspacing="0" data-expandtext="show" data-collapsetext="hide"
|-
 
|}
 
|-|Hell Mode=


<tabber>


'''This is the on of the toughest Arcade Mode there is!''' <br>
|-|Recommended Gear Setup=


This area has moved to [[Gear Progression]]


This hellish mode will give players a test on their endurance in the Arcade! <br>


Get your hands on the[[Tribrid Inferno Cape]]! one of the best mid-game capes! <br>
|-|Starter=
<center/>
==Clue Scroll==
[[File:Clue Scrolls Graphic 3.png|center|300x300px]]


'''For every hell mode attempt, you must sacrifice a [[Tribrid Infernal Cape]].''' <br>
<center/>
Clue Scrolls (easy)
<center/>


Easy Clue scrolls are obtained through killing any type of monsters. <br>
Everything needed to complete Clue Scrolls can be bought from the Clue Scroll Shop at ::shops. <br>
You can obtain the [[Clue Scroll Amulet]] from the [[Tempoross]] as well as the [[Clue Scroll Ring]] from the [[Vote Store]] <br>
which have there own uniqe bonuses to boost your clue scroll grind! <br>
profit: Up to 2b/hr<br>


The hell mode puts a spin on the already existing extreme mode. When in the hell mode, all monsters spawning will be doubled and have 100x more hp than they do in the extreme mode. <br>
( To find more specific information on the items listed visit there listed page)
This is 55 waves of pure madness, but you are adequetly rewarded with receiving 10x more tokens than you would in the other modes. <br>


Upon completing the hell mode, you will receive a [[Tribrid Inferno Cape]]! <br>
----
<br />'''


[[File:Tribrid Inferno Cape.png|100px|]] [[File:Tribrid Inferno Cape Equipped.png|50px|]] <br>
{| class="wikitable dropstable mw-collapsible mw-collapsed rdtable" style="text-align:center" cellpadding="1" cellspacing="0" data-expandtext="show" data-collapsetext="hide"
|-
! colspan="5" style="text-align:center;" | Recommended Mage Gear
|-
! colspan="1" style="text-align:center;" |Equipment
Gear
! colspan="1" style="text-align:center;" |Mid-Gear
! colspan="1" style="text-align:center;" |End-Game Gear
|-
|style="text-align:center;" | Aura
|style="text-align:center;" | [[File:Auras.png|30px]] [[Auras|Mystic Lvl 3-4]]
|style="text-align:center;" | [[File:Kaiser Aura.png|30px]] [[Kaiser Aura]]
|-
|style="text-align:center;" | Pocket
|style="text-align:center;" | [[File:Stone_of_Power.png|30px]] [[Stone of Power]]
| [[File:Book of Heaven.png|30px]] [[Book of Heaven]] [[File:Book of Hell.png|30px]] [[Book of Hell]] <br>
|-
|style="text-align:center;" | Necklace
|style="text-align:center;" | [[File:Trix Amulet (i).png|30px]][[Trix Amulet (i)]]
|style="text-align:center;" | [[File:Kaiser Necklace.png|30px]] [[Kaiser Necklace]]
|-
|style="text-align:center;" | Helmet
|style="text-align:center;" | [[File:Space Virtus Helm.png|30px]] [[Space Virtus Helm]]
|style="text-align:center;" | [[File:Artic Guardian Hat.png|30px]] [[Artic Guardian Hat]]
|-
|style="text-align:center;" | Body
|style="text-align:center;" | [[File:Space Virtus Body.png|30px]] [[Space Virtus Body]]
|style="text-align:center;" | [[File:Artic Guardian Robe Top.png|30px]] [[Artic Guardian Robe Top]]
|-
|style="text-align:center;" | Legs
|style="text-align:center;" | [[File:Space Virtus Legs.png|30px]] [[Space Virtus Legs]]
|style="text-align:center;" | [[File:Artic Guardian Robe Bottoms.png|30px]] [[Artic Guardian Robe Bottoms]]
|-
|style="text-align:center;" | Belt
|style="text-align:center;" |
|style="text-align:center;" | [[File:Sigil of Power.png|30px]] [[Sigil of Power]]
|-
|style="text-align:center;" | Mainhand
|style="text-align:center;" | [[File:Sanguinesti Staff (i).png|30px]] [[Sanguinesti Staff (i)]]
|style="text-align:center;" | [[File:Staff of Awakening.png|30px]] [[Staff of Awakening]]
|-
|style="text-align:center;" | Offhand
|style="text-align:center;" | [[File:Ancient Wyvern Shield.png|30px]] [[Ancient Wyvern Shield]]
|style="text-align:center;" | [[File:SharkFist Mage Offhand.png|30px]] [[SharkFist Mage Offhand]]
|-
|style="text-align:center;" | Cape
|style="text-align:center;" | [[File:Tribrid Infernal Cape.png|30px]] [[Tribrid Infernal Cape]]
|style="text-align:center;" | [[File:Demon Cape.png|30px]] [[Demon Cape]]
|-
|style="text-align:center;" | Arrow
|style="text-align:center;" | [[File:Thepowerstone.png|30px]] [[The Power Stone]]
|style="text-align:center;" | [[File:Elemental Ward Fury.png|30px]] [[Elemental Ward Fury]]
|-
|style="text-align:center;" | Boots
|style="text-align:center;" | [[File:Ultimate Mage Boots.png|30px]] [[Ultimate Mage Boots]]
|style="text-align:center;" | [[File:Draconic Magic Boots.png|30px]] [[Draconic Mage Boots]]
|-
|style="text-align:center;" | Gloves
|style="text-align:center;" | [[File:Ultimate Mage Gloves.png|30px]] [[Ultimate Mage Gloves]]
|style="text-align:center;" | [[File:Ultimate Cerberus Gloves.png|30px]] [[Ultimate Cerberus Gloves]]
|-
|-
|style="text-align:center;" | Ring
|'''[[Slayer | Slayer (Easy task)]]'''
|style="text-align:center;" | [[File:Brimstone Ring Equipped.png|30px]] [[Brimstone Ring]]
|[[File:Slayer Master.png|center|150x150px]]
|style="text-align:center;" | [[File:Kaiser Ring.png|30px]] [[Kaiser Ring]]
|'''~300M/hr'''
|'''Slayer''' is a popular way of making money. Simply go to the '''Slayer Master''' at ::home and get your first task to start.  
|-
|-
|style="text-align:center;" | Pet(s)
|style="text-align:center;" | [[File:Thanos Pet Icon.png|30px]] [[Thanos Pet]]
|style="text-align:center;" | [[File:Shadow Drake.png|30px]] [[Shadow Drake]]


|}
|'''[[Revenants]]'''
 
|[[File:Revenants.png|center|150x150px]]
{| class="wikitable dropstable mw-collapsible mw-collapsed rdtable" style="text-align:center" cellpadding="1" cellspacing="0" data-expandtext="show" data-collapsetext="hide"
|'''~150M/hr'''
|-
|'''[[Revenants]]''' killing is one of the most popular money makers in-game. You can get there by clicking on your Spellbook and select the category '''Monsters'''.
! colspan="5" style="text-align:center;" | Recommended Melee Gear
|-
! colspan="1" style="text-align:center;" |Equipment
! colspan="1" style="text-align:center;" |Mid-Gear
! colspan="1" style="text-align:center;" |End-Game Gear
|-
|style="text-align:center;" | Aura
|style="text-align:center;" | [[File:Auras.png|30px]] [[Auras|Berserker Lvl 3-4]]
|style="text-align:center;" | [[File:Kaiser Aura.png|30px]] [[Kaiser Aura]]
|-
|style="text-align:center;" | Pocket
|style="text-align:center;" | [[File:Stone_of_Power.png|30px]] [[Stone of Power]] <br>
|style="text-align:center;" | [[File:Book of Heaven.png|30px]] [[Book of Heaven]] [[File:Book of Hell.png|30px]] [[Book of Hell]]
|-
|style="text-align:center;" | Necklace
|style="text-align:center;" | [[File:Trix Amulet (i).png|30px]] [[Trix Amulet (i)]]
|style="text-align:center;" | [[File:Kaiser Necklace.png|30px]] [[Kaiser Necklace]]
|-
|style="text-align:center;" | Helmet
|style="text-align:center;" | [[File:Justiciar faceguard.png|30px]] [[Justiciar faceguard]]
|style="text-align:center;" | [[Silent Death Helm]]
|-
|style="text-align:center;" | Body
|style="text-align:center;" | [[File:Justiciar chestguard.png|30px]] [[Justiciar chestguard]]
|style="text-align:center;" | [[Silent Death Body]]
|-
|-
|style="text-align:center;" | Legs
'''NOTE: Look at the '''Recommended Gear Setup''' at the top as its recommended to bring AoE weapons.
|style="text-align:center;" | [[File:Justiciar legguards.png|30px]] [[Justiciar legguards]]
|style="text-align:center;" | [[Silent Death Legs]]
|-
|-
|style="text-align:center;" | Belt
|'''[[In-Game Events]]'''
|style="text-align:center;" |
|[[File:INGEvent.PNG|center|150x150px]]
|style="text-align:center;" | [[File:Sigil of Power.png|30px]] [[Sigil of Power]]
|'''Random'''
|'''In-Game Events'' are scheduled to happend every single day in-game and on the [https://discord.gg/F4FT3xMgfJ Discord]. The rewards are typically never really the same but can be very rewarding. Whether you lose or not you have a chance to pick up some extra loot with the voting exlusive bonus event aswell as the '''Hot and Cold''' after every single event. With that being said there is Piñata being spawned in so everyone can go ahead and pick up some extra goodies. It is '''highly''' recommended to attend these events due to how easily accessible it is with low effort.
|-
|-
|style="text-align:center;" | Mainhand
|style="text-align:center;" | [[File:Arrav Sword.png|30px]] [[Arrav Sword]]
|style="text-align:center;" | [[File:Slayer Master Hammer (i).png|30px]] [[Slayer Master Hammer (i)]]
|-
|style="text-align:center;" | Offhand
|style="text-align:center;" | [[File:Arrav Shield.png|30px]] [[Arrav Shield]]
|style="text-align:center;" | [[File:SharkFist Melee Offhand.png|30px]] [[SharkFist Melee Offhand]]
|-
|style="text-align:center;" | Cape
|style="text-align:center;" | [[File:Tribrid Infernal Cape.png|30px]] [[Tribrid Infernal Cape]]
|style="text-align:center;" | [[File:Demon Cape.png|30px]] [[Demon Cape]]
|-
|style="text-align:center;" | Arrow
|style="text-align:center;" | [[File:The Power Fist.png|30px]] [[The Power Fist]]
|style="text-align:center;" | [[File:Elemental Ward Fury.png|30px]] [[Elemental Ward Fury]]
|-
|style="text-align:center;" | Boots
|style="text-align:center;" | [[File:Ultimate_Melee_Boots.png|30px]] [[Ultimate Melee Boots]]
|style="text-align:center;" | [[File:Draconic Melee Boots.png|30px]] [[Draconic Melee Boots]]
|-
|style="text-align:center;" | Gloves
|style="text-align:center;" | [[File:Ultimate_Brawler_Gloves.png|30px]] [[Ultimate Brawler Gloves]]
|style="text-align:center;" | [[File:Ultimate Cerberus Gloves.png|30px]] [[Ultimate Cerberus Gloves]]
|-
|style="text-align:center;" | Ring
|style="text-align:center;" | [[File:Brimstone Ring Equipped.png|30px]] [[Brimstone Ring]]
|style="text-align:center;" | [[File:Kaiser Ring.png|30px]] [[Kaiser Ring]]
|-
|style="text-align:center;" | Pet(s)
|style="text-align:center;" | [[File:Thanos Pet Icon.png|30px]] [[Thanos Pet]]
|style="text-align:center;" | [[File:Shadow Drake.png|30px]] [[Shadow Drake]]
|}


{| class="wikitable dropstable mw-collapsible mw-collapsed rdtable" style="text-align:center" cellpadding="1" cellspacing="0" data-expandtext="show" data-collapsetext="hide"
|-
! colspan="5" style="text-align:center;" | Recommended Range Gear
|-
! colspan="1" style="text-align:center;" |Equipment
! colspan="1" style="text-align:center;" |Mid-Gear
! colspan="1" style="text-align:center;" |End-Game Gear
|-
|style="text-align:center;" | Aura
|style="text-align:center;" | [[File:Auras.png|30px]] [[Auras|Augury Lvl 3-4]] 
|style="text-align:center;" | [[File:Kaiser Aura.png|30px]] [[Kaiser Aura]]
|-
|style="text-align:center;" | Pocket
|style="text-align:center;" | [[File:Stone_of_Power.png|30px]] [[Stone of Power]] <br>
|style="text-align:center;" | [[File:Book of Heaven.png|30px]] [[Book of Heaven]] [[File:Book of Hell.png|30px]] [[Book of Hell]]
|-
|style="text-align:center;" | Necklace
|style="text-align:center;" | [[File:Trix Amulet (i).png|30px]] [[Trix Amulet (i)]]
|style="text-align:center;" | [[File:Kaiser Necklace.png|30px]] [[Kaiser Necklace]]
|-
|style="text-align:center;" | Helmet
|style="text-align:center;" | [[File:Space Pernix Mask.png|30px]] [[Space Pernix Set|Space Pernix Hat]]
|style="text-align:center;" | [[File:Doomblade Cowl.png|30px]] [[Doomblade Cowl]]
|-
|style="text-align:center;" | Belt
|style="text-align:center;" |
|style="text-align:center;" | [[File:Sigil of Power.png|30px]] [[Sigil of Power]]
|-
|style="text-align:center;" | Body
|style="text-align:center;" | [[File:Space Pernix Body.png|30px]] [[Space Pernix Set|Space Pernix Body]]
|style="text-align:center;" | [[File:Doomblade Spaulders.png|30px]] [[Doomblade Spaulders]]
|-
|style="text-align:center;" | Legs
|style="text-align:center;" | [[File:Space Pernix Legs.png|30px]] [[Space Pernix Set|Space Pernix Legs]]
|style="text-align:center;" | [[File:Doomblade Pants.png|30px]] [[Doomblade Pants]]
|-
|style="text-align:center;" | Mainhand
|style="text-align:center;" | [[File:Poison Lotus Crossbow.png|30px]] [[Poison Lotus Crossbow]]
|style="text-align:center;" | [[File:Ultimate Raksha Crossbow.png|30px]] [[Ultimate Raksha Crossbow]]
|-
|style="text-align:center;" | Offhand
|style="text-align:center;" | [[File:Poison Lotus Crossbow Offhand.png|30px]] [[Poison Lotus Offhand Crossbow]]
|style="text-align:center;" | [[File:SharkFist Range Offhand.png|30px]] [[SharkFist Range Offhand]]
|-
|style="text-align:center;" | Cape
|style="text-align:center;" | [[File:Tribrid Infernal Cape.png|30px]] [[Tribrid Infernal Cape]]
|style="text-align:center;" | [[File:Demon Cape.png|30px]] [[Demon Cape]]
|-
|style="text-align:center;" | Arrow
|style="text-align:center;" | [[File:The Power Arrow.png|30px]] [[The Power Arrow]]
|style="text-align:center;" | [[File:Elemental Ward Fury.png|30px]] [[Elemental Ward Fury]]
|-
|style="text-align:center;" | Boots
|style="text-align:center;" | [[File:Ultimate Range Boots.png|30px]] [[Ultimate Range Boots]]
|style="text-align:center;" | [[File:Draconic Range Boots.png|30px]] [[Draconic Range Boots]]
|-
|style="text-align:center;" | Gloves
|style="text-align:center;" | [[File:Ultimate Ranger Gloves.png|30px]] [[Ultimate Ranger Gloves]]
|style="text-align:center;" | [[File:Ultimate Cerberus Gloves.png|30px]] [[Ultimate Cerberus Gloves]]
|-
|style="text-align:center;" | Ring
|style="text-align:center;" | [[File:Brimstone Ring Equipped.png|30px]] [[Brimstone Ring]]
|style="text-align:center;" | [[File:Kaiser Ring.png|30px]] [[Kaiser Ring]]
|-
|style="text-align:center;" | Pet(s)
|style="text-align:center;" | [[File:Thanos Pet Icon.png|30px]] [[Thanos Pet]]
|style="text-align:center;" | [[File:Shadow Drake.png|30px]] [[Shadow Drake]]
|-
|-
|'''[[Zulrah]]'''
|[[File:Zulrah2.png|center|150x150px]]
|'''~1-2B/hr'''
|'''[[Zulrah]]''' easy to kill with safe-spotting, and is a great source of income due to [[Range Slayer Helmet]],[[Melee Slayer Helmet]],[[Magic Slayer Helmet]]. Requires different styles of attack on phases. You can get there by clicking on your Spellbook and select the category '''Bosses'''.


|}
|}


|-|Avengers Mode=
|-|Mid-Game=
 
 
The '''Avengers Mode''' is one of the newest and most popular arcade modes. In the avengers arcade you face off against several characters from the avengers universe, all of which have their own special abilities to make the minigame more challenging, along with many different waves which will be listed below! <br>


{| class="wikitable dropstable mw-collapsible mw-collapsed rdtable" style="text-align:center" cellpadding="2" cellspacing="0" data-expandtext="show" data-collapsetext="hide" <br>
{| class="article-table" border="1" cellpadding="2" cellspacing="2" style="margin:auto"
|-
|-
! |Waves
! scope="col" style="text-align:center;" |Enemy
! scope="col" style="text-align:center;" |Image
! scope="col" style="text-align:center;" |Profit
! scope="col" style="text-align:center;" |Guide/Info
|-
|-
! scope="col" style="text-align:center;" |'''Wave 1: Black Panther'''  
|'''[[Abyssal Sire]]
|[[File:Abyssal Sire.png|Center|150x150px]]
|'''~500M/hr'''
|'''[[Abyssal Sire]]''' has become a really good way to make money due to the [[Sire Crystal]] needed for upgrades. To get there click on your Spellbook and select the category '''Bosses'''.


! scope="col" style="text-align:center;" | Use soulsplit for this wave or if you have Sponsor+ prayer it's better to use Fury or Cyclone for more damage. <br>
|-
|-
! scope="col" style="text-align:center;" |'''Wave 2: Drax the Destroyer'''


! scope="col" style="text-align:center;" | Same strategy as Black Panther, but when Drax the Destroyer says "argggghhhh" your prayer will be drained to 0 so it's recommended to bring a super restore potion, [[Captain America Shield]], or a pet that restores prayer such as the [[Helicopter Pet]]. <br>
|'''[[Clue scrolls]]'''
|-
|[[File:Clue Scrolls Graphic 3.png|center|150x150px]]
! scope="col" style="text-align:center;" |'''Wave 3: Vision'''
|'''Up to 2B/hr'''
|'''Hard Clue Scrolls''' are obtained through killing any type of monsters.


! scope="col" style="text-align:center;" | Same strategy as Black Panther. <br>
Everything needed to complete '''Clue Scrolls''' can be bought from the '''Clue Scroll Shop''' at ::shops.
|-
|-
! scope="col" style="text-align:center;" |'''Wave 4: Dr Strange'''
! scope="col" style="text-align:center;" | Same stategy as Black Panther but sometimes he will teleport under you. <br>


|'''[[Arcade | DC Universe]]'''
|[[File:Arcade Machine.png|center|150x150px]]
|'''~1B/hr'''
|'''DC Universe''' is a raid that consists of 5 waves including; Batman, The Joker, Wonder Woman, Superman and Flash. Upon completion you can recieve tokens and boxes that can be sold to players.
|-
|-
! scope="col" style="text-align:center;" |'''Wave 5: Ant Man'''
! scope="col" style="text-align:center;" | When Ant Man says "Haha" he will turn small and any damage that you deal to him will heal him. He also will say "Haha" again when he returns to normal size and then you can deal damage. <br>


|'''[[Dreamland]]'''
|[[File:DreamlandArea.png|center|150x150px]]
|'''~500M/hr'''
|'''Dreamland''' is a minigame used to create some of the best gloves and boots [[Ultimate Tribrid Gloves]] and [[Ultimate Tribrid Boots]] in the game.
|-
|-
! scope="col" style="text-align:center;" | '''Wave 6: Captain America'''
! scope="col" style="text-align:center;" | Same strategy as Black Panther, but he does have soulsplit so watch your prayer points and bring super restore potions,[[Captain America Shield]], or a pet that restores prayer such as the [[Helicopter Pet]] or [[Diablo Jr]] incase. <br>
|-
! scope="col" style="text-align:center;" | '''Wave 7: Iron Man'''
! scope="col" style="text-align:center;" | '''Note: Iron Man is immune to Range and Melee'''
If you are using range or melee, then bring a switch to mage and continue killing, swap back to range or melee after. If you are only using Mage then you are fine. <br>


|'''[[Slayer | Slayer (Hard task)]]'''
|[[File:Slayer Master.png|center|150x150px]]
|'''~600M/hr'''
|The Hard '''Slayer''' tasks is a popular way of making money. Simply go to the '''Slayer Master''' at ::home and
go to '''Unlocks''' and purchase the Hard Tasks for 25 slayer points.
|-
|-
! scope="col" style="text-align:center;" | '''Wave 8: Spiderman'''
! scope="col" style="text-align:center;" | Same strategy as Black Panther, but can freeze you for 3 seconds, and can do a lot of damage with his combos so be aware of your HP. <br>


|'''[[Skotizo]]'''
|[[File:Skotos_Equipped.png|center|150x150px]]
|'''Volatile'''
|'''[[Skotizo]]''' is an great way of making money but is mostly about luck. To get there go to your Spellbook and select the category '''Bosses''', upon arriving kill the werewolves for a chance to get a '''Skotizo Key'''.
|-
|-
! scope="col" style="text-align:center;" | '''Wave 9: Hulk'''
! scope="col" style="text-align:center;" | Do not stand right next to his spawn because when he says "SMASH" he will deal 75 damage so be aware of your HP. Using Soulsplit, or another form of healing will make this boss much easier. <br>


|'''[[Vorkath]]'''
|[[File:Vorkath.png|center|150x150px]]
|'''~500M/hr'''
|'''[[Vorkath]]''' is an great way of making money but is mostly about luck. To get there go to your Spellbook and select the category '''Bosses'''.
|-
|-
! scope="col" style="text-align:center;" | '''Wave 10: Thanos and Ultron'''
! scope="col" style="text-align:center;" | For this wave, start next to Thanos and attack him. Be aware that he switches his protection prayer randomly, so be ready to switch styles. Ultron will walk over and, if you have an AOE weapon, then you will be able to heal from the hits on Ultron. Watch your HP because Thanos can create combos with his hits and poison. <br>


|'''[[Theatre of Blood]]'''
|[[File:Ver Sinhaza.png|center|150x150px]]
|'''Volatile'''
|'''[[Theatre of Blood]]''' is a raid that requires great teamwork or the right gear to complete. Look at the '''Recommended Gear Setup''' at the top as the raid requires all 3 different attack styles (Ranged, Melee, Magic).
|-
|-
'''Total Tokens After Each Wave''' <br>


'''Note''': Tokens are affected by Donator Rank and Wednesday's Arcade Event. The following values in the drop don below are the total token rewards, they do not add up cumulatively.''' <br>
|'''[[Strykewyrm Minigame | Strykewyrm Minigame (Normal)]]'''
|[[File:Strykewyrm_Minigame.png|center|150x150px]]
|'''1-4B/hr'''
|'''[[Strykewyrm Minigame]]''' is a minigame which can be very rewarding upon completion. To get there speak to the '''Strykewyrm Minigame Manager''' at ::home near to the shops. To start this minigame you'll need to have 50.000 in your inventory.


{| class="wikitable dropstable mw-collapsible mw-collapsed rdtable" style="text-align:center" cellpadding="2" cellspacing="0" data-expandtext="show" data-collapsetext="hide"
|-
! colspan="10" style="min-width:250px" |Token Reward by Wave
|-
! scope="col" style="text-align:center;" |Wave
! scope="col" style="text-align:center;" |Reward
|-
|style="text-align:center;" |'''Wave 1'''
|style="text-align:center;" |20 tokens
|-
|style="text-align:center;" |'''Wave 2'''
|style="text-align:center;" |40 tokens
|-
|style="text-align:center;" |'''Wave 3'''
|style="text-align:center;" |60 tokens
|-
|style="text-align:center;" |'''Wave 4'''
|style="text-align:center;" |80 tokens
|-
|style="text-align:center;" |'''Wave 5'''
|style="text-align:center;" |100 tokens
|-
|style="text-align:center;" |'''Wave 6'''
|style="text-align:center;" |125 tokens
|-
|style="text-align:center;" |'''Wave 7'''
|style="text-align:center;" |150 tokens
|-
|style="text-align:center;" |'''Wave 8'''
|style="text-align:center;" |250 tokens
|-
|style="text-align:center;" |'''Wave 9'''
|style="text-align:center;" |350 tokens
|-
|style="text-align:center;" |'''Wave 10'''
|style="text-align:center;" |500 tokens
|}
|}
|-|End-Game=
<center/>
==Lodsmok==
[[File:Lodsmok.png|200px]]


lodsmok is a dragon blaa blaa blaa


You also, unlike in the other modes, get a chance at a rare drop after completing the avengers mode.
it drops [[Dranoic Remains]] which can be sold in the POS for a good profit as well as elemental ward plus the peices etc
If you are powerful enough to collect all 6 [[Infinity Stones]], you can bind them to the [[Infinity Gauntlet]] to create the new best weapon in-game: the [[Infinity Gauntlet (Charged)]]. This weapon out-damages even the [[BFG9000]]. <br>
 
The following are possible rewards. <br>
 
<center>
{| class="wikitable dropstable mw-collapsible mw-collapsed rdtable" style="text-align:center" cellpadding="2" cellspacing="0" data-expandtext="show" data-collapsetext="hide" <br>
|-
! |'''Rare Drops After Completing All Waves:'''
|-
! scope="col" style="text-align:center;" |[[Infinity Gauntlet]]
 
! scope="col" style="text-align:center;" | [[File:Infinity Gauntlet Icon.png|center|45x45px]]
|-
|Thanos Pet|[[Thanos Pet]]
|[[File:Thanos Pet Icon.png|center|45x45px]]
|-
|Soul Stone|[[Infinity Stones|Soul Stone]]
|[[File:Soul Stone.png|center|45x45px]]
|-
|Time Stone|[[Infinity Stones|Time Stone]]
|[[File:Time Stone.png|center|45x45px]]
|-
|Space Stone|[[Infinity Stones|Space Stone]]
|[[File:Space Stone.png|center|45x45px]]
|-
|Mind Stone|[[Infinity Stones|Mind Stone]]
|[[File:Mind Stone.png|center|45x45px]]
|-
|Reality Stone|[[Infinity Stones|Reality Stone]]
|[[File:Reality Stone.png|center|45x45px]]
|-
|Power Stone|[[Infinity Stones|Power Stone]]
|[[File:Power Stone.png|center|45x45px]]
|-
|[[Black Panther Helm]]
|[[File:Black Panther Helm.png|center|45x45px]]
|-
|[[Black Panther Platebody]]
|[[File:Black Panther Platebody.png|center|45x45px]]
|-
|[[Black Panther Platelegs]]
|[[File:Black Panther Plateleg.png|center|45x45px]]
|-
|[[Black Panther Gloves]]
|[[File:Black Panther Gloves.png|center|45x45px]]
|-
|[[Black Panther Boots]]
|[[File:Black Panther Boots.png|center|45x45px]]
|}


----


==Nightmare==


{| class="wikitable dropstable mw-collapsible mw-collapsed rdtable" style="text-align:center" cellpadding="1" cellspacing="0" data-expandtext="show" data-collapsetext="hide"
night mare is a night mare bala blaa drops nightmare coins etc etc
|-
! colspan="5" style="text-align:center;" | Recommended Mage Gear
|-
! colspan="1" style="text-align:center;" |Equipment
Gear
! colspan="1" style="text-align:center;" |Mid-Gear
! colspan="1" style="text-align:center;" |End-Game Gear
|-
|style="text-align:center;" | Aura
|style="text-align:center;" | [[File:Auras.png|30px]] [[Auras|Mystic Lvl 3-4]]
|style="text-align:center;" | [[File:Kaiser Aura.png|30px]] [[Kaiser Aura]]
|-
|style="text-align:center;" | Pocket
|style="text-align:center;" | [[File:Stone_of_Power.png|30px]] [[Stone of Power]]
| [[File:Book of Heaven.png|30px]] [[Book of Heaven]] [[File:Book of Hell.png|30px]] [[Book of Hell]] <br>
|-
|style="text-align:center;" | Necklace
|style="text-align:center;" | [[File:Trix Amulet (i).png|30px]][[Trix Amulet (i)]]
|style="text-align:center;" | [[File:Kaiser Necklace.png|30px]] [[Kaiser Necklace]]
|-
|style="text-align:center;" | Helmet
|style="text-align:center;" | [[File:Space Virtus Helm.png|30px]] [[Space Virtus Helm]]
|style="text-align:center;" | [[File:Artic Guardian Hat.png|30px]] [[Artic Guardian Hat]]
|-
|style="text-align:center;" | Body
|style="text-align:center;" | [[File:Space Virtus Body.png|30px]] [[Space Virtus Body]]
|style="text-align:center;" | [[File:Artic Guardian Robe Top.png|30px]] [[Artic Guardian Robe Top]]
|-
|style="text-align:center;" | Legs
|style="text-align:center;" | [[File:Space Virtus Legs.png|30px]] [[Space Virtus Legs]]
|style="text-align:center;" | [[File:Artic Guardian Robe Bottoms.png|30px]] [[Artic Guardian Robe Bottoms]]
|-
|style="text-align:center;" | Belt
|style="text-align:center;" |
|style="text-align:center;" | [[File:Sigil of Power.png|30px]] [[Sigil of Power]]
|-
|style="text-align:center;" | Mainhand
|style="text-align:center;" | [[File:Sanguinesti Staff (i).png|30px]] [[Sanguinesti Staff (i)]]
|style="text-align:center;" | [[File:Staff of Awakening.png|30px]] [[Staff of Awakening]]
|-
|style="text-align:center;" | Offhand
|style="text-align:center;" | [[File:Ancient Wyvern Shield.png|30px]] [[Ancient Wyvern Shield]]
|style="text-align:center;" | [[File:SharkFist Mage Offhand.png|30px]] [[SharkFist Mage Offhand]]
|-
|style="text-align:center;" | Cape
|style="text-align:center;" | [[File:Tribrid Infernal Cape.png|30px]] [[Tribrid Infernal Cape]]
|style="text-align:center;" | [[File:Demon Cape.png|30px]] [[Demon Cape]]
|-
|style="text-align:center;" | Arrow
|style="text-align:center;" | [[File:Thepowerstone.png|30px]] [[The Power Stone]]
|style="text-align:center;" | [[File:Elemental Ward Fury.png|30px]] [[Elemental Ward Fury]]
|-
|style="text-align:center;" | Boots
|style="text-align:center;" | [[File:Ultimate Mage Boots.png|30px]] [[Ultimate Mage Boots]]
|style="text-align:center;" | [[File:Draconic Magic Boots.png|30px]] [[Draconic Mage Boots]]
|-
|style="text-align:center;" | Gloves
|style="text-align:center;" | [[File:Ultimate Mage Gloves.png|30px]] [[Ultimate Mage Gloves]]
|style="text-align:center;" | [[File:Ultimate Cerberus Gloves.png|30px]] [[Ultimate Cerberus Gloves]]
|-
|style="text-align:center;" | Ring
|style="text-align:center;" | [[File:Brimstone Ring Equipped.png|30px]] [[Brimstone Ring]]
|style="text-align:center;" | [[File:Kaiser Ring.png|30px]] [[Kaiser Ring]]
|-
|style="text-align:center;" | Pet(s)
|style="text-align:center;" | [[File:Thanos Pet Icon.png|30px]] [[Thanos Pet]]
|style="text-align:center;" | [[File:Shadow Drake.png|30px]] [[Shadow Drake]]


|}
----


{| class="wikitable dropstable mw-collapsible mw-collapsed rdtable" style="text-align:center" cellpadding="1" cellspacing="0" data-expandtext="show" data-collapsetext="hide"
<br />
|-
! colspan="5" style="text-align:center;" | Recommended Melee Gear
|-
! colspan="1" style="text-align:center;" |Equipment
! colspan="1" style="text-align:center;" |Mid-Gear
! colspan="1" style="text-align:center;" |End-Game Gear
|-
|style="text-align:center;" | Aura
|style="text-align:center;" | [[File:Auras.png|30px]] [[Auras|Berserker Lvl 3-4]]
|style="text-align:center;" | [[File:Kaiser Aura.png|30px]] [[Kaiser Aura]]
|-
|style="text-align:center;" | Pocket
|style="text-align:center;" | [[File:Stone_of_Power.png|30px]] [[Stone of Power]] <br>
|style="text-align:center;" | [[File:Book of Heaven.png|30px]] [[Book of Heaven]] [[File:Book of Hell.png|30px]] [[Book of Hell]]
|-
|style="text-align:center;" | Necklace
|style="text-align:center;" | [[File:Trix Amulet (i).png|30px]] [[Trix Amulet (i)]]
|style="text-align:center;" | [[File:Kaiser Necklace.png|30px]] [[Kaiser Necklace]]
|-
|style="text-align:center;" | Helmet
|style="text-align:center;" | [[File:Justiciar faceguard.png|30px]] [[Justiciar faceguard]]
|style="text-align:center;" | [[Silent Death Helm]]
|-
|style="text-align:center;" | Body
|style="text-align:center;" | [[File:Justiciar chestguard.png|30px]] [[Justiciar chestguard]]
|style="text-align:center;" | [[Silent Death Body]]
|-
|style="text-align:center;" | Legs
|style="text-align:center;" | [[File:Justiciar legguards.png|30px]] [[Justiciar legguards]]
|style="text-align:center;" | [[Silent Death Legs]]
|-
|style="text-align:center;" | Belt
|style="text-align:center;" |
|style="text-align:center;" | [[File:Sigil of Power.png|30px]] [[Sigil of Power]]
|-
|style="text-align:center;" | Mainhand
|style="text-align:center;" | [[File:Arrav Sword.png|30px]] [[Arrav Sword]]
|style="text-align:center;" | [[File:Slayer Master Hammer (i).png|30px]] [[Slayer Master Hammer (i)]]
|-
|style="text-align:center;" | Offhand
|style="text-align:center;" | [[File:Arrav Shield.png|30px]] [[Arrav Shield]]
|style="text-align:center;" | [[File:SharkFist Melee Offhand.png|30px]] [[SharkFist Melee Offhand]]
|-
|style="text-align:center;" | Cape
|style="text-align:center;" | [[File:Tribrid Infernal Cape.png|30px]] [[Tribrid Infernal Cape]]
|style="text-align:center;" | [[File:Demon Cape.png|30px]] [[Demon Cape]]
|-
|style="text-align:center;" | Arrow
|style="text-align:center;" | [[File:The Power Fist.png|30px]] [[The Power Fist]]
|style="text-align:center;" | [[File:Elemental Ward Fury.png|30px]] [[Elemental Ward Fury]]
|-
|style="text-align:center;" | Boots
|style="text-align:center;" | [[File:Ultimate_Melee_Boots.png|30px]] [[Ultimate Melee Boots]]
|style="text-align:center;" | [[File:Draconic Melee Boots.png|30px]] [[Draconic Melee Boots]]
|-
|style="text-align:center;" | Gloves
|style="text-align:center;" | [[File:Ultimate_Brawler_Gloves.png|30px]] [[Ultimate Brawler Gloves]]
|style="text-align:center;" | [[File:Ultimate Cerberus Gloves.png|30px]] [[Ultimate Cerberus Gloves]]
|-
|style="text-align:center;" | Ring
|style="text-align:center;" | [[File:Brimstone Ring Equipped.png|30px]] [[Brimstone Ring]]
|style="text-align:center;" | [[File:Kaiser Ring.png|30px]] [[Kaiser Ring]]
|-
|style="text-align:center;" | Pet(s)
|style="text-align:center;" | [[File:Thanos Pet Icon.png|30px]] [[Thanos Pet]]
|style="text-align:center;" | [[File:Shadow Drake.png|30px]] [[Shadow Drake]]
|}
|}
|-|Gambling=
Gambling is one of the best way to make money on the server. It is one of the most popular methods to gain wealth amongst other players in Redemptionrsps; however, gambling can come at a cost. The 3 most common ways to gamble are by gambling other players at ::dicezone, using the (grand) Lottery System, and trying your luck with Donation Boxes. Are you feeling lucky?


{| class="wikitable dropstable mw-collapsible mw-collapsed rdtable" style="text-align:center" cellpadding="1" cellspacing="0" data-expandtext="show" data-collapsetext="hide"
{| border="1" cellpadding="1" cellspacing="1" class="article-table" style="width: 500px;"
|-
! colspan="5" style="text-align:center;" | Recommended Range Gear
|-
! colspan="1" style="text-align:center;" |Equipment
! colspan="1" style="text-align:center;" |Mid-Gear
! colspan="1" style="text-align:center;" |End-Game Gear
|-
|style="text-align:center;" | Aura
|style="text-align:center;" | [[File:Auras.png|30px]] [[Auras|Augury Lvl 3-4]] 
|style="text-align:center;" | [[File:Kaiser Aura.png|30px]] [[Kaiser Aura]]
|-
|style="text-align:center;" | Pocket
|style="text-align:center;" | [[File:Stone_of_Power.png|30px]] [[Stone of Power]] <br>
|style="text-align:center;" | [[File:Book of Heaven.png|30px]] [[Book of Heaven]] [[File:Book of Hell.png|30px]] [[Book of Hell]]
|-
|style="text-align:center;" | Necklace
|style="text-align:center;" | [[File:Trix Amulet (i).png|30px]] [[Trix Amulet (i)]]
|style="text-align:center;" | [[File:Kaiser Necklace.png|30px]] [[Kaiser Necklace]]
|-
|style="text-align:center;" | Helmet
|style="text-align:center;" | [[File:Space Pernix Mask.png|30px]] [[Space Pernix Set|Space Pernix Hat]]
|style="text-align:center;" | [[File:Doomblade Cowl.png|30px]] [[Doomblade Cowl]]
|-
|style="text-align:center;" | Belt
|style="text-align:center;" |
|style="text-align:center;" | [[File:Sigil of Power.png|30px]] [[Sigil of Power]]
|-
|style="text-align:center;" | Body
|style="text-align:center;" | [[File:Space Pernix Body.png|30px]] [[Space Pernix Set|Space Pernix Body]]
|style="text-align:center;" | [[File:Doomblade Spaulders.png|30px]] [[Doomblade Spaulders]]
|-
|style="text-align:center;" | Legs
|style="text-align:center;" | [[File:Space Pernix Legs.png|30px]] [[Space Pernix Set|Space Pernix Legs]]
|style="text-align:center;" | [[File:Doomblade Pants.png|30px]] [[Doomblade Pants]]
|-
|style="text-align:center;" | Mainhand
|style="text-align:center;" | [[File:Poison Lotus Crossbow.png|30px]] [[Poison Lotus Crossbow]]
|style="text-align:center;" | [[File:Ultimate Raksha Crossbow.png|30px]] [[Ultimate Raksha Crossbow]]
|-
|style="text-align:center;" | Offhand
|style="text-align:center;" | [[File:Poison Lotus Crossbow Offhand.png|30px]] [[Poison Lotus Offhand Crossbow]]
|style="text-align:center;" | [[File:SharkFist Range Offhand.png|30px]] [[SharkFist Range Offhand]]
|-
|style="text-align:center;" | Cape
|style="text-align:center;" | [[File:Tribrid Infernal Cape.png|30px]] [[Tribrid Infernal Cape]]
|style="text-align:center;" | [[File:Demon Cape.png|30px]] [[Demon Cape]]
|-
|style="text-align:center;" | Arrow
|style="text-align:center;" | [[File:The Power Arrow.png|30px]] [[The Power Arrow]]
|style="text-align:center;" | [[File:Elemental Ward Fury.png|30px]] [[Elemental Ward Fury]]
|-
|style="text-align:center;" | Boots
|style="text-align:center;" | [[File:Ultimate Range Boots.png|30px]] [[Ultimate Range Boots]]
|style="text-align:center;" | [[File:Draconic Range Boots.png|30px]] [[Draconic Range Boots]]
|-
|style="text-align:center;" | Gloves
|style="text-align:center;" | [[File:Ultimate Ranger Gloves.png|30px]] [[Ultimate Ranger Gloves]]
|style="text-align:center;" | [[File:Ultimate Cerberus Gloves.png|30px]] [[Ultimate Cerberus Gloves]]
|-
|style="text-align:center;" | Ring
|style="text-align:center;" | [[File:Brimstone Ring Equipped.png|30px]] [[Brimstone Ring]]
|style="text-align:center;" | [[File:Kaiser Ring.png|30px]] [[Kaiser Ring]]
|-
|-
|style="text-align:center;" | Pet(s)
! scope="col" style="text-align:center;"|Gambling
|style="text-align:center;" | [[File:Thanos Pet Icon.png|30px]] [[Thanos Pet]]
! scope="col" style="text-align:center;"|Grand Lottery
|style="text-align:center;" | [[File:Shadow Drake.png|30px]] [[Shadow Drake]]
! scope="col" style="text-align:center;"|Donation Boxes
! scope="col" style="text-align:center;"|Item Lottery
! scope="col" style="text-align:center;"|Slot Machines
! scope="col" style="text-align:center;"|Chicken Fight
|-
|-
 
| style="text-align:center;"|[[Dicing]] <br> <br>[[Flower Poker]]
| style="text-align:center;"|[[Grand Lottery]]
| style="text-align:center;"|[[Miscellaneous]]
| style-"text-align:center;"|[[Item Lottery]]
| style-"text-align:center;"|[[Slot Machines]]
| style-"text-align:center;"|[[Chicken Fight]]
|}
|}


|}
|-|Miscellaneous=
 
|-|Endless Mode=
The arcade's '''Endless Mode''' is one of, most challenging arcade mode's.
 
With new debuffs and rewards, this new mode is ''endlessly'' rewarding. The endless arcade mode contains enemies from both the regular/extreme modes as well as from the avengers arcade mode.
 
The first 55 waves of the endless mode are the same as the normal and extreme arcade modes.
 
{| class="wikitable dropstable mw-collapsible mw-collapsed rdtable" style="text-align:center" cellpadding="2" cellspacing="0" data-expandtext="show" data-collapsetext="hide"
|-
! colspan="10" style="min-width:250px" |New waves, effects, and rewards
|-
! scope="col" style="text-align:center;" |Wave
! scope="col" style="text-align:center;" |Reward
|-
|scope="col" style="text-align:center;"|'''Wave 56'''
|scope="col" style="text-align:center;"|3x Links
3x Lara Croft
|-
|scope="col" style="text-align:center;"|'''Wave 57'''
|scope="col" style="text-align:center;"|
4x Diablo
|-
|scope="col" style="text-align:center;"|'''Wave 58'''
|scope="col" style="text-align:center;"|3x Dark Raiden
|-
|scope="col" style="text-align:center;"|'''Wave 59'''
|scope="col" style="text-align:center;"|3x Raiden
|-
|scope="col" style="text-align:center;"|'''Wave 60'''
|scope="col" style="text-align:center;"|4x Lara Croft
|-
|scope="col" style="text-align:center;"|'''Wave 61'''
|scope="col" style="text-align:center;"|4x Links
|-
|scope="col" style="text-align:center;"|'''Wave 62'''
|scope="col" style="text-align:center;"|
3 x Link
3 x Lara Croft
3 x Diablo
3 x Dark Raiden
3 x Raiden
|-
|scope="col" style="text-align:center;"|'''Wave 63'''
|scope="col" style="text-align:center;"|4x Dark Raiden
4x Raiden
|-
|scope="col" style="text-align:center;"|'''Wave 64'''
|scope="col" style="text-align:center;"|5x diablo
5x lara croft
|-
|scope="col" style="text-align:center;"|'''Wave 65'''
|scope="col" style="text-align:center;"|6x Lara Croft


After this wave, healing items and soulsplit will only work ''every other'' hit, making them 50% as effective.
{| class="article-table" border="1" cellpadding="2" cellspacing="2" style="margin:auto"
|-
|scope="col" style="text-align:center;"|'''Wave 66'''
|scope="col" style="text-align:center;"|5x link
|-
|-
|scope="col" style="text-align:center;"|'''Wave 67'''
! scope="col" style="text-align:center;" |Source
|scope="col" style="text-align:center;"|5x Dark Raiden
! scope="col" style="text-align:center;" |Image
5x Raiden
! scope="col" style="text-align:center;" |Requirement
! scope="col" style="text-align:center;" |Guide/Info
|-
|-
|scope="col" style="text-align:center;"|'''Wave 68'''
|'''[[Vote]]'''
|scope="col" style="text-align:center;"|5x Link
|[[File:Vote Ticket.png|center|150x150px]]
5x Lara Croft
|'''Voting'''
5x Diablo
|By ''' Voting''' you can choose to either sell your vote codes to other players or spend them on items in the '''[[Vote Store]]''' in which you can sell to the '''[[Black Market Dealer]]''' or to other players.
5x Dark Raiden
5x Raiden
|-
|scope="col" style="text-align:center;"|'''Wave 69'''
|scope="col" style="text-align:center;"| 7x lara croft
|-
|style="text-align:center;" |'''Wave 70'''
|scope="col" style="text-align:center;"|
7x link


After this wave, rocks will begin to fall from the ceiling, dealing 20 damage if they land on you.
Upon voting you will be able to attend the vote boss whenever it spawns after every 100 votes. To get there type ::voteboss.
|-
|-
|scope="col" style="text-align:center;"|'''Wave 71'''
|'''[[Bomberman]]'''
|scope="col" style="text-align:center;"|6x Raiden
|[[File:Bomberman.png|center|150x150px]]
|-
|'''[[Sponsor]]'''
|scope="col" style="text-align:center;"|'''Wave 72'''
|'''[[Bomberman]]''' is a Sponsor+ boss that spawns every 30 minutes and can be accessed through using the command '''::bomberman''' or under the "Misc" category in your teleport interface.
|scope="col" style="text-align:center;"|8x link
|-
|scope="col" style="text-align:center;"|'''Wave 73'''
|scope="col" style="text-align:center;"|5x Link
5x Lara Croft
5x Diablo
|-
|scope="col" style="text-align:center;"|'''Wave 74'''
|scope="col" style="text-align:center;"|8x Lara Croft
|-
|style="text-align:center;" |'''Wave 75'''
|scope="col" style="text-align:center;"|1x Antman
1x Ironman
1x Black Panther


Reward: if wave 75 is passed, the player receives a [[Tribrid Infernal Cape]] and gains the ability to start endless mode at wave 50!
'''Bomberman''' has a great amount of different items which are very valuable like the Goodieboxes; [[Executive Totem Goodiebox]], [[Descimator9000 Goodiebox]] and the many different boxes that can drop. Bomberman however statically drops between 20-50 Gold Coins to everyone who have done damage to him.
|-
|scope="col" style="text-align:center;"|'''Wave 76'''
|scope="col" style="text-align:center;"|1x Ultron
1x Thanos
|-
|scope="col" style="text-align:center;"|'''Wave 77'''
|scope="col" style="text-align:center;"|1x Ultron
1x Thanos
1x Raiden
|-
|scope="col" style="text-align:center;"|'''Wave 78'''
|scope="col" style="text-align:center;"|9x Link
|-
|-
|scope="col" style="text-align:center;"|'''Wave 79'''
|'''[[Miss Fortune]]'''
|scope="col" style="text-align:center;"|2x Antman
|[[File:Miss_Fortune.png|center|150x150px]]
2x Ironman
|center|'''[[Executive]]'''
2x Black Panther
|'''[[Miss Fortune]]''' is a Executive+ boss that spawns every 20 minutes and can be accessed through using the command '''::missfortune''' or under the "Misc" category in your teleport interface.
|-
|style="text-align:center;" |'''Wave 80'''
|scope="col" style="text-align:center;"|2x Ultron
2x Thanos


After this wave, healing items and soulsplit will only work ''every fourth'' hit, making them 25% as effective.
'''Miss Fortune''' carries a great amount of different loot which is very valuable if sold on the player market or used such as the different Goodieboxes [[Elemental Fury Staff Goodiebox]] and [[Descimator9000 Goodiebox]]. Both can be opened and if you are lucky enough be able to grab yourself some amazing loot in which you then can sell for more through ::market.
|-
|scope="col" style="text-align:center;"|'''Wave 81'''
|scope="col" style="text-align:center;"|10x Raiden
|-
|scope="col" style="text-align:center;"|'''Wave 82'''
|scope="col" style="text-align:center;"|10x Link
|-
|scope="col" style="text-align:center;"|'''Wave 83'''
|scope="col" style="text-align:center;"|6x Link
6x Lara Croft
6x Diablo
|-
|scope="col" style="text-align:center;"|'''Wave 84'''
|scope="col" style="text-align:center;"|10x Lara Croft
|-
|scope="col" style="text-align:center;"|'''Wave 85'''
|scope="col" style="text-align:center;"|2x Antman
2x Ironman
2x Black Panther
|-
|scope="col" style="text-align:center;"|'''Wave 86'''
|scope="col" style="text-align:center;"|3x Ultron
3x Thanos
|-
|scope="col" style="text-align:center;"|'''Wave 87'''
|scope="col" style="text-align:center;"|3x Ultron
3x Thanos
3x Raiden
|-
|scope="col" style="text-align:center;"|'''Wave 88'''
|scope="col" style="text-align:center;"|10x Link
|-
|-
|scope="col" style="text-align:center;"|'''Wave 89'''
|'''[[In-Game Donation Sales]]'''
|scope="col" style="text-align:center;"|3x Antman
|[[File:IGDono.PNG|center|150x150px]]
3x Ironman
|'''Donation'''
3x Black Panther
|'''In-Game Donations''' are another way of making a large amount of money if you are willing to sell to other players. Deals like these has to be looked over with a member of the Redemption staff team to avoid any form of scamming.
|-
|style="text-align:center;" |'''Wave 90'''
|scope="col" style="text-align:center;"|4x Ultron
4x Thanos


After this wave, a poison effect takes hold dealing more damage with each wave.
More information can be found [https://redemptionrsps.com/wiki/In-Game_Donation_Sales here].
|-
|-
|scope="col" style="text-align:center;"|'''Wave 91'''
|scope="col" style="text-align:center;"|10x Raiden
|-
|scope="col" style="text-align:center;"|'''Wave 92'''
|scope="col" style="text-align:center;"|12x Link
|-
|scope="col" style="text-align:center;"|'''Wave 93'''
|scope="col" style="text-align:center;"|7x Link
7x Lara Croft
7x Diablo
|-
|scope="col" style="text-align:center;"|'''Wave 94'''
|scope="col" style="text-align:center;"|15x Lara Croft
|-
|style="text-align:center;" |'''Wave 95'''
|scope="col" style="text-align:center;"|5x Antman
5x Ironman
5x Black Panther


After this wave, explosions start to take place which can 1-hit the player.
|'''[[Weekly Bosses]]'''
|-
|[[File:WeeklyBossPanel.PNG|center|150x150px]]
|scope="col" style="text-align:center;"|'''Wave 96'''
|'''Weekly'''
|scope="col" style="text-align:center;"|5x Ultron
|The '''Weekly Bosses''' are constantly providing some great loot for you to be able to pick up if you are consistent enough. The way that it works is that every week 1st place, 2nd place and 3rd place are rewarded for their effort put into encountering this boss with some amazing prizes.
5x Thanos
|-
|-
|scope="col" style="text-align:center;"|'''Wave 97'''
|'''[[In-Game Events]]'''
|scope="col" style="text-align:center;"|6x Ultron
|[[File:INGEvent.PNG|center|150x150px]]
6x Thanos
|'''Random'''
6x Raiden
|'''In-Game Events'' are scheduled to happend every single day in-game and on the [https://discord.gg/F4FT3xMgfJ Discord]. The rewards are typically never really the same but can be very rewarding. Whether you lose or not you have a chance to pick up some extra loot with the voting exlusive bonus event aswell as the '''Hot and Cold''' after every single event. With that being said there is Piñata being spawned in so everyone can go ahead and pick up some extra goodies.
|-
|-
|scope="col" style="text-align:center;"|'''Wave 98'''
|'''[[Drop Party Event]]'''
|scope="col" style="text-align:center;"|20x Link
|[[File:Party_Pete.png|center|150x150px]]
|'''Random'''
|'''Drop Parties''' are usually started when the server has recieved a total of $750. However. Most of the time members of the staff team goes out of their way to show their appreciation by filling up the chest with some amazing items that can be sold for a large amount of money and forcing these amazing drop parties to start without donations being needed.
|-
|-
|scope="col" style="text-align:center;"|'''Wave 99'''
|'''[[Mr. X]]'''
|scope="col" style="text-align:center;"|10x Antman
|[[File:MrX.png|center|150x150px]]
10x Ironman
|'''Every 20 Minutes'''
10x Black Panther
|'''[[Mr. X]]''' is a newly added NPC added to the game who will randomly pick a player every 20 minutes. '''Mr X''' has great amount of different items that he can drop but will always drop 5x [[Mega Lottery Box]] which can be sold for around 35.000.000 at the market. Besides the Mega Lottery Boxes he can also drop '''Goodieboxes''' and the newly added '''Nemesis Pet'''.
|-
|-
|style="text-align:center;" |'''Wave 100'''
|scope="col" style="text-align:center;"|10x Ultron
10x Thanos
The '''first player''' to complete wave 100 received a '''''mystery prize'''''!
808Raptor was the first to finish wave 100 and claimed the prize of $1k store credit!
|}
|-|DC Raid=
<center>
The DC Raid can be found in the Game's Room (::arcade) along with all of the other arcade modes. The raid consists of 5 waves in which you fight Batman, The Joker, Wonder Woman, Superman, and Flash.
'''Wave Breakdown'''
{{color|yellow|'''Wave 1: Batman'''}}
[[File:Batman NPC.gif|center|300x300px]]
HP: 1,500,000
Attack Style: Range


''Ability: A very rare chance Batman will stun you with his batterang for 3 seconds''
|-|Donating=
 
{{:Donate}}
 
</tabber>
 
{{color|Lime|'''Wave 2: The Joker'''}}
 
[[File:The Joker NPC.gif|center|300x300px]]
 
HP: 1,600,000
 
Attack Style: Range
 
''Ability: Laughing Gas : Joker will poison the area around your player''
 
 
{{color|red|'''Wave 3: Wonder Woman'''}}
 
[[File:Wonder Woman NPC.gif|center|300x300px]]
 
HP: 1,700,000
 
Attack Style: Melee
 
''Ability: Taunt, Wonder Woman will pull you towards her and stun you for a few seconds.''
 
{{color|blue|'''Wave 4: Superman'''}}
 
[[File:Superman NPC.gif|center|300x300px]]
 
HP: 1,800,000
 
Attack Style: Melee
 
''Ability:Super Strength, just hits..really really...hard.''
 
{{color|red|'''Wave 5: Flash'''}}
 
[[File:Flash NPC.gif|center|300x300px]]
 
HP: 3,000,000
 
Attack Style: Melee
 
''Ability: Super Speed: Randomly runs around the room dodging your attacks''
 
==Suggested Gear==
 
{| class="wikitable dropstable mw-collapsible mw-collapsed rdtable" style="text-align:center" cellpadding="1" cellspacing="0" data-expandtext="show" data-collapsetext="hide"
|-
! colspan="5" style="text-align:center;" | Recommended Mage Gear
|-
! colspan="1" style="text-align:center;" |Equipment
Gear
! colspan="1" style="text-align:center;" |Mid-Gear
! colspan="1" style="text-align:center;" |End-Game Gear
|-
|style="text-align:center;" | Aura
|style="text-align:center;" | [[File:Auras.png|30px]] [[Auras|Mystic Lvl 3-4]]
|style="text-align:center;" | [[File:Kaiser Aura.png|30px]] [[Kaiser Aura]]
|-
|style="text-align:center;" | Pocket
|style="text-align:center;" | [[File:Stone_of_Power.png|30px]] [[Stone of Power]]
| [[File:Book of Heaven.png|30px]] [[Book of Heaven]] [[File:Book of Hell.png|30px]] [[Book of Hell]] <br>
|-
|style="text-align:center;" | Necklace
|style="text-align:center;" | [[File:Trix Amulet (i).png|30px]][[Trix Amulet (i)]]
|style="text-align:center;" | [[File:Kaiser Necklace.png|30px]] [[Kaiser Necklace]]
|-
|style="text-align:center;" | Helmet
|style="text-align:center;" | [[File:Space Virtus Helm.png|30px]] [[Space Virtus Helm]]
|style="text-align:center;" | [[File:Artic Guardian Hat.png|30px]] [[Artic Guardian Hat]]
|-
|style="text-align:center;" | Body
|style="text-align:center;" | [[File:Space Virtus Body.png|30px]] [[Space Virtus Body]]
|style="text-align:center;" | [[File:Artic Guardian Robe Top.png|30px]] [[Artic Guardian Robe Top]]
|-
|style="text-align:center;" | Legs
|style="text-align:center;" | [[File:Space Virtus Legs.png|30px]] [[Space Virtus Legs]]
|style="text-align:center;" | [[File:Artic Guardian Robe Bottoms.png|30px]] [[Artic Guardian Robe Bottoms]]
|-
|style="text-align:center;" | Belt
|style="text-align:center;" |
|style="text-align:center;" | [[File:Sigil of Power.png|30px]] [[Sigil of Power]]
|-
|style="text-align:center;" | Mainhand
|style="text-align:center;" | [[File:Sanguinesti Staff (i).png|30px]] [[Sanguinesti Staff (i)]]
|style="text-align:center;" | [[File:Staff of Awakening.png|30px]] [[Staff of Awakening]]
|-
|style="text-align:center;" | Offhand
|style="text-align:center;" | [[File:Ancient Wyvern Shield.png|30px]] [[Ancient Wyvern Shield]]
|style="text-align:center;" | [[File:SharkFist Mage Offhand.png|30px]] [[SharkFist Mage Offhand]]
|-
|style="text-align:center;" | Cape
|style="text-align:center;" | [[File:Tribrid Infernal Cape.png|30px]] [[Tribrid Infernal Cape]]
|style="text-align:center;" | [[File:Demon Cape.png|30px]] [[Demon Cape]]
|-
|style="text-align:center;" | Arrow
|style="text-align:center;" | [[File:Thepowerstone.png|30px]] [[The Power Stone]]
|style="text-align:center;" | [[File:Elemental Ward Fury.png|30px]] [[Elemental Ward Fury]]
|-
|style="text-align:center;" | Boots
|style="text-align:center;" | [[File:Ultimate Mage Boots.png|30px]] [[Ultimate Mage Boots]]
|style="text-align:center;" | [[File:Draconic Magic Boots.png|30px]] [[Draconic Mage Boots]]
|-
|style="text-align:center;" | Gloves
|style="text-align:center;" | [[File:Ultimate Mage Gloves.png|30px]] [[Ultimate Mage Gloves]]
|style="text-align:center;" | [[File:Ultimate Cerberus Gloves.png|30px]] [[Ultimate Cerberus Gloves]]
|-
|style="text-align:center;" | Ring
|style="text-align:center;" | [[File:Brimstone Ring Equipped.png|30px]] [[Brimstone Ring]]
|style="text-align:center;" | [[File:Kaiser Ring.png|30px]] [[Kaiser Ring]]
|-
|style="text-align:center;" | Pet(s)
|style="text-align:center;" | [[File:Thanos Pet Icon.png|30px]] [[Thanos Pet]]
|style="text-align:center;" | [[File:Shadow Drake.png|30px]] [[Shadow Drake]]
 
|}
 
{| class="wikitable dropstable mw-collapsible mw-collapsed rdtable" style="text-align:center" cellpadding="1" cellspacing="0" data-expandtext="show" data-collapsetext="hide"
|-
! colspan="5" style="text-align:center;" | Recommended Melee Gear
|-
! colspan="1" style="text-align:center;" |Equipment
! colspan="1" style="text-align:center;" |Mid-Gear
! colspan="1" style="text-align:center;" |End-Game Gear
|-
|style="text-align:center;" | Aura
|style="text-align:center;" | [[File:Auras.png|30px]] [[Auras|Berserker Lvl 3-4]]
|style="text-align:center;" | [[File:Kaiser Aura.png|30px]] [[Kaiser Aura]]
|-
|style="text-align:center;" | Pocket
|style="text-align:center;" | [[File:Stone_of_Power.png|30px]] [[Stone of Power]] <br>
|style="text-align:center;" | [[File:Book of Heaven.png|30px]] [[Book of Heaven]] [[File:Book of Hell.png|30px]] [[Book of Hell]]
|-
|style="text-align:center;" | Necklace
|style="text-align:center;" | [[File:Trix Amulet (i).png|30px]] [[Trix Amulet (i)]]
|style="text-align:center;" | [[File:Kaiser Necklace.png|30px]] [[Kaiser Necklace]]
|-
|style="text-align:center;" | Helmet
|style="text-align:center;" | [[File:Justiciar faceguard.png|30px]] [[Justiciar faceguard]]
|style="text-align:center;" | [[Silent Death Helm]]
|-
|style="text-align:center;" | Body
|style="text-align:center;" | [[File:Justiciar chestguard.png|30px]] [[Justiciar chestguard]]
|style="text-align:center;" | [[Silent Death Body]]
|-
|style="text-align:center;" | Legs
|style="text-align:center;" | [[File:Justiciar legguards.png|30px]] [[Justiciar legguards]]
|style="text-align:center;" | [[Silent Death Legs]]
|-
|style="text-align:center;" | Belt
|style="text-align:center;" |
|style="text-align:center;" | [[File:Sigil of Power.png|30px]] [[Sigil of Power]]
|-
|style="text-align:center;" | Mainhand
|style="text-align:center;" | [[File:Arrav Sword.png|30px]] [[Arrav Sword]]
|style="text-align:center;" | [[File:Slayer Master Hammer (i).png|30px]] [[Slayer Master Hammer (i)]]
|-
|style="text-align:center;" | Offhand
|style="text-align:center;" | [[File:Arrav Shield.png|30px]] [[Arrav Shield]]
|style="text-align:center;" | [[File:SharkFist Melee Offhand.png|30px]] [[SharkFist Melee Offhand]]
|-
|style="text-align:center;" | Cape
|style="text-align:center;" | [[File:Tribrid Infernal Cape.png|30px]] [[Tribrid Infernal Cape]]
|style="text-align:center;" | [[File:Demon Cape.png|30px]] [[Demon Cape]]
|-
|style="text-align:center;" | Arrow
|style="text-align:center;" | [[File:The Power Fist.png|30px]] [[The Power Fist]]
|style="text-align:center;" | [[File:Elemental Ward Fury.png|30px]] [[Elemental Ward Fury]]
|-
|style="text-align:center;" | Boots
|style="text-align:center;" | [[File:Ultimate_Melee_Boots.png|30px]] [[Ultimate Melee Boots]]
|style="text-align:center;" | [[File:Draconic Melee Boots.png|30px]] [[Draconic Melee Boots]]
|-
|style="text-align:center;" | Gloves
|style="text-align:center;" | [[File:Ultimate_Brawler_Gloves.png|30px]] [[Ultimate Brawler Gloves]]
|style="text-align:center;" | [[File:Ultimate Cerberus Gloves.png|30px]] [[Ultimate Cerberus Gloves]]
|-
|style="text-align:center;" | Ring
|style="text-align:center;" | [[File:Brimstone Ring Equipped.png|30px]] [[Brimstone Ring]]
|style="text-align:center;" | [[File:Kaiser Ring.png|30px]] [[Kaiser Ring]]
|-
|style="text-align:center;" | Pet(s)
|style="text-align:center;" | [[File:Thanos Pet Icon.png|30px]] [[Thanos Pet]]
|style="text-align:center;" | [[File:Shadow Drake.png|30px]] [[Shadow Drake]]
|}
 
{| class="wikitable dropstable mw-collapsible mw-collapsed rdtable" style="text-align:center" cellpadding="1" cellspacing="0" data-expandtext="show" data-collapsetext="hide"
|-
! colspan="5" style="text-align:center;" | Recommended Range Gear
|-
! colspan="1" style="text-align:center;" |Equipment
! colspan="1" style="text-align:center;" |Mid-Gear
! colspan="1" style="text-align:center;" |End-Game Gear
|-
|style="text-align:center;" | Aura
|style="text-align:center;" | [[File:Auras.png|30px]] [[Auras|Augury Lvl 3-4]] 
|style="text-align:center;" | [[File:Kaiser Aura.png|30px]] [[Kaiser Aura]]
|-
|style="text-align:center;" | Pocket
|style="text-align:center;" | [[File:Stone_of_Power.png|30px]] [[Stone of Power]] <br>
|style="text-align:center;" | [[File:Book of Heaven.png|30px]] [[Book of Heaven]] [[File:Book of Hell.png|30px]] [[Book of Hell]]
|-
|style="text-align:center;" | Necklace
|style="text-align:center;" | [[File:Trix Amulet (i).png|30px]] [[Trix Amulet (i)]]
|style="text-align:center;" | [[File:Kaiser Necklace.png|30px]] [[Kaiser Necklace]]
|-
|style="text-align:center;" | Helmet
|style="text-align:center;" | [[File:Space Pernix Mask.png|30px]] [[Space Pernix Set|Space Pernix Hat]]
|style="text-align:center;" | [[File:Doomblade Cowl.png|30px]] [[Doomblade Cowl]]
|-
|style="text-align:center;" | Belt
|style="text-align:center;" |
|style="text-align:center;" | [[File:Sigil of Power.png|30px]] [[Sigil of Power]]
|-
|style="text-align:center;" | Body
|style="text-align:center;" | [[File:Space Pernix Body.png|30px]] [[Space Pernix Set|Space Pernix Body]]
|style="text-align:center;" | [[File:Doomblade Spaulders.png|30px]] [[Doomblade Spaulders]]
|-
|style="text-align:center;" | Legs
|style="text-align:center;" | [[File:Space Pernix Legs.png|30px]] [[Space Pernix Set|Space Pernix Legs]]
|style="text-align:center;" | [[File:Doomblade Pants.png|30px]] [[Doomblade Pants]]
|-
|style="text-align:center;" | Mainhand
|style="text-align:center;" | [[File:Poison Lotus Crossbow.png|30px]] [[Poison Lotus Crossbow]]
|style="text-align:center;" | [[File:Ultimate Raksha Crossbow.png|30px]] [[Ultimate Raksha Crossbow]]
|-
|style="text-align:center;" | Offhand
|style="text-align:center;" | [[File:Poison Lotus Crossbow Offhand.png|30px]] [[Poison Lotus Offhand Crossbow]]
|style="text-align:center;" | [[File:SharkFist Range Offhand.png|30px]] [[SharkFist Range Offhand]]
|-
|style="text-align:center;" | Cape
|style="text-align:center;" | [[File:Tribrid Infernal Cape.png|30px]] [[Tribrid Infernal Cape]]
|style="text-align:center;" | [[File:Demon Cape.png|30px]] [[Demon Cape]]
|-
|style="text-align:center;" | Arrow
|style="text-align:center;" | [[File:The Power Arrow.png|30px]] [[The Power Arrow]]
|style="text-align:center;" | [[File:Elemental Ward Fury.png|30px]] [[Elemental Ward Fury]]
|-
|style="text-align:center;" | Boots
|style="text-align:center;" | [[File:Ultimate Range Boots.png|30px]] [[Ultimate Range Boots]]
|style="text-align:center;" | [[File:Draconic Range Boots.png|30px]] [[Draconic Range Boots]]
|-
|style="text-align:center;" | Gloves
|style="text-align:center;" | [[File:Ultimate Ranger Gloves.png|30px]] [[Ultimate Ranger Gloves]]
|style="text-align:center;" | [[File:Ultimate Cerberus Gloves.png|30px]] [[Ultimate Cerberus Gloves]]
|-
|style="text-align:center;" | Ring
|style="text-align:center;" | [[File:Brimstone Ring Equipped.png|30px]] [[Brimstone Ring]]
|style="text-align:center;" | [[File:Kaiser Ring.png|30px]] [[Kaiser Ring]]
|-
|style="text-align:center;" | Pet(s)
|style="text-align:center;" | [[File:Thanos Pet Icon.png|30px]] [[Thanos Pet]]
|style="text-align:center;" | [[File:Shadow Drake.png|30px]] [[Shadow Drake]]
|-
 
|}
 
 
==Rewards==
{| class="wikitable dropstable mw-collapsible mw-collapsed rdtable" style="text-align:center" cellpadding="1" cellspacing="0" data-expandtext="show" data-collapsetext="hide"
|-
! colspan="10" style="min-width:250px" |Possible Loot
|-
{{DropsLine|Name = Bronze Coin|Quantity = 10K-15K|Rarity = Always}}
{{DropsLine|Name = DC Universe Box|Quantity = 1|Rarity = 1 in 35}}
{{DropsLine|Name = DC Universe Box|Quantity = 2|Rarity = 1 in 65}}
{{DropsLine|Name = Bronze Coin|Quantity = 20K-30K|Rarity = 1 in 100}}
{{DropsLine|Name = Arcade Token|Quantity = 1|Rarity = 1 in 100}}
{{DropsLine|Name = Rainbow Fish|Quantity = 10|Rarity = 1 in 100}}
{{DropsLine|Name = DC Universe Box|Quantity = 3|Rarity = 1 in 125}}
{{DropsLine|Name = DC Universe Box|Quantity = 4|Rarity = 1 in 200}}
{{DropsLine|Name = Bronze Coin|Quantity = 35K-50K|Rarity = 1 in 300}}
{{DropsLine|Name = Arcade Token|Quantity = 2|Rarity = 1 in 300}}
{{DropsLine|Name = DC Universe Box|Quantity = 5|Rarity = 1 in 300}}
{{DropsLine|Name = Batman Mask|Quantity = 1|Rarity = 1 in 750}}
{{DropsLine|Name = Batman Body|Quantity = 1|Rarity = 1 in 750}}
{{DropsLine|Name = Batman Legs|Quantity = 1|Rarity = 1 in 750}}
{{DropsLine|Name = Superman Helmet|Quantity = 1|Rarity = 1 in 750}}
{{DropsLine|Name = Superman Body|Quantity = 1|Rarity = 1 in 750}}
{{DropsLine|Name = Superman Legs|Quantity = 1|Rarity = 1 in 750}}
{{DropsLine|Name = Flash Helmet|Quantity = 1|Rarity = 1 in 750}}
{{DropsLine|Name = Flash Body|Quantity = 1|Rarity = 1 in 750}}
{{DropsLine|Name = Flash Legs|10px|Quantity = 1|Rarity = 1 in 750}}
{{DropsLine|Name = Arcade Token|Quantity = 1|Rarity = 1 in 750}}
{{DropsLine|Name = DC Universe Box|Quantity = 10|Rarity = 1 in 750}}
{{DropsLine|Name = Donator Tabs|Quantity = 3|Rarity = 1 in 750}}


{| class="wikitable dropstable mw-collapsible mw-collapsed rdtable" style="text-align:center" cellpadding="1" cellspacing="0" data-expandtext="show" data-collapsetext="hide"
|-
! colspan="5" style="text-align:center;" | Recommended Mage Gear
|-
! colspan="1" style="text-align:center;" |Equipment
Gear
! colspan="1" style="text-align:center;" |Mid-Gear
! colspan="1" style="text-align:center;" |End-Game Gear
|-
|style="text-align:center;" | Aura
|style="text-align:center;" | [[File:Auras.png|30px]] [[Auras|Mystic Lvl 3-4]]
|style="text-align:center;" | [[File:Kaiser Aura.png|30px]] [[Kaiser Aura]]
|-
|style="text-align:center;" | Pocket
|style="text-align:center;" | [[File:Stone_of_Power.png|30px]] [[Stone of Power]]
| [[File:Book of Heaven.png|30px]] [[Book of Heaven]] [[File:Book of Hell.png|30px]] [[Book of Hell]] <br>
|-
|style="text-align:center;" | Necklace
|style="text-align:center;" | [[File:Trix Amulet (i).png|30px]][[Trix Amulet (i)]]
|style="text-align:center;" | [[File:Kaiser Necklace.png|30px]] [[Kaiser Necklace]]
|-
|style="text-align:center;" | Helmet
|style="text-align:center;" | [[File:Space Virtus Helm.png|30px]] [[Space Virtus Helm]]
|style="text-align:center;" | [[File:Artic Guardian Hat.png|30px]] [[Artic Guardian Hat]]
|-
|style="text-align:center;" | Body
|style="text-align:center;" | [[File:Space Virtus Body.png|30px]] [[Space Virtus Body]]
|style="text-align:center;" | [[File:Artic Guardian Robe Top.png|30px]] [[Artic Guardian Robe Top]]
|-
|style="text-align:center;" | Legs
|style="text-align:center;" | [[File:Space Virtus Legs.png|30px]] [[Space Virtus Legs]]
|style="text-align:center;" | [[File:Artic Guardian Robe Bottoms.png|30px]] [[Artic Guardian Robe Bottoms]]
|-
|style="text-align:center;" | Belt
|style="text-align:center;" |
|style="text-align:center;" | [[File:Sigil of Power.png|30px]] [[Sigil of Power]]
|-
|style="text-align:center;" | Mainhand
|style="text-align:center;" | [[File:Sanguinesti Staff (i).png|30px]] [[Sanguinesti Staff (i)]]
|style="text-align:center;" | [[File:Staff of Awakening.png|30px]] [[Staff of Awakening]]
|-
|style="text-align:center;" | Offhand
|style="text-align:center;" | [[File:Ancient Wyvern Shield.png|30px]] [[Ancient Wyvern Shield]]
|style="text-align:center;" | [[File:SharkFist Mage Offhand.png|30px]] [[SharkFist Mage Offhand]]
|-
|style="text-align:center;" | Cape
|style="text-align:center;" | [[File:Tribrid Infernal Cape.png|30px]] [[Tribrid Infernal Cape]]
|style="text-align:center;" | [[File:Demon Cape.png|30px]] [[Demon Cape]]
|-
|style="text-align:center;" | Arrow
|style="text-align:center;" | [[File:Thepowerstone.png|30px]] [[The Power Stone]]
|style="text-align:center;" | [[File:Elemental Ward Fury.png|30px]] [[Elemental Ward Fury]]
|-
|style="text-align:center;" | Boots
|style="text-align:center;" | [[File:Ultimate Mage Boots.png|30px]] [[Ultimate Mage Boots]]
|style="text-align:center;" | [[File:Draconic Magic Boots.png|30px]] [[Draconic Mage Boots]]
|-
|style="text-align:center;" | Gloves
|style="text-align:center;" | [[File:Ultimate Mage Gloves.png|30px]] [[Ultimate Mage Gloves]]
|style="text-align:center;" | [[File:Ultimate Cerberus Gloves.png|30px]] [[Ultimate Cerberus Gloves]]
|-
|style="text-align:center;" | Ring
|style="text-align:center;" | [[File:Brimstone Ring Equipped.png|30px]] [[Brimstone Ring]]
|style="text-align:center;" | [[File:Kaiser Ring.png|30px]] [[Kaiser Ring]]
|-
|style="text-align:center;" | Pet(s)
|style="text-align:center;" | [[File:Thanos Pet Icon.png|30px]] [[Thanos Pet]]
|style="text-align:center;" | [[File:Shadow Drake.png|30px]] [[Shadow Drake]]
 
|}
 
{| class="wikitable dropstable mw-collapsible mw-collapsed rdtable" style="text-align:center" cellpadding="1" cellspacing="0" data-expandtext="show" data-collapsetext="hide"
|-
! colspan="5" style="text-align:center;" | Recommended Melee Gear
|-
! colspan="1" style="text-align:center;" |Equipment
! colspan="1" style="text-align:center;" |Mid-Gear
! colspan="1" style="text-align:center;" |End-Game Gear
|-
|style="text-align:center;" | Aura
|style="text-align:center;" | [[File:Auras.png|30px]] [[Auras|Berserker Lvl 3-4]]
|style="text-align:center;" | [[File:Kaiser Aura.png|30px]] [[Kaiser Aura]]
|-
|style="text-align:center;" | Pocket
|style="text-align:center;" | [[File:Stone_of_Power.png|30px]] [[Stone of Power]] <br>
|style="text-align:center;" | [[File:Book of Heaven.png|30px]] [[Book of Heaven]] [[File:Book of Hell.png|30px]] [[Book of Hell]]
|-
|style="text-align:center;" | Necklace
|style="text-align:center;" | [[File:Trix Amulet (i).png|30px]] [[Trix Amulet (i)]]
|style="text-align:center;" | [[File:Kaiser Necklace.png|30px]] [[Kaiser Necklace]]
|-
|style="text-align:center;" | Helmet
|style="text-align:center;" | [[File:Justiciar faceguard.png|30px]] [[Justiciar faceguard]]
|style="text-align:center;" | [[Silent Death Helm]]
|-
|style="text-align:center;" | Body
|style="text-align:center;" | [[File:Justiciar chestguard.png|30px]] [[Justiciar chestguard]]
|style="text-align:center;" | [[Silent Death Body]]
|-
|style="text-align:center;" | Legs
|style="text-align:center;" | [[File:Justiciar legguards.png|30px]] [[Justiciar legguards]]
|style="text-align:center;" | [[Silent Death Legs]]
|-
|style="text-align:center;" | Belt
|style="text-align:center;" |
|style="text-align:center;" | [[File:Sigil of Power.png|30px]] [[Sigil of Power]]
|-
|style="text-align:center;" | Mainhand
|style="text-align:center;" | [[File:Arrav Sword.png|30px]] [[Arrav Sword]]
|style="text-align:center;" | [[File:Slayer Master Hammer (i).png|30px]] [[Slayer Master Hammer (i)]]
|-
|style="text-align:center;" | Offhand
|style="text-align:center;" | [[File:Arrav Shield.png|30px]] [[Arrav Shield]]
|style="text-align:center;" | [[File:SharkFist Melee Offhand.png|30px]] [[SharkFist Melee Offhand]]
|-
|style="text-align:center;" | Cape
|style="text-align:center;" | [[File:Tribrid Infernal Cape.png|30px]] [[Tribrid Infernal Cape]]
|style="text-align:center;" | [[File:Demon Cape.png|30px]] [[Demon Cape]]
|-
|style="text-align:center;" | Arrow
|style="text-align:center;" | [[File:The Power Fist.png|30px]] [[The Power Fist]]
|style="text-align:center;" | [[File:Elemental Ward Fury.png|30px]] [[Elemental Ward Fury]]
|-
|style="text-align:center;" | Boots
|style="text-align:center;" | [[File:Ultimate_Melee_Boots.png|30px]] [[Ultimate Melee Boots]]
|style="text-align:center;" | [[File:Draconic Melee Boots.png|30px]] [[Draconic Melee Boots]]
|-
|style="text-align:center;" | Gloves
|style="text-align:center;" | [[File:Ultimate_Brawler_Gloves.png|30px]] [[Ultimate Brawler Gloves]]
|style="text-align:center;" | [[File:Ultimate Cerberus Gloves.png|30px]] [[Ultimate Cerberus Gloves]]
|-
|style="text-align:center;" | Ring
|style="text-align:center;" | [[File:Brimstone Ring Equipped.png|30px]] [[Brimstone Ring]]
|style="text-align:center;" | [[File:Kaiser Ring.png|30px]] [[Kaiser Ring]]
|-
|style="text-align:center;" | Pet(s)
|style="text-align:center;" | [[File:Thanos Pet Icon.png|30px]] [[Thanos Pet]]
|style="text-align:center;" | [[File:Shadow Drake.png|30px]] [[Shadow Drake]]
|}
 
{| class="wikitable dropstable mw-collapsible mw-collapsed rdtable" style="text-align:center" cellpadding="1" cellspacing="0" data-expandtext="show" data-collapsetext="hide"
|-
! colspan="5" style="text-align:center;" | Recommended Range Gear
|-
! colspan="1" style="text-align:center;" |Equipment
! colspan="1" style="text-align:center;" |Mid-Gear
! colspan="1" style="text-align:center;" |End-Game Gear
|-
|style="text-align:center;" | Aura
|style="text-align:center;" | [[File:Auras.png|30px]] [[Auras|Augury Lvl 3-4]] 
|style="text-align:center;" | [[File:Kaiser Aura.png|30px]] [[Kaiser Aura]]
|-
|style="text-align:center;" | Pocket
|style="text-align:center;" | [[File:Stone_of_Power.png|30px]] [[Stone of Power]] <br>
|style="text-align:center;" | [[File:Book of Heaven.png|30px]] [[Book of Heaven]] [[File:Book of Hell.png|30px]] [[Book of Hell]]
|-
|style="text-align:center;" | Necklace
|style="text-align:center;" | [[File:Trix Amulet (i).png|30px]] [[Trix Amulet (i)]]
|style="text-align:center;" | [[File:Kaiser Necklace.png|30px]] [[Kaiser Necklace]]
|-
|style="text-align:center;" | Helmet
|style="text-align:center;" | [[File:Space Pernix Mask.png|30px]] [[Space Pernix Set|Space Pernix Hat]]
|style="text-align:center;" | [[File:Doomblade Cowl.png|30px]] [[Doomblade Cowl]]
|-
|style="text-align:center;" | Belt
|style="text-align:center;" |
|style="text-align:center;" | [[File:Sigil of Power.png|30px]] [[Sigil of Power]]
|-
|style="text-align:center;" | Body
|style="text-align:center;" | [[File:Space Pernix Body.png|30px]] [[Space Pernix Set|Space Pernix Body]]
|style="text-align:center;" | [[File:Doomblade Spaulders.png|30px]] [[Doomblade Spaulders]]
|-
|style="text-align:center;" | Legs
|style="text-align:center;" | [[File:Space Pernix Legs.png|30px]] [[Space Pernix Set|Space Pernix Legs]]
|style="text-align:center;" | [[File:Doomblade Pants.png|30px]] [[Doomblade Pants]]
|-
|style="text-align:center;" | Mainhand
|style="text-align:center;" | [[File:Poison Lotus Crossbow.png|30px]] [[Poison Lotus Crossbow]]
|style="text-align:center;" | [[File:Ultimate Raksha Crossbow.png|30px]] [[Ultimate Raksha Crossbow]]
|-
|style="text-align:center;" | Offhand
|style="text-align:center;" | [[File:Poison Lotus Crossbow Offhand.png|30px]] [[Poison Lotus Offhand Crossbow]]
|style="text-align:center;" | [[File:SharkFist Range Offhand.png|30px]] [[SharkFist Range Offhand]]
|-
|style="text-align:center;" | Cape
|style="text-align:center;" | [[File:Tribrid Infernal Cape.png|30px]] [[Tribrid Infernal Cape]]
|style="text-align:center;" | [[File:Demon Cape.png|30px]] [[Demon Cape]]
|-
|style="text-align:center;" | Arrow
|style="text-align:center;" | [[File:The Power Arrow.png|30px]] [[The Power Arrow]]
|style="text-align:center;" | [[File:Elemental Ward Fury.png|30px]] [[Elemental Ward Fury]]
|-
|style="text-align:center;" | Boots
|style="text-align:center;" | [[File:Ultimate Range Boots.png|30px]] [[Ultimate Range Boots]]
|style="text-align:center;" | [[File:Draconic Range Boots.png|30px]] [[Draconic Range Boots]]
|-
|style="text-align:center;" | Gloves
|style="text-align:center;" | [[File:Ultimate Ranger Gloves.png|30px]] [[Ultimate Ranger Gloves]]
|style="text-align:center;" | [[File:Ultimate Cerberus Gloves.png|30px]] [[Ultimate Cerberus Gloves]]
|-
|style="text-align:center;" | Ring
|style="text-align:center;" | [[File:Brimstone Ring Equipped.png|30px]] [[Brimstone Ring]]
|style="text-align:center;" | [[File:Kaiser Ring.png|30px]] [[Kaiser Ring]]
|-
|style="text-align:center;" | Pet(s)
|style="text-align:center;" | [[File:Thanos Pet Icon.png|30px]] [[Thanos Pet]]
|style="text-align:center;" | [[File:Shadow Drake.png|30px]] [[Shadow Drake]]
|-
 
|}

Revision as of 00:47, 29 January 2023

Page-title-money-making.jpg
This page is a compilation of only the few most popular ways of making money. Of course, whether it be merching or something else entirely, there are plenty of ways to make money which haven't been listed.

Get creative, and forge your own path!

Clue Scroll

Clue Scrolls Graphic 3.png

Clue Scrolls (easy)

Easy Clue scrolls are obtained through killing any type of monsters.
Everything needed to complete Clue Scrolls can be bought from the Clue Scroll Shop at ::shops.
You can obtain the Clue Scroll Amulet from the Tempoross as well as the Clue Scroll Ring from the Vote Store
which have there own uniqe bonuses to boost your clue scroll grind!
profit: Up to 2b/hr

( To find more specific information on the items listed visit there listed page)


|- | Slayer (Easy task)

|
Slayer Master.png

|~300M/hr |Slayer is a popular way of making money. Simply go to the Slayer Master at ::home and get your first task to start. |-

|Revenants

|
Revenants.png

|~150M/hr |Revenants killing is one of the most popular money makers in-game. You can get there by clicking on your Spellbook and select the category Monsters. |- NOTE: Look at the Recommended Gear Setup at the top as its recommended to bring AoE weapons. |- |In-Game Events

|
INGEvent.PNG

|Random |'In-Game Events are scheduled to happend every single day in-game and on the Discord. The rewards are typically never really the same but can be very rewarding. Whether you lose or not you have a chance to pick up some extra loot with the voting exlusive bonus event aswell as the Hot and Cold after every single event. With that being said there is Piñata being spawned in so everyone can go ahead and pick up some extra goodies. It is highly recommended to attend these events due to how easily accessible it is with low effort. |-

|- |Zulrah

|
Zulrah2.png

|~1-2B/hr |Zulrah easy to kill with safe-spotting, and is a great source of income due to Range Slayer Helmet,Melee Slayer Helmet,Magic Slayer Helmet. Requires different styles of attack on phases. You can get there by clicking on your Spellbook and select the category Bosses.

|}

Enemy Image Profit Guide/Info
Abyssal Sire Center ~500M/hr Abyssal Sire has become a really good way to make money due to the Sire Crystal needed for upgrades. To get there click on your Spellbook and select the category Bosses.
Clue scrolls
Clue Scrolls Graphic 3.png
Up to 2B/hr Hard Clue Scrolls are obtained through killing any type of monsters.

Everything needed to complete Clue Scrolls can be bought from the Clue Scroll Shop at ::shops.

DC Universe
Arcade Machine.png
~1B/hr DC Universe is a raid that consists of 5 waves including; Batman, The Joker, Wonder Woman, Superman and Flash. Upon completion you can recieve tokens and boxes that can be sold to players.
Dreamland
DreamlandArea.png
~500M/hr Dreamland is a minigame used to create some of the best gloves and boots Ultimate Tribrid Gloves and Ultimate Tribrid Boots in the game.
Slayer (Hard task)
Slayer Master.png
~600M/hr The Hard Slayer tasks is a popular way of making money. Simply go to the Slayer Master at ::home and

go to Unlocks and purchase the Hard Tasks for 25 slayer points.

Skotizo Volatile Skotizo is an great way of making money but is mostly about luck. To get there go to your Spellbook and select the category Bosses, upon arriving kill the werewolves for a chance to get a Skotizo Key.
Vorkath
Vorkath.png
~500M/hr Vorkath is an great way of making money but is mostly about luck. To get there go to your Spellbook and select the category Bosses.
Theatre of Blood
Ver Sinhaza.png
Volatile Theatre of Blood is a raid that requires great teamwork or the right gear to complete. Look at the Recommended Gear Setup at the top as the raid requires all 3 different attack styles (Ranged, Melee, Magic).
Strykewyrm Minigame (Normal)
Strykewyrm Minigame.png
1-4B/hr Strykewyrm Minigame is a minigame which can be very rewarding upon completion. To get there speak to the Strykewyrm Minigame Manager at ::home near to the shops. To start this minigame you'll need to have 50.000 in your inventory.

Lodsmok

Lodsmok.png

lodsmok is a dragon blaa blaa blaa

it drops Dranoic Remains which can be sold in the POS for a good profit as well as elemental ward plus the peices etc


Nightmare

night mare is a night mare bala blaa drops nightmare coins etc etc


|}

Gambling is one of the best way to make money on the server. It is one of the most popular methods to gain wealth amongst other players in Redemptionrsps; however, gambling can come at a cost. The 3 most common ways to gamble are by gambling other players at ::dicezone, using the (grand) Lottery System, and trying your luck with Donation Boxes. Are you feeling lucky?

Gambling Grand Lottery Donation Boxes Item Lottery Slot Machines Chicken Fight
Dicing

Flower Poker
Grand Lottery Miscellaneous Item Lottery Slot Machines Chicken Fight

Source Image Requirement Guide/Info
Vote
Vote Ticket.png
Voting By Voting you can choose to either sell your vote codes to other players or spend them on items in the Vote Store in which you can sell to the Black Market Dealer or to other players.

Upon voting you will be able to attend the vote boss whenever it spawns after every 100 votes. To get there type ::voteboss.

Bomberman
Bomberman.png
Sponsor Bomberman is a Sponsor+ boss that spawns every 30 minutes and can be accessed through using the command ::bomberman or under the "Misc" category in your teleport interface.

Bomberman has a great amount of different items which are very valuable like the Goodieboxes; Executive Totem Goodiebox, Descimator9000 Goodiebox and the many different boxes that can drop. Bomberman however statically drops between 20-50 Gold Coins to everyone who have done damage to him.

Miss Fortune
Miss Fortune.png
Executive Miss Fortune is a Executive+ boss that spawns every 20 minutes and can be accessed through using the command ::missfortune or under the "Misc" category in your teleport interface.

Miss Fortune carries a great amount of different loot which is very valuable if sold on the player market or used such as the different Goodieboxes Elemental Fury Staff Goodiebox and Descimator9000 Goodiebox. Both can be opened and if you are lucky enough be able to grab yourself some amazing loot in which you then can sell for more through ::market.

In-Game Donation Sales
IGDono.PNG
Donation In-Game Donations are another way of making a large amount of money if you are willing to sell to other players. Deals like these has to be looked over with a member of the Redemption staff team to avoid any form of scamming.

More information can be found here.

Weekly Bosses
WeeklyBossPanel.PNG
Weekly The Weekly Bosses are constantly providing some great loot for you to be able to pick up if you are consistent enough. The way that it works is that every week 1st place, 2nd place and 3rd place are rewarded for their effort put into encountering this boss with some amazing prizes.
In-Game Events
INGEvent.PNG
Random 'In-Game Events are scheduled to happend every single day in-game and on the Discord. The rewards are typically never really the same but can be very rewarding. Whether you lose or not you have a chance to pick up some extra loot with the voting exlusive bonus event aswell as the Hot and Cold after every single event. With that being said there is Piñata being spawned in so everyone can go ahead and pick up some extra goodies.
Drop Party Event
Party Pete.png
Random Drop Parties are usually started when the server has recieved a total of $750. However. Most of the time members of the staff team goes out of their way to show their appreciation by filling up the chest with some amazing items that can be sold for a large amount of money and forcing these amazing drop parties to start without donations being needed.
Mr. X
MrX.png
Every 20 Minutes Mr. X is a newly added NPC added to the game who will randomly pick a player every 20 minutes. Mr X has great amount of different items that he can drop but will always drop 5x Mega Lottery Box which can be sold for around 35.000.000 at the market. Besides the Mega Lottery Boxes he can also drop Goodieboxes and the newly added Nemesis Pet.

Redemption Donation Title.png

Redemption Banner.gif

Donator Ranks
Donator Ranks are a special designation granted to players who have made monetary contributions to support the server's maintenance, development, and overall operation. This rank is often offered as a token of appreciation for the financial support provided by players. They unlock certain content, perks, and benefits for the player as the rank increases. Below are the methods on obtaining donator ranks.
Rank How to Obtain
Extreme Donator.png Extreme Donator Using an Extreme Donator ticket obtained in-game.
Sponsor.png Sponsor

Purchasing a Sponsor Ticket from the web store for $50

Obtaining a Sponsor Ticket from: Vending Machine, Vote Boss, Uncle Pennybags, Scrooge McDuck, Limestream Demon

Upgrading an Extreme Donator Ticket

Executive.png Executive

Purchasing the "Executive Package Crate" from the web store

Donating $300 total

Combining the Executive Totem and Owner Cape

Note: Must have Sponsor Rank prior to Executive.

Inferno.png Inferno Use $15,000 Custom Credit Scrolls.

Note: Must have Executive Rank prior to Inferno.

Platinum.png Platinum Donate $5,000 in a 365-day period.
Arcane.png Arcane Use $25,000 Custom Credit Scrolls.

Note: Must have Platinum Rank prior to Arcane.

Diamond.png Diamond Donating $20,000 overall.

Note: Must have Platinum Rank prior to Diamond.

Extreme Donator Title.png

Rank Elo Tribrid Boost Drop Rate Arcade Tokens Boost Boost Command Elo Degrade XP Bonus Dreamland Token Boost Daily Reward
Extreme Donator.png Extreme Donator 1.3 0% 0% N/A Cannot use. Normal 0% 0% Claim at ::ez by talking to Extreme Chief.

Sponsor Title.png

In addition to the Extreme Donator perks, sponsors get:

Rank Elo Tribrid Boost Drop Rate Arcade Tokens Boost Boost Command Elo Degrade XP Bonus Dreamland Token Boost Daily Rewards Sponsor.png Sponsor 1.75 10% 10% 1.5x 2x after 7 days of inactivity at a rate of 0.03 per day 0% 0% At ::sz, talk to the Master Sponsor.
Sponsor+ Commands
Command Description
::fall Allows the player to display a fall animation. Relog to reset animation.
::god Allows the player to float when walking. Relog to reset animation.
::dab Allows the player to "Dab" emote.
::boost Boosts the player's damage by 1.2x for 20 minutes.
::hideicon Hides the icon above the player's head.

Sponsor zone.png

To enter the sponsor zone, use the command ::sz

+Access to the following bosses at ::sz
Bosses (Northwest Clockwise)
Shadow King.png
Shadow King
Olaf 150.png
Olaf
The Necromancer.png
Necromancer
Chaos Elemental.png
Chaos elemental
King Dreamer.png
King dreamer
Scorpia.png
Scorpia
Venenatis.png
Venenatis
Nex.png
Nex
Magegray.png
Magegray
Corporal Beast.png
Mini Coporeal Beast
Tormented Demon.png
Mini Tormented Demon
Barrelchest.png
Mini Barrelchest
Mini Bosses.jpg
Mini Zilyana
Mini Kree'ara (Morph).png
Mini Kree'arra
King Black Dragon.png
Mini King Black Dragon
General Graador.png
Mini Graador
Mini Titan (Morph).png
Mini Titan
Trinity master.png
The Trinity Master is a minigame where you fight 3 different bosses. In each fight, a player must switch between combat styles in order to be victorious. This is outdated.

Sponsor Dragon
Sponsor Dragon.png
Combat Level 1400
Hitpoints 1,000,000
Slayer Level 0
Aggressive No
Attack Style Magic
Attack Speed Monster attack speed 5.gif
Max Hit Unknown
Weakness Any attack style
Always Drops See drop table
Examine It´s a Sponsor Dragon
Hit Cap

The Sponsor Dragon is available to Sponsor, Executive, Platinum and Diamond members.

How to Access the Sponsor Dragon?
When going to ::sponsorzone - run South-East and the Sponsor Dragon Manager will be waiting for you. Simply click him and teleport to the Sponsor Dragon.


Collection Log Rewards
Item Quantity Rarity
Bronze Coin.png Bronze Coin 10k−30k Always
Ak-47 Asiimov.png Ak-47 Asiimov 1 Uncommon
Gold Coin.png Gold Coin 5 Uncommon
Tactical Box.png Tactical Box 1 Uncommon
2x Damage Card.png 2x Damage Card 2 Uncommon
Muscle Milk.png Muscle Milk 1 Uncommon
Mystic Milk.png Mystic Milk 2 Uncommon
Archer Milk.png Archer Milk 2 Uncommon
Strength Milk.png Strength Milk 2 Uncommon
Attack Milk.png Attack Milk 2 Uncommon
The Sponsor Icon.png The Sponsor Icon 1 Rare
Sponsor Camo Helmet.png Sponsor Camo Helmet 1 Rare
Sponsor Camo Top.png Sponsor Camo Top 1 Rare
Sponsor Camo Bottoms.png Sponsor Camo Bottoms 1 Rare
High-Grade Enchantment Stone.png High-Grade Enchantment Stone 1 Rare
Sponsor Helmet.png Sponsor Helmet 1 Ultra Rare
Sponsor Platebody.png Sponsor Platebody 1 Ultra Rare
Sponsor Platelegs.png Sponsor Platelegs 1 Ultra Rare
Executive Totem Goodiebox.png Executive Totem Goodiebox 1 Ultra Rare
Sponsor Dragon Pet.png Sponsor Dragon Pet 1 1:1250

Executive Title.png

Rank Elo Tribrid Boost Drop Rate Arcade Tokens Boost Boost Command Elo Degrade XP Bonus Dreamland Token Boost Daily Rewards
Executive.png Executive 2.5 30% 15% 2x 3x after 7 days of inactivity at a rate of 0.01 per day 5% 0% At ::exezone, talk to the Executive Rewards Master

Executive Dragon
Executive dragon.png
Combat Level 4,785
Hitpoints 1,000,000
Slayer Level 1
Aggressive No
Attack Style Magic/Melee
Attack Speed Monster attack speed 6.gif
Max Hit 38
Weakness Hybrid
Always Drops 30 Executive Points
Examine It´s a Executive Dragon
Hit Cap


Executive Dragon

The Executive Dragon is the Dragon only available to our Executives and above.

How to get there

When going to ::exezone - run East and you will see the Executive Dragon next to the Corporeal Beasts. Please note that you are NOT able to use the Executive Cape when fighting the Executive Dragon.

Collection Log Rewards
Drops
Item Quantity Rarity
Executive Dragon Bones.png Executive Dragon Bones 1 Always
Bronze Coin.png Bronze Coin 15k−60k Always
Helicopter Pet.png Helicopter Pet 1 1:1,000
Executive Dragon Pet.png Executive Dragon Pet 1 1:1,000
Executive Helm.png Executive Helm 1 1:1,000
Executive Body.png Executive Body 1 1:1,000
Executive Legs.png Executive Legs 1 1:1,000
Executive Gloves.png Executive Gloves 1 1:1,000
File:Executive Boots.png Executive Boots 1 1:1,000
Ak-47 Asiimov.png Ak-47 Asiimov 1 1:2,000
Toilet.png Toilet 1 1:2,000
The Executive Icon.png The Executive Icon 1 1:2,000


Executive Guardian
Executive Guardian.png
Combat Level 782
Hitpoints 300,000,000
Slayer Level 1
Aggressive Yes
Attack Style Magic
Attack Speed Unknown (edit)
Max Hit Unknown
Weakness N/A
Always Drops Gold Coin
Examine It's a Executive Guardian.
Hit Cap


Monster Name

Executive Guardian is a level 782 Donator Boss. Only Executive, Inferno, Platinum, Arcane and Diamond players can access this boss. It can only be killed 10 times per day.

How to Get There

To get to the Executive Guardian, the player must have access to the Executive Zone. Click the portal located in this area to be teleported to the boss.

Drops
Always Drop Rates
Item Amount Drop Rate
Gold Coin.png Gold Coins 100-1000 Always
Crimson Chin Teleport.png Crimson Chin Teleport 1-10 1/10
Slayer Superior Teleport.png Slayer Superior Teleports 1-10 1/10
Summer Cocktail Damage.png Summer Cocktail Damage 1-10 1/10
Summer Cocktail Drop Rate.png Summer Cocktail Drop Rate 1-10 1/10
$1 Custom Credit Scroll (u).png $1 Custom Credit Scroll (u) 1-5 1/50
Salvage Fragments.png Salvage Fragments 25-250 1/200
Treasure Hunter Chest.png Treasure Hunter Chest 1 1/1000
Soul of Redemption.png Soul of Redemption 1 1/1000

Shop
Executive Shop Revamp.png
Genie.png
Genie
Arcade reward shop.png
Arcade shop.png
Arcade Shop
Protein shop.png
Observatory professor.png
Observatory Professor
Potion shop.png
Professor oddenstein.png
Professor Oddenstein


Set.png

The Executive Set is a custom armor set purchasable in the Executive Shop.
The full set costs 1,300,000 executive points.

The Executive Helm, Executive Body, and Executive Legs cost 300,000 Executive Points each; and the Executive Boots and Executive Gloves cost 200,000 Executive Points each.

You can use a Soul of Redemption on each of the pieces Executive Helm, Executive Body, and Executive Legs. Doing so on all three will activate the set bonus and increase the drop rate and luck as seen below.

NOTE: Once the player uses all charges allotted for the Tier 2 set, the set will revert back into Tier 1 and must be charged again by using a Soul of Redemption on each Tier 1 armor piece.

Hover over image for type Executive Set Equipped.png
Attack-icon.png Attack bonus
White dagger.png White scimitar.png White warhammer.png Magic-icon.png Ranged-icon.png
+1,200 +1,200 +1,200 +1,200 +1,200
Defence-icon.png Defence bonus
White dagger.png White scimitar.png White warhammer.png Magic-icon.png Ranged-icon.png
+1,800 +1,800 +1,800 +1,800 +1,800
Other bonuses Slot
Strength-icon.png RangedStrength-icon.png MagicDamage-icon.png Prayer-icon.png

Set slot.png

+1,500 +1,500 +10,710 +0
Bonus Stats Item Class
Hit Count Icon.png AoE Icon.png Drop Rate Icon.png Double Drop Rate Icon.png

Hybrid

N/A N/A 15% 0%
Strength Boost Icon.png Ranged Boost Icon.png Magic Boost Icon.png Hit Distance Icon.png
10% 10% 10% N/A


Hover over image for type Executive Set Equipped.png
Attack-icon.png Attack bonus
White dagger.png White scimitar.png White warhammer.png Magic-icon.png Ranged-icon.png
+2,850 +2,850 +2,850 +2,850 +2,850
Defence-icon.png Defence bonus
White dagger.png White scimitar.png White warhammer.png Magic-icon.png Ranged-icon.png
+3,600 +3,600 +3,600 +3,600 +3,600
Other bonuses Slot
Strength-icon.png RangedStrength-icon.png MagicDamage-icon.png Prayer-icon.png

Set slot.png

+3,000 +3,000 +21,420 +0
Bonus Stats Item Class
Hit Count Icon.png AoE Icon.png Drop Rate Icon.png Double Drop Rate Icon.png

Hybrid

N/A N/A 35% 0%
Strength Boost Icon.png Ranged Boost Icon.png Magic Boost Icon.png Hit Distance Icon.png
10% 10% 10% N/A


Inferno Title.png

In addition to the previous ranks perks, Inferno gets:

Rank Elo Tribrid Boost Drop Rate Arcade Tokens Boost Boost Command Elo Degrade XP Bonus Dreamland Token Boost Guardian Daily Rewards
Inferno.png Inferno 3 60% 30% 2x 3x after 7 days of inactivity at a rate of 0.01 per day 20% 20% Inferno Guardian One of the Following:
1-5x Slayer Superior
1x Mr X Teleport
10-20 Crimson Chin Teleport


Inferno Warden
Inferno Warden.png
Combat Level 500
Hitpoints 500M
Slayer Level 1
Aggressive No
Attack Style magic
Attack Speed Unknown (edit)
Max Hit ???
Weakness N/A
Always Drops Gold Coin
Examine It's a Inferno Warden.
Hit Cap None


Inferno Warden

Inferno Warden is a level 500 monster. It does not have a damage cap.

It is exclusive to the Inferno Rank.

How to Get There

The Inferno Warden can be found in the Inferno Zone at ::Inferno in-game.


Collection Log Rewards
Drops
Item Quantity Rarity
Gold Coins.png Gold Coins 100−200 Always
Kismet Box.png Kismet Box 1−3 1/50
Treasure Hunter Chest.png Treasure Hunter Chest 1 1/250
Dream Enchantment Stone.png Dream Enchantment Stone 1 1/250
5x Damage Card.png 5x Damage Card 3−5 1/250
Kismet Box.png Kismet Box 3 1/250
Divine Kismet Box.png Divine Kismet Box 1 1/250
Inferno Helm.png Inferno Helm 1 1/500
Inferno Body.png Inferno Body 1 1/500
Inferno Legs.png Inferno Legs 1 1/500
Inferno Warden Pet.png Inferno Warden Pet 1 1/1000


Inferno Guardian
Inferno Guardian.png
Combat Level 782
Hitpoints 400M
Slayer Level 1
Aggressive Yes
Attack Style Magic
Attack Speed Monster attack speed 9.gif
Max Hit Unknown
Weakness N/A
Always Drops Gold Coin
Examine It's a Inferno Guardian.
Hit Cap None


Monster Name

Inferno Guardian is a level 782 Donator Boss. Only Inferno, Platinum, Arcane and Diamond players can access this boss. It can only be killed 10 times per day.

How to Get There

To get to the Inferno Guardian, the player must have access to the Inferno Zone. Click the portal located in this area to be teleported to the boss.


Drops
Item Quantity Rarity
Gold Coins.png Gold Coins 25−500 Always
Crimson Chin Teleport.png Crimson Chin Teleport 1−10 1/10
Slayer Superior Teleport.png Slayer Superior Teleport 1−10 1/10
Summer Cocktail Damage.png Summer Cocktail Damage 1−10 1/10
Summer Cocktail Drop Rate.png Summer Cocktail Drop Rate 1−10 1/10
Salvage Fragments.png Salvage Fragments 25−300 1/10
$1 Custom Credit Scroll (u).png $1 Custom Credit Scroll (u) 1−5 1/100
Treasure Hunter Chest.png Treasure Hunter Chest 1 1/200
$10 Custom Credit Scroll (u).png $10 Custom Credit Scroll (u) 1 1/1000
Soul of Redemption.png Soul of Redemption 1 1/1000


Inferno Shop.png

Item Price
5.0x Damage Card (3 Minutes) 750M
Summer Cocktail Damage 1.5B
Summer Cocktail Drop Rate 1.5B
Mid-Tier Bountiful Gem Box 1.25B
Double Slayer Exp Potion 500M
Double Slayer Points Potion 500M
Perfect Enchantment Stone 500M
Inferno Scarf 150B


The Inferno Set is an Inferno Donator exclusive set dropped by the Inferno Warden.

It has a set bonus of 35% Tribrid Bonus, 60% Drop Rate, and a 1/10 chance to do 2.5x the player's base damage.

Hover over image for type Inferno Set Equipped.png
Attack-icon.png Attack bonus
White dagger.png White scimitar.png White warhammer.png Magic-icon.png Ranged-icon.png
+7,500 +7,500 +7,500 +7,500 +7,500
Defence-icon.png Defence bonus
White dagger.png White scimitar.png White warhammer.png Magic-icon.png Ranged-icon.png
+7,500 +7,500 +7,500 +7,500 +7,500
Other bonuses Slot
Strength-icon.png RangedStrength-icon.png MagicDamage-icon.png Prayer-icon.png

Set slot.png

+39,000 +39,000 +39,000 +12
Bonus Stats Item Class
Hit Count Icon.png AoE Icon.png Drop Rate Icon.png Double Drop Rate Icon.png

Hybrid

N/A N/A 60% 0%
Strength Boost Icon.png Ranged Boost Icon.png Magic Boost Icon.png Hit Distance Icon.png
35% 35% 35% N/A


The Inferno Pool is a way that players with access to the Inferno zone can boost their drop rate and damage.

When 50B is deposited, the player will receive a 1 hour 50% Tribrid Damage and 100% Drop Rate. This has a 24 hour cool down period.

Platinum rank players have a 50% discount for this buff, meaning it will cost them 25B for 1 hour of the boost.

Diamond rank players can activate this pool for free.


Platinum Title.png

Ranks How to Obtain
Platinum.png Platinum Donate $5,000 in a 365 day period. This time starts from first donation.

In name, or donations bought from other players, do NOT count towards Platinum Partnership.


In addition to the previous ranks perks, Platinum Partners get:

Rank Elo Tribrid Boost Drop Rate Arcade Tokens Boost Boost Command Dreamland Tokens Boost XP Boost Elo Degrade Guardian Platinum Crate Discount Code
Platinum.png Platinum 4 50% 15% 2x 4x 30% 30% after 30 days of inactivity at a rate of 0.01 per day Platinum Guardian 10x/day 1 Platinum Crate per month for a full year 10% off donation using code found on Discord

Platinum Commands
Command Description
::teemo Teleports to Teemo.
::boost Boosts the player's damage for 20 minutes.
::plat Teleports to the Platinum Zone.

Platinum Dragon
Platinum Dragon.png
Combat Level 4,785
Hitpoints 1,000,000
Slayer Level 1
Aggressive No
Attack Style Melee
Attack Speed Monster attack speed 5.gif
Max Hit Unknown
Weakness Melee, Mage, Ranged
Always Drops Platinum Tokens
Examine It's a Platinum Dragon.
Hit Cap


Platinum Dragon
Platinum Dragon; is a one of a kind boss, it is only accessible for players holding the Platinum rank.
How to Get There

The Platinum Dragon can be found in the Platinum Zone at ::plat in-game.

Collection Log Rewards
Possible Loots
Item Quantity Rarity
Platinum Dragon Bones.png Platinum Dragon Bones 1 Always
Platinum Dragon Pet.png Platinum Dragon Pet 1 Rare
Custom NPC's


Platinum Guardian
Platinum Guardian.png
Combat Level 782
Hitpoints 750,000,000
Slayer Level 1
Aggressive Yes
Attack Style Magic
Attack Speed Monster attack speed 9.gif
Max Hit Unknown
Weakness N/A
Always Drops Gold Coin
Examine It's a Platinum Guardian.
Hit Cap


Monster Name

Platinum Guardian is a level 782 Donator Boss. Only Platinum, Arcane and Diamond players can access this boss. It can only be killed 10 times per day.

How to Get There

To get to the Platinum Guardian, the player must have access to the Platinum Zone. Click the portal located in this area to be teleported to the boss.


Drops
Item Drop Rates
Item Amount Drop Rate
Gold Coin.png Gold Coin 25-2500 Always
$1 Custom Credit Scroll.png $1 Custom Credit Scroll (u) 1-5 Always
Crimson Chin Teleport.png Crimson Chin Teleport 1-10 1/10
Slayer Superior Teleport.png Slayer Superior Teleports 1-10 1/10
Summer Cocktail Damage.png Summer Cocktail Damage 1-10 1/10
Summer Cocktail Drop Rate.png Summer Cocktail Drop Rate 1-10 1/10
Salvage Fragments.png Salvage Fragments 25-500 1/100
$10 Custom Credit Scroll.png $10 Custom Credit Scroll (u) 1 1/500
Treasure Hunter Chest.png Treasure Hunter Chest 1 1/750
$25 Custom Credit Scroll.png $25 Custom Credit Scroll (u) 1 1/750
Soul of Redemption.png Soul of Redemption 1 1/750

Demonic Guardian
Demonic Guardian.png
Combat Level 194
Hitpoints 15,000,000
Slayer Level 1
Aggressive no
Attack Style Melee
Attack Speed Monster attack speed 5.gif
Max Hit Unknown
Weakness Hybrid
Always Drops See Drop Table
Examine It´s a Demonic Guardian
Hit Cap


Demonic Guardian
Demonic Guardian is a boss located in the Platinum Zone.
Getting There

The Demonic Guardian can be found in the Platinum Zone. Use the command ::plat to get there. THe player must be at least Platinum Rank.

Collection Log
Collection Log Rewards
Drop Table
Item Quantity Rarity
Platinum Tenderiser.png Platinum Tenderiser 1 1/350
Platinum Maul Of Omens.png Platinum Maul Of Omens 1 1/350
Platinum Spirit Shield.png Platinum Spirit Shield 1 1/350
Platinum Partyhat.png Platinum Partyhat 1 1/350
Torn Prayer Scroll Part 1.png Torn Prayer Scroll Part 1 1 1/350
Torn Prayer Scroll Part 2.png Torn Prayer Scroll Part 2 1 1/350
Torn Prayer Scroll Part 3.png Torn Prayer Scroll Part 3 1 1/350
Gold Coin.png Gold Coin 15−30 1/602
Perfect Enchantment Stone.png Perfect Enchantment Stone 1 1/602
Donator Tabs.png Donator Tabs 1 1/602


Mega Rare Drop Table Logo.png


The Mega Rare Drop Table is a special drop table accessible by Executives, Elite Members, Platinum Partners, and Diamond Partners.

The cost to access this drop table varies per rank, starting at

Executive/Elites - 5B/Hour

Platinum - 5B/Hour +5% drop rate

Diamond - 5B/Hour +10% drop rate

It can be purchased by right clicking the Executive Rewards Master or the Platinum Shop

Note: The timer pauses when the user logs out or leaves the zone.


Image Quantity
Slot Machine Spin Token.png Slot Machine Spin Token 25, 50
Donator Tabs.png Donator Tabs 10, 25, 50, 100
$1 Custom Credit Scroll.png $1 Custom Credit Scroll(u) 1
$5 Custom Credit Scroll.png $5 Custom Credit Scroll(u) 1
$10 Custom Credit Scroll.png $10 Custom Credit Scroll(u) 1
$25 Custom Credit Scroll.png $25 Custom Credit Scroll(u) 1
$50 Custom Credit Scroll.png $50 Custom Credit Scroll(u) 1
$100 Custom Credit Scroll.png $100 Custom Credit Scroll(u) 1
$250 Custom Credit Scroll.png $250 Custom Credit Scroll(u) 1
Galaxy Executive Cape.png Galaxy Executive Cape 1

The Grayson/Sandbox are a special slot machine available to Platinum Partners. The buy in is set at 50,000 Platinum Tokens

Reminder! Slot machines do not Guarantee a victory on every spin, nor does every prize guarantee a profit

Potential Winnings

Prize Winnings
Platinum Token.png
50k Platinum Tokens
Platinum Token.png
75k Platinum Tokens
Platinum Token.png
150k Platinum Tokens
Platinum Token.png
200k Platinum Tokens
Platinum Token.png
500k Platinum Tokens
Platinum Token.png
750k Platinum Tokens
Platinum Token.png
1M Platinum Tokens
Platinum Token.png
2M Platinum Tokens
Platinum Token.png
3M Platinum Tokens
Platinum Token.png
10M Platinum Tokens
25px25px
1 $5 Custom Credit Scroll
25px25px
1 $50 Custom Credit Scroll
25px25px
1 $100 Custom Credit Scroll
25px25px
1 $250 Custom Credit Scroll

Platinum Tokens
File:Platinum Tokens.png Platinum Tokens are a currency item used by Platinum, Arcane, and Diamond players. The tokens may be used to upgrade the Platinum Token Shop, make purchases from this shop, or to spin the Redemption Platinum Slots.

The tokens are dropped by monsters in the Platinum Zone, given in Platinum Crates, or won from the Redemption Platinum Slots.

Construction.png
This Article Is Currently Under Construction.

The articles content is missing, incomplete or not fully accurate. Please refrain from editing it in order to avoid edit conflicts.


Platinum Token Shop
The Platinum Token Shop is a shop that may be accessed by Platinum, Arcane, and Diamond players. The shop can be upgraded using ???? Platinum Tokens.
Shop Contents
File:Platinum Token Shop.png
Item Cost

Teemo
Teemo.png
Combat Level 911
Hitpoints 200m
Slayer Level 1
Aggressive Yes
Attack Style Melee
Attack Speed
Max Hit Unknown
Weakness Unknown
Always Drops See drop table
Examine It's a Teemo
Hit Cap


Teemo
  • Teemo is a Boss exclusive to Platinum, Arcane, and Diamond members.
  • This boss spawns every 30 minutes.
  • Damage Cap: 500,000
  • You must have voted within the last 24 hours to deal damage to this boss.
Getting There
You can teleport to Teemo by typing the command ::teemo
Collection Log
Collection Log Rewards

Image Item Quantity


Drop Table


Superior Platinum Set.png


Upon receiving Platinum Partner rank, players can purchase the Platinum Mage, Range and Melee armor sets from the Platinum Shop at ::plat. These three Platinum sets can be combined to create the Superior Platinum Set which is an upgradable armor set detailed below:


The base Superior Platinum Set set costs 16,400,000 Platinum Tokens (16.4B Cash); it is created by combining the Platinum Melee, Magic, and Range Sets along with the Platinum Glaive. The total cost of the Platinum Mage, Range and Melee armor sets is 900,000 Platinum Tokens (900M Cash). It costs 500,000 Platinum Tokens (500M Cash) to upgrade the Platinum Shop so that you can purchase the Platinum Glaive. The cost of the Platinum Glaive itself is 15,000,000 Platinum Tokens (15B Cash).

Hover over image for type Superior Platinum Set.png
Attack-icon.png Attack bonus
White dagger.png White scimitar.png White warhammer.png Magic-icon.png Ranged-icon.png
+2,250 +2,250 +2,250 +2,250 +2,250
Defence-icon.png Defence bonus
White dagger.png White scimitar.png White warhammer.png Magic-icon.png Ranged-icon.png
+2,250 +2,250 +2,250 +2,250 +2,250
Other bonuses Slot
Strength-icon.png RangedStrength-icon.png MagicDamage-icon.png Prayer-icon.png

Set slot.png

+37,500 +37,500 +37,500 +0
Bonus Stats Item Class
Hit Count Icon.png AoE Icon.png Drop Rate Icon.png Double Drop Rate Icon.png

Hybrid

N/A N/A 50% 0%
Strength Boost Icon.png Ranged Boost Icon.png Magic Boost Icon.png Hit Distance Icon.png
0% 0% 0% N/A


Tier One: In order to make the Superior Platinum Set (Tier One), add 200,000 Platinum Tokens to the Superior Platinum Helm, Body and Legs (total cost of 600,000 Platinum Tokens).

Hover over image for type Superior Platinum Set.png
Attack-icon.png Attack bonus
White dagger.png White scimitar.png White warhammer.png Magic-icon.png Ranged-icon.png
+3,249 +3,249 +3,249 +3,249 +3,249
Defence-icon.png Defence bonus
White dagger.png White scimitar.png White warhammer.png Magic-icon.png Ranged-icon.png
+3,249 +3,249 +3,249 +3,249 +3,249
Other bonuses Slot
Strength-icon.png RangedStrength-icon.png MagicDamage-icon.png Prayer-icon.png

Set slot.png

+39,000 +39,000 +39,000 +0
Bonus Stats Item Class
Hit Count Icon.png AoE Icon.png Drop Rate Icon.png Double Drop Rate Icon.png

Hybrid

N/A N/A 60% 0%
Strength Boost Icon.png Ranged Boost Icon.png Magic Boost Icon.png Hit Distance Icon.png
0% 0% 0% N/A


T2: In order to make the Superior Platinum Set (T2), add 1,000,000 Platinum Tokens to the Superior Platinum Tier One Helm, Body and Legs (total cost of 3,000,000 Platinum Tokens). In order to receive the full T2 bonuses, you must additionally use Platinum Tokens to charge the Superior Platinum T2 Helm, Body and Legs.

The set will give a 1/10 chance to do 3x the player's base damage.


Hover over image for type Superior Platinum T2 Set Equipped.png
Attack-icon.png Attack bonus
White dagger.png White scimitar.png White warhammer.png Magic-icon.png Ranged-icon.png
+8,500 +8,500 +8,500 +8,500 +8,500
Defence-icon.png Defence bonus
White dagger.png White scimitar.png White warhammer.png Magic-icon.png Ranged-icon.png
+4,000 +4,000 +4,000 +4,000 +4,000
Other bonuses Slot
Strength-icon.png RangedStrength-icon.png MagicDamage-icon.png Prayer-icon.png

Set slot.png

+45,000 +45,000 +45,000 +12
Bonus Stats Item Class
Hit Count Icon.png AoE Icon.png Drop Rate Icon.png Double Drop Rate Icon.png

Hybrid

N/A N/A 60% 0%
Strength Boost Icon.png Ranged Boost Icon.png Magic Boost Icon.png Hit Distance Icon.png
30% 30% 30% N/A


T3: In order to make the Superior Platinum Set (T3), you must use a Soul of Redemption on each of the Superior Platinum T2 set pieces (Helm, Body and Legs).

The set will give a 1/10 chance to do 3.5x the player's base damage.


  • NOTE: Once the player uses all charges allotted for the T3 set, the set will revert back into T2 and must be charged again by using a Soul of Redemption on each T2 armor piece.
Hover over image for type Superior Platinum T2 Set Equipped.png
Attack-icon.png Attack bonus
White dagger.png White scimitar.png White warhammer.png Magic-icon.png Ranged-icon.png
+12,750 +12,750 +12,750 +12,750 +12,750
Defence-icon.png Defence bonus
White dagger.png White scimitar.png White warhammer.png Magic-icon.png Ranged-icon.png
+8,010 +8,010 +8,010 +8,010 +8,010
Other bonuses Slot
Strength-icon.png RangedStrength-icon.png MagicDamage-icon.png Prayer-icon.png

Set slot.png

+52,500 +52,500 +52,500 +15
Bonus Stats Item Class
Hit Count Icon.png AoE Icon.png Drop Rate Icon.png Double Drop Rate Icon.png

Hybrid

N/A N/A 90% 0%
Strength Boost Icon.png Ranged Boost Icon.png Magic Boost Icon.png Hit Distance Icon.png
75% 75% 75% N/A


Arcane Title.png


Arcane Dragon
Arcane Dragon Detail.png
Combat Level 500
Hitpoints 800M
Slayer Level 1
Aggressive No
Attack Style magic
Attack Speed Unknown (edit)
Max Hit ???
Weakness N/A
Always Drops Gold Coin
Examine It's a Arcane Dragon.
Hit Cap None


Arcane Dragon

Arcane Dragon is a level 500 monster. It does not have a damage cap.

It is exclusive to the Arcane Rank.

How to Get There

The Arcane Dragon can be found in the Arcane Zone at ::Arcane in-game.


Collection Log Rewards
Drops
Item Quantity Rarity
Gold Coins.png Gold Coins 100−200 Always
Kismet Box.png Kismet Box 1−3 1/50
Treasure Hunter Chest.png Treasure Hunter Chest 1 1/250
Dream Enchantment Stone.png Dream Enchantment Stone 1 1/250
Kismet Box.png Kismet Box 5 1/250
Divine Kismet Box.png Divine Kismet Box 1 1/500
Arcane Helm.png Arcane Helm 1 1/500
Arcane Body.png Arcane Body 1 1/500
Arcane Legs.png Arcane Legs 1 1/500
Arcane Dragon.png Arcane Dragon 1 1/1000


Arcane Guardian
Arcane Guardian.png
Combat Level ???
Hitpoints 800M
Slayer Level 1
Aggressive Yes
Attack Style Magic
Attack Speed Monster attack speed 9.gif
Max Hit Unknown
Weakness N/A
Always Drops Gold Coin
Examine It's a Arcane Guardian.
Hit Cap None


Monster Name

Arcane Guardian is a level 782 Donator Boss. Only Arcane and Diamond players can access this boss. It can only be killed 10 times per day.

How to Get There

To get to the Arcane Guardian, the player must have access to the Arcane Zone. Click the portal located in this area to be teleported to the boss.


Drops
Item Quantity Rarity
Gold Coins.png Gold Coins 25−1,000 Always
$1 Custom Credit Scroll (u).png $1 Custom Credit Scroll (u) 1−8 Always
Crimson Chin Teleport.png Crimson Chin Teleport 1−10 1/10
Slayer Superior Teleport.png Slayer Superior Teleport 1−10 1/10
Summer Cocktail Damage.png Summer Cocktail Damage 1−10 1/10
Summer Cocktail Drop Rate.png Summer Cocktail Drop Rate 1−10 1/10
Salvage Fragments.png Salvage Fragments 25−550 1/10
$5 Custom Credit Scroll.png $5 Custom Credit Scroll 1 1/100
Treasure Hunter Chest.png Treasure Hunter Chest 1 1/100
$10 Custom Credit Scroll (u).png $10 Custom Credit Scroll (u) 1 1/500
$25 Custom Credit Scroll (u).png $25 Custom Credit Scroll (u) 1 1/750
Soul of Redemption.png Soul of Redemption 1 1/750


Arcane Shop.png

Item Price
5.0x Damage Card (3 Minutes) 500M
Spring Slayer Cocktail 750M
Dream Enchantment Stone 2.5B
Bountiful Gem Box 1B
Extreme Donator Potion 15B


The Arcane Set is an Arcane Donator exclusive set dropped by the Arcane Dragon.

It has a set bonus of 75% Tribrid Bonus, 90% Drop Rate, and a 1/10 chance to do 4x the player's base damage.

Hover over image for type Arcane Set Equipped.png
Attack-icon.png Attack bonus
White dagger.png White scimitar.png White warhammer.png Magic-icon.png Ranged-icon.png
+13,500 +13,500 +13,500 +13,500 +13,500
Defence-icon.png Defence bonus
White dagger.png White scimitar.png White warhammer.png Magic-icon.png Ranged-icon.png
+9,000 +9,000 +9,000 +9,000 +9,000
Other bonuses Slot
Strength-icon.png RangedStrength-icon.png MagicDamage-icon.png Prayer-icon.png

Set slot.png

+54,000 +54,000 +54,000 +15
Bonus Stats Item Class
Hit Count Icon.png AoE Icon.png Drop Rate Icon.png Double Drop Rate Icon.png

Hybrid

N/A N/A 90% 0%
Strength Boost Icon.png Ranged Boost Icon.png Magic Boost Icon.png Hit Distance Icon.png
75% 75% 75% N/A


The Arcane Pool is a way that players with access to the Arcane zone can boost their drop rate and damage.

When 100B is deposited, the player will receive a 1 hour 100% Tribrid Damage and 200% Drop Rate. This has a 24 hour cool down period.

Diamond rank players can activate this pool for free.


Diamond Title.png

Ranks How to Obtain
Diamond.png Diamond Donate $20,000 over the lifetime of an account. Must have Platinum rank first.

This equates to donating $5,000 in 365 days and an additional $15,000.

In addition to the previous ranks perks, Diamond gets:

Rank Elo Tribrid Boost Drop Rate Arcade Tokens Boost Boost Command Dreamland Tokens Boost XP Boost Elo Degrade Guardian Platinum Crates
Diamond.png Diamond 6 150% 100% 2x 5x 50% 50% ELO will not decay Diamond Guardian Platinum Crates for life


Diamond Dragon
Diamond Dragon.png
Combat Level 1450
Hitpoints 350M
Slayer Level 1
Aggressive No
Attack Style magic
Attack Speed Unknown (edit)
Max Hit 150
Weakness N/A
Always Drops Gold Coin
Examine It's a Diamond Dragon.
Hit Cap None


Diamond Dragon

Diamond Dragon is a level 1450 monster. It does not have a damage cap.

It is exclusive to the Diamond Rank.

How to Get There

The Diamond Dragon can be found in the Diamond Zone at ::diamond in-game.

Fight Overview

Basic overview of mechanics and fight. If this is not needed (i.e. basic slayer monster) then do not include this section. The Diamond Dragon is capable of dealing massive amounts of fire damage due to its breath. To decrease the damage taken by this the player must either use a hellfire offhand, or use some form of antifire potions.

Collection Log Rewards
Drops
Item Quantity Rarity
Diamond Dragon Bones.png Diamond Dragon Bones 1 1/1
Gold Coin.png Gold Coin 25−125 1/1
Slot Machine Spin Token.png Slot Machine Spin Token 1−5 1/100
Perfect Enchantment Stone.png Perfect Enchantment Stone 1 1/250
Slot Machine Spin Token.png Slot Machine Spin Token 5−10 1/250
Gold Coin.png Gold Coin 125−250 1/250
Platinum Coin.png Platinum Coin 1−15 1/500
Diamond Prayer Scroll Part 1.png Diamond_Prayer Scroll Part 1 1 1/200
Diamond Prayer Scroll Part 2.png Diamond_Prayer Scroll Part 2 1 1/200
Diamond Prayer Scroll Part 3.png Diamond_Prayer Scroll Part 3 1 1/200
Slot Machine Spin Token.png Slot Machine Spin Token 15−30 1/500
Diamond Helm.png Diamond_Helm 1 1/500
Diamond Platebody.png Diamond_Platebody 1 1/500
Diamond Platelegs.png Diamond_Platelegs 1 1/500
Dream Enchantment Stone.png Dream Enchantment Stone 1 1/1500
$5 Custom Credit Scroll.png $5 Custom Credit Scroll 1 1/2000


Diamond Guardian
Diamond Guardian.png
Combat Level 782
Hitpoints 1,000,000,000
Slayer Level 1
Aggressive Yes
Attack Style Magic
Attack Speed Monster attack speed 9.gif
Max Hit Unknown
Weakness N/A
Always Drops Gold Coin
Examine It's a Diamond Guardian.
Hit Cap None


Diamond Guardian

Diamond Guardian is a level 782 Donator Boss. Only Diamond players can access this boss. It can only be killed 10 times per day.

How to Get There

The Diamond Guardian is found in Diamond zone, Diamond players can get there by using ::diamond in-game. Click the portal located in the west room of this area to be teleported to the boss.

Drops
Item Drop Rates
Item Amount Drop Rate
Gold Coin.png Gold Coins 250 - 1,000 Always
$1 Custom Credit Scroll.png $1 Custom Credit Scroll (u) 1-10 Always
Crimson Chin Teleport.png Crimson Chin Teleport 1-10 1/20
Slayer Superior Teleport.png Slayer Superior Teleports 1-10 1/20
Summer Cocktail Damage.png Summer Cocktail Damage 1-15 1/20
Summer Cocktail Drop Rate.png Summer Cocktail Drop Rate 1-15 1/20
Salvage Fragments.png Salvage Fragments 25-600 1/75
Treasure Hunter Chest.png Treasure Hunter Chest 1 1/500
$10 Custom Credit Scroll.png $10 Custom Credit Scroll (u) 1 1/500
$25 Custom Credit Scroll.png $25 Custom Credit (u) 1 1/500
Soul of Redemption.png Soul of Redemption 1 1/500

Diamond Daily Task Logo.png

The Diamond daily task system rewards players with experience, reward points, and character boosts for completing daily tasks such as killing monsters, performing skills, or participating in minigames.

To access the Diamond Daily Task system, a player must be a Diamond member.

To view the Diamond Daily Task system, the player may talk to the "Diamond Daily Task Manager" to the west of the Diamond zone, or access the interface through the miscellaneous/information icon on the bottom right of the user interface.

Diamond Daily Task General.png

Viewing current tasks is done by selecting the menu button on the top left of the interface itself.

Diamond Daily Task View.png


Grants player 1 reward point for completing used for the Diamond Daily Task Reward shop

Easy Tasks - 1 Points
Redeem 3 Vote Codes
Kill 5 Diamond Dragons
Complete 5 Slayer Tasks
Kill 100 Crimson Chin
Kill 25 Mr X
Kill 25 Omen
Kill 25 Posiedon
Kill 25 Masterwork Warrior
Kill 10 Diamond Guardians


Grants player 2 reward point for completing used for the Diamond Daily Task Reward shop

Medium Tasks - 2 Points
Complete Extreme Hell Arcade
Complete 1 Woodcutting Task
Add 100 logs to the Bonfire
Complete 1 Fishing Task
Kill 25 Doomblade
Kill 25 Artic Guardian
Kill Teemo 1 Time
Kill Diamond Dragon 10 Times

Grants player 3 reward point for completing used for the Diamond Daily Task Reward shop

Hard Tasks - 3 Points
Kill 100 Slayer Superiors
Kill 50 Marrow Reaper
Complete 25 Slayer Tasks
Complete 10 Yugioh Raids
Kill the Great Olm 15 Times
Kill Cerberus 150 Times
Complete 1 Tempoross Minigame
Deposit 250B into the Fountain of Fortune
Kill Lachrym 50 Times

Grants player 4 reward point for completing used for the Diamond Daily Task Reward shop

Elite Tasks - 4 Points
Kill Vulcan 50 Times
Complete 10 Rise of the Titans Raids
Kill 100 Marrow Reaper
Complete 30 Slayer Tasks
Kill Telos 10 Times
Kill Diamond Dragon 50 times
Spin the Platinum Slot Machine 500 Times

Diamond Daily Task Effects.png


Players are granted 1 paragon point for completing all 4 tasks.


Diamond Paragon Effects
Strength Boost Increase your combat strength by 1,000 stats
Tribrid % Boost: Increase your tribrid % by 5%
ELO Boost: Increase ELO boost by 0.03%
Drop Rate Increase drop rate by 5%
Deadly Key Increase chance to save a key by 1%
Olm Key Increase chance to save any Olm key by 1%
Treasure Hunter Chest Key Increase chance to save a THC Key by 1%
Donator Guardians Increases chance to save a Donator Guardian by 0.50%


Reward Points are awarded for each task completed depending on task difficulty; a player can spend those points on the Diamond Daily Tasks rewards point shop.

Diamond Daily Task Shop.png
Reward Shop Pricing
$5 Custom Credit Scroll (u) - 2 Points
$10 Custom Credit Scroll (u) - 4 Points
$25 Custom Credit Scroll (u) - 10 Points
$50 Custom Credit Scroll (u) - 16 points
$100 Custom Credit Scroll (u) - 32 points
$250 Custom Credit Scroll (u) - 64 points
Scroll Crate - 8 points


Diamond Shop.png
Diamond Shop Pricing
2.5x Damage Card - 5M
Potion of Agreesion - 50M
Royal Mystery Box - 10M
Box of Dreams - 200M
Mega Lottery Box - 25M
Ultra Pet Box - 25M
Herblore Supply Crate - 25M
Sire Crystal - 500K
Extreme Boost Potion - 25M

Upon receiving Diamond, you are eligible to kill the Diamond Dragon, which will drop the pieces of the Diamond Armor Set.


The Diamond Armor Set can be obtained by killing the Diamond Dragon. It is a very powerful armor set that is exclusive to only the Diamond Rank players.

The Diamond Armor Set can be upgraded into the Diamond Armor Set T2.

The set will give a 1/10 chance to do 5x the player's base damage.


Hover over image for type Diamond Armor Set Equipped.png
Attack-icon.png Attack bonus
White dagger.png White scimitar.png White warhammer.png Magic-icon.png Ranged-icon.png
+13500 +13500 +13500 +13500 +13500
Defence-icon.png Defence bonus
White dagger.png White scimitar.png White warhammer.png Magic-icon.png Ranged-icon.png
+9000 +9000 +9000 +9000 +9000
Other bonuses Slot
Strength-icon.png RangedStrength-icon.png MagicDamage-icon.png Prayer-icon.png

Set slot.png

+60000 +60000 +60000 +15
Bonus Stats Item Class
Hit Count Icon.png AoE Icon.png Drop Rate Icon.png Double Drop Rate Icon.png

Hybrid

0 0 75% ?
Strength Boost Icon.png Ranged Boost Icon.png Magic Boost Icon.png Hit Distance Icon.png
50% 50% 50% 0


Upgrading

Upgrade Materials
Upgrade Location Chance
Inventory 100%
Item Quantity
Diamond Helm.png
Diamond Helm 1
Diamond Platebody.png
Diamond Platebody 1
Diamond Platelegs.png
Diamond Platelegs 1
Soul of Redemption.png
Soul of Redemption 3(1 per piece)
Results in
Diamond Armor Set T2.png
Diamond Armor Set T2


Item Sources

Source Level Quantity Rarity
Diamond Dragon 1450 1 1/350


The Diamond Armor Set T2 is the upgraded version of the Diamond Armor Set. It is obtained by using a Soul of Redemption on each piece of armor.

  • NOTE: Once the player uses all charges allotted for the T2 set, the set will revert back into the regular Diamond Set and must be charged again by using a Soul of Redemption on each armor piece.

The set will give a 1/5 chance to do 5x the player's base damage.


Hover over image for type Diamond Armor Set Equipped.png
Attack-icon.png Attack bonus
White dagger.png White scimitar.png White warhammer.png Magic-icon.png Ranged-icon.png
+20250 +20250 +20250 +20250 +20250
Defence-icon.png Defence bonus
White dagger.png White scimitar.png White warhammer.png Magic-icon.png Ranged-icon.png
+8010 +8010 +8010 +8010 +8010
Other bonuses Slot
Strength-icon.png RangedStrength-icon.png MagicDamage-icon.png Prayer-icon.png

Set slot.png

+90000 +90000 +90000 +15
Bonus Stats Item Class
Hit Count Icon.png AoE Icon.png Drop Rate Icon.png Double Drop Rate Icon.png

Hybrid

0 0 90% ?
Strength Boost Icon.png Ranged Boost Icon.png Magic Boost Icon.png Hit Distance Icon.png
75% 75% 75% 0


Item Sources

The Diamond Armor Set T2 can be obtained by using a Soul of Redemption on each piece of the Diamond Set.

Each Soul of Redemption used on an armor piece grants 250,000 charges.

Upgrade Materials
Upgrade Location Chance
Inventory 100%
Item Quantity
Diamond Helm.png
Diamond Helm 1
Diamond Platebody.png
Diamond Platebody 1
Diamond Platelegs.png
Diamond Platelegs 1
Soul of Redemption.png
Soul of Redemption 3(1 per piece)
Results in
Diamond Armor Set T2.png
Diamond Armor Set T2


Donator Perks
Below is a list of the perks that Donator Ranks offer. This list is not exhaustive and more perks are offered for each rank. Perks do not stack. To see a full list of the perks the rank offers, visit the rank's page.
Rank Elo Tribrid Boost Drop Rate Arcade Tokens Boost Boost Command Elo Degrade XP Bonus Dreamland Token Boost
Extreme Donator.png Extreme Donator 1.3 0% 0% N/A Cannot use. Normal 0% 0%
Sponsor.png Sponsor 1.75 10% 10% 1.5x 2x after 7 days of inactivity at a rate of 0.03 per day 0% 0%
Executive.png Executive 2.5 30% 15% 2x 3x after 7 days of inactivity at a rate of 0.01 per day 5% 0%
Inferno.png Inferno 3 60% 30% 2x 3x after 7 days of inactivity at a rate of 0.01 per day 20% 20%
Platinum.png Platinum 4 75% 50% 2x 4x after 30 days of inactivity at a rate of 0.01 per day 30% 30%
Arcane.png Arcane 5 100% 75% 2x 4x after 30 days of inactivity at a rate of 0.01 per day 40% 40%
Diamond.png Diamond 6 150% 100% 3x 5x No impact 50% 50%

Top Donator Leaderboard
The Top Donator Leaderboard showcases the top 5 donators of the month. At the end of the month, the rewards will be distributed to the winners.

Each time there is a new top donator, an alert in game will pop up and they will grant the server a 200% drop rate boost for 1 hour, 200% damage boost for 1 hour, and 20% DDR for 1 hour.

The leading donator will have access to the Premium Prayer.

All of the Store Credit available from these rewards can be used on custom base/custom add-ons, not including remodels.

Monthly Rewards
1st Place

Gilded Champion Set

$500 Store Credit

100 Diamond Coins

50 $100 Custom Credit Scroll

5 Golden Chest Tickets

5 Animated Chest Scroll

2nd Place

$250 Store Credit

20 Diamond Coins

10 $100 Custom Credit Scroll

4 Golden Chest Tickets

4 Animated Chest Scroll

3rd Place

$100 Store Credit

15 Diamond Coins

15 $50 Custom Credit Scroll

3 Golden Chest Tickets

3 Animated Chest Scroll

4th Place

$50 Store Credit

10 Diamond Coins

10 $50 Custom Credit Scroll

2 Golden Chest Tickets

2 Animated Chest Scroll

5th Place

5 Diamond Coins

5 $50 Custom Credit Scroll

1 Golden Chest Tickets

1 Animated Chest Scroll

Arcane Dragon Tile.png
Arcane Guardian Tile.png
Bomberman Tile.png
Demonic Guardian Tile.png
Diamond Dragon Tile.png
Diamond Guardian Tile.png
Executive Dragon Tile.png
Executive Guardian Tile.png
Inferno Guardian Tile.png
Inferno Warden Tile.png
Lucky Jester Tile.png
Miss Fortune Tile.png
Platinum Dragon Tile.png
Platinum Guardian Tile.png
Scrooge McDuck Tile.png
Sponsor Dragon Tile.png
Teemo Tile.png
Uncle Penny Bags Tile.png

30 Day Membership.png Redemption Membership is an addition to a player's Donator Rank.


Membership Perks:
50% Drop Rate 50% Luck Bonus 50% Tribrid Bonus
3x ELO gained per day 1 Slayer Point for completing hard tasks 3 Slayer points for completing boss tasks
5% Increase to grinder value 5% Upgrade chance boost 1 Daily task in each difficulty
25% Bonus XP Third gem socket slot
Special Access:
Donator Bosses Miss Fortune Bomberman
Executive Rank bonuses Executive Zone
Double Drop Rate:
10% Double drop rate for 1 hour with 6-hour cooldown

As a member, players have access to the perks listed below as well as daily spins on the Membership Daily Spin wheel.
The amount of spins is based on your donation rank as seen below:

All Ranks: 1 Daily Reward Spin
Platinum Rank: 3 Reward Spins
Diamond Rank: 5 Reward Spins

Slayer Box.png Slayer Box 1 N/A
Spin to Win Token.png Spin to Win Token 1 N/A
Spin to Win Token.png Spin to Win Token 3 N/A
Spin to Win Token.png Spin to Win Token 5 N/A
Treasure Hunter Chest Key.png Treasure Hunter Chest Key 1 N/A
Treasure Hunter Chest Key.png Treasure Hunter Chest Key 3 N/A
Ultimate Fortune Chest.png Ultimate Fortune Chest 1 N/A
$5 Custom Credit Scroll (u).png $5 Custom Credit Scroll (u) 1 N/A
$10 Custom Credit Scroll (u).png $10 Custom Credit Scroll (u) 1 N/A
$25 Custom Credit Scroll (u).png $25 Custom Credit Scroll (u) 1 N/A
Scroll Crate.png Scroll Crate 1 N/A
Scroll Crate.png Scroll Crate 3 N/A
Platinum Coin.png Platinum Coin 10 N/A
Platinum Coin.png Platinum Coin 25 N/A
Platinum Coin.png Platinum Coin 50 N/A
Dream Enchantment Stone.png Dream Enchantment Stone 10 N/A
Supreme Enchantment Stone.png Supreme Enchantment Stone 1 N/A
Owner's Box.png Owner's Box 1 N/A
Owner's Box.png Owner's Box 3 N/A
Sigil Box.png Sigil Box 1 N/A
Slayer Key (+).png Slayer Key (+) 10 N/A
Slayer Key (+).png Slayer Key (+) 25 N/A
Slayer Key (+).png Slayer Key (+) 50 N/A
Slayer Superior Teleport.png Slayer Superior Teleport 10 N/A


Dreamweaver Wand.png
The Dreamweaver Wand is an upgradable weapon that you can access as long as you have an active Redemption Membership. This is purchased from the Membership Shop for 250B.

This weapon is able to be upgraded based on the wielder's membership streak.
For every 1 month on the player's membership streak they will gain 3,125 magic strength and 20% magic bonus.
This is capped at 500% Magic Bonus total and 120,000 Magic Strength total.

Hover over image for type Dreamweaver Wand Equipped.png
Attack-icon.png Attack bonus
White dagger.png White scimitar.png White warhammer.png Magic-icon.png Ranged-icon.png
+0 +0 +0 +17,500 +0
Defence-icon.png Defence bonus
White dagger.png White scimitar.png White warhammer.png Magic-icon.png Ranged-icon.png
+0 +0 +0 +0 +0
Other bonuses Slot
Strength-icon.png RangedStrength-icon.png MagicDamage-icon.png Prayer-icon.png

Weapon slot.png

+0 +0 +40,000 +0
Bonus Stats Item Class
Hit Count Icon.png AoE Icon.png Drop Rate Icon.png Double Drop Rate Icon.png

Magic

3 50x50 35% 0%
Strength Boost Icon.png Ranged Boost Icon.png Magic Boost Icon.png Hit Distance Icon.png
0% 0% 20% 7
Monster attack speed 9.gif


Hover over image for type Dreamweaver Wand Equipped.png
Attack-icon.png Attack bonus
White dagger.png White scimitar.png White warhammer.png Magic-icon.png Ranged-icon.png
+0 +0 +0 +17,500 +0
Defence-icon.png Defence bonus
White dagger.png White scimitar.png White warhammer.png Magic-icon.png Ranged-icon.png
+0 +0 +0 +0 +0
Other bonuses Slot
Strength-icon.png RangedStrength-icon.png MagicDamage-icon.png Prayer-icon.png

Weapon slot.png

+0 +0 +120,000 +0
Bonus Stats Item Class
Hit Count Icon.png AoE Icon.png Drop Rate Icon.png Double Drop Rate Icon.png

Magic

3 50x50 35% 0%
Strength Boost Icon.png Ranged Boost Icon.png Magic Boost Icon.png Hit Distance Icon.png
0% 0% 500% 7
Monster attack speed 9.gif


Grayson/Sandbox

The Membership Store is a shop available to Redemption Members.

This shop is located at ::home in the bank building near the Item Grinder.

Membership Shop.png
Item Price Daily Limit
Creator's Gate Key 50M Coins 100 Per Day
Heaven boss portal key 25M Coins 200 Per Day
Hell boss portal key 25M Coins 200 Per Day
Dream Enchantment Stone 1B Coins 3 Per Day
Dream Enchantment Stone (e) 25B Coins 1 Per Day
$5 Custom Credit Scroll 20B Coins 1 Per Day
Antique Lamp 10M Coins 100 Per Day
2.8x Damage Card 20M Coins 10 Per Day
Minesweeper Box 500M Coins 25 Per Day
4x Slayer Experience Potion 1B Coins 1 Per Day
Dreamweaver Wand 250B Coins 1 Per Day

The below additional benefits are available to our loyal members that maintain their Redemption Membership on a monthly basis

Bonus Monthly Increase Bonus Cap
Daily Membership Spin 1 5 additional spins
Wager Saver 0.002 2.9% saved on all bets
Daily Guardian Save Chance 1% 12%
Drop Rate 10% 100%

Lucky Jester Boss
Lucky Jester NPC.png
Combat Level ???
Hitpoints 2.5B
Slayer Level 1
Aggressive Yes
Attack Style Magic
Attack Speed Monster attack speed 5.gif
Max Hit N/A
Weakness N/A
Always Drops Platinum Coins
Examine It's a Lucky Jester Boss.
Hit Cap 200k


Lucky Jester

Lucky Jester Boss is a boss with 2.5B hitpoints. It spawns every 60 minutes and can be accessed via the command "::MBOSS" or through the teleport interface. Active Redemption Membership is required to fight this boss.

How to Get There

Accessed via the command "::MBOSS" or through the teleport interface.

Collection Log Rewards
Drops
Item Quantity Rarity
Platinum Coin.png Platinum Coin 1−5 Always
Platinum Coin.png Platinum Coin 10−15 1/25
Slayer Box.png Slayer Box 1 1/25
Box of Enchantments.png Box of Enchantments 1 1/25
Platinum Coin.png Platinum Coin 20−30 1/50
Supreme Enchantment Stone.png Supreme Enchantment Stone 1 1/50
Shadow Pet.png Shadow Pet 1 1/50
Baby Yoda Pet.png Baby Yoda Pet 1 1/50
Bountiful Gem Box.png Bountiful Gem Box 5 1/50
Bountiful Gem Box.png Bountiful Gem Box 10 1/125
Mid Tier Gem Box.png Mid Tier Gem Box 3 1/125
High Tier Gem Box.png High Tier Gem Box 1 1/125
Lucky Jester Hat.png Lucky Jester Hat 1 1/250
Lucky Jester Coat.png Lucky Jester Coat 1 1/250
Lucky Jester Bottoms.png Lucky Jester Bottoms 1 1/250
Lucky Jester Gloves.png Lucky Jester Gloves 1 1/250
Lucky Jester Boots.png Lucky Jester Boots 1 1/250
Lucky Jester Cape.png Lucky Jester Cape 1 1/1000
Lucky Jester Pet.png Lucky Jester Pet 1 1/1000

Donating to Redemption is a great way to support the server and receive exclusive benefits or items. This is a step-by-step guide on how to donate.

Store Page

To donate, you need to go to the store page. There are several ways to access the store page, including typing ::donate or ::store in the game chat, clicking on the store link on the wiki navigation bar, or clicking on the store link on the forums.

Browse available item

Once you're on the store page, you can browse the available items or benefits that you can donate for. Some popular items include cosmetics, items, and special access to exclusive areas.

Add items to your cart

Once you've found the items or benefits that you want to donate for, add them to your cart by clicking on the "Add to cart" button.

Enter your in-game username

After adding items to your cart, you'll be prompted to enter your in-game username.

In Game Name.png

If you have any coupon codes, enter them in the provided field to get a discount on your order.

Coupon Code.png

Choose a checkout method

On the checkout page, you'll be prompted to choose your preferred checkout method. Redemption offers two options: Paypal or Stripe.

Checkout Methods.png

Before submitting your payment, review your order one last time to ensure that everything is correct. This is your chance to make any changes to your order before making a payment.

Make a payment

Once you've confirmed your order, it's time to make a payment. Follow the steps provided by your chosen payment method to complete the transaction.

PayPal Payment Method.png

Stripe Payment Method.png

Type ::donated in-game

After you have made your donation, type ::donated in the game chat to claim your donation items. This will prompt the server to apply the donation benefits to your account.

And that's it! By following these steps, you should be able to donate and receive the benefits or items that you have donated for. If you have any questions or encounter any issues during the donation process, don't hesitate to contact a donation Admin in game or on Discord!

How it Works
To begin, you'll choose a base item from our extensive selection of weapons, armor, and pets. You can browse our current offerings on our website to find the perfect base item for your vision. But don't worry if you don't see exactly what you're looking for - our donation admins are happy to discuss creating a custom base item just for you.

Once you've chosen your base item, our donation admins will work with you to determine the final price, stats, and how to obtain your custom item in-game.

And if you're feeling extra creative, we even offer the option to create a custom model for your gear.

Important Note: Prior to a custom order being processed, you must purchase a base item and at least 1 custom option. You cannot create a custom by only purchasing the base item. Custom Credit Scrolls cannot be used until at least the base item and 1 custom option has been purchased.

Custom Credit Scrolls
Custom Credit Scrolls are scrolls worth dollar amounts in-game that can be used to add to existing custom gear, or in some cases can be used to create new custom items.

The scrolls come in either $1, $5, $10, $25, $50, $100, or $250. The (u) version of the Custom Credit Scrolls cannot be put into the Item Grinder for grinder points, but the regular versions can. If you'd like to see how many grinder points each scroll gives go here.

$5 Custom Credit Scrolls are the only tradable scroll in-game. All other Custom Credit Scrolls are Not Tradeable.

If you would like to learn about all of the methods there are for obtaining Custom Credit Scrolls, go here.

If you would like to see a general guide on what to do with your first custom, go to this page: Custom Starter Guide.

Custom Credit Scroll Usage Example

You must pay full price for the base item and for some customizations such as an item recolor. However, some customizations such as AoE may be purchased exclusively with Custom Credit Scrolls.

Example:

You would like a Skull Descimator9000 mainhand that is red and has 50x50 AoE.
Base - $300
Recolor - $100
50x50 AoE - $500
This would total $900. You must pay for the base ($300) and the Recolor ($100), for a total of $400. The remaining $500 Cash Price, $1,000 Scroll Price for the purchase of AoE can be paid with custom credit scrolls.

You only need custom base to be able to add stats.

To see prices for Custom Donations, click here!

Donation Sale Rules and Process
Buying Donations from other players
Players can only buy donations with in-game currency. Attempting to buy or sell donations using non-accepted methods will result in a permanent ban for Real World Trading (RWT).

Players must always use a staff member as a middleman for donation purchases.

Before contacting a staff member for a middleman, both the buyer and the seller should confirm:

Total donation value

Agreement on payment

Contact any helper+ to request a middleman. If available, the staff member will ask for the second player's name and teleport both to a private location.

The buyer then trades the payment to the staff member. Only after confirmation that the payment is held should the seller donate to the server.

Selling Donations
After payment confirmation, go to the donation store via ::store or ::donate.

Select the items requested by the buyer. In the in-game name box, enter the buyer's username. Purchase the donation and confirm in-game.

After claiming the donation (::donated), the in-game payment will be transferred to the seller, completing the transaction.

Donation Pricing
As of November 11th, 2020, there are maximum amounts for buying/selling donations:
Donation Price ($) Bronze Coins / $ rate
$1-$99 275M per 1$
$100-$299 325M per 1$
$300-$499 400M per 1$
$500+ Uncapped