Recommended Gear[edit | edit source]
Use the Gear Progression guide to find gear setups to use in the raid. Range and Mage are recommended as Melee is only required for one stage. If attempting the raid with a group, an early-mid game setup should suffice. If attempting solo, you should have at least Late-mid game gear for all 3 styles.
Throughout the raid, if your team performs well, you can earn a chest near the doorway to the next room that offers basic food and potions if you are ever in serious need.
Starting The Fight[edit | edit source]
To get to the Theatre of Blood, open the teleport interface (CTRL+X) and navigate to the raids tab and select 'Theatre of Blood'.
Death within the Theatre of Blood[edit | edit source]
If a player is killed in the Theatre of Blood, they are instantly transported to the outside of the building. If attempting in a group, you will be respawned once the current room is complete. If solo, you will need to reattempt the Theatre of Blood from the beginning.
Maiden of Sugadinti[edit | edit source]
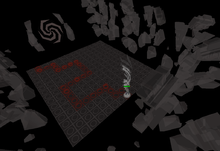
After entering the doors of the Theatre of Blood, move down the corridor until you reach a large room with an arena in the center. Pass through the flashing red barrier to begin the fight.
At 70%, 50%, and 30% hitpoints, the Maiden will spawn 2 Nylocas Matomenos on either side, which will walk straight toward her and heal her for 100k HP if they reach her. To stop this, players must focus the Nylocas before returning to damaging the Maiden.
The Maiden has very strong tornado attacks that are magic based and will only target the closest player to her meaning that the strongest player or the tank should always be closest to her.
The Maiden will also throw blood spots at each player dealing large amounts of damage every tick if not dodged. Simply step off of the area to avoid further damage. This attack also creates Blood Spawns that will randomly move around the arena placing a blood spot on each tile they move to. These will also deal high damage, so keep an eye of the blood spawns and avoid stepping on any new spots. The Blood Spawns can be killed.
Once the Maiden has been killed, walk back through the red flashing barrier and up the stairs to the right of the arena until you reach a door at the end. Walk through said door to move into the next room.
The Pestilent Bloat[edit | edit source]
Upon entering the next room, you find yourself in another large room with an arena in the center. Walk to the red flashing barrier, but DO NOT enter quite yet.
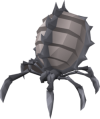
The Pestilent Bloat will move around this arena in a circle. You must wait until he passes the barrier and begins moving down the next lane before entering the arena as he deals very rapid ranged damage if you are standing in front of him. Once inside, follow to wherever the bloat went and begin damaging him.
Throughout the fight, mutilated hands and feet will fall from the ceiling that deal very high damage if you are caught underneath them. You can tell where these will be falling by the slowing darkening shadows on the ground. These will drop randomly and are not guaranteed to always fall where a player is standing.
As you are following the bloat and dealing damage, keep in mind that he has a chance to instantly turn around and move in the opposite direction. If you are caught by his damage, immediately turn and run the opposite direction while healing. You will need to move all the way around the opposite direction to get behind the bloat again and continue to deal damage.
Once the bloat is dead, move through the flashing red barrier on the opposite side of the arena, not the one you came through, and straight up the stairs through the next doorway to the next boss.
Nylocas Vasilias[edit | edit source]
Continue straight ahead until you reach another red barrier. This boss requires all 3 combat styles and can be one of the more difficult stages of the Theatre of Blood. If you are with a group, coordinate with your team who will be using which combat style. If you are solo, you will need to swap between all 3 combat styles to complete this section.


Nylocas Hagios (Blue) is weak to magic, Nylocas Ischyros (Grey) weak to melee, Nylocas Toxobolos (Green) is weak to range.
Upon entering the arena, Nycolas will begin spawning at the ends of the 3 spider web lanes on the sides of the central area. They will move towards the center in an attempt to destroy the pillars at the corners of the central area. Attack your designated color (If you pre-planned with a group) as soon as it spawns. If a pillar that the Nylocas are attacking is destroyed, any Nylocas assigned to that pillar will turn to the players and attack them instead. Continue this until Nylocas Vasilias spawns.
Nylocas Vasilias will be the largest Nylocas in the room. His color coordinates to what damage needs to be dealt to hurt him, similar to the smaller versions, but will change color throughout the fight. Make sure to manage your food/potions as Vasilias is capable of two shotting players from full health.
Once finished, go through the red barrier you entered from and back up the stairs towards the doorway you entered from. On your right, you will see a branching corridor. Move down said corridor and enter the doorway to the next room.
Sotetseg[edit | edit source]
Move to the opposite end to where the red barrier is located and enter. It is recommended to send the strongest player in to solo as the Shadow Realm mechanic can be difficult for the players with lower end gear.
Once inside, run across the tiles in the middle and start attacking Sotetseg. At 66% HP and 33%, he will send a random player to the Shadow Realm and everyone else will be moved to the opposite side of the tiles.
The player sent into the Shadow Realm will be given a pattern on the tiles. The player must follow the pattern as it is shown to allow the other players to follow the path and not be killed. On the other end is a portal to bring the player back into the fight. Cross the tiles and continue damaging Sotetseg until he sends another player to the Shadow Realm. Repeat the necessary steps and cross the tiles to finish the fight with Stoteseg.
After defeating Sotetseg, move back through the red barrier you came through and straight up the stairs into the next room.
Xarpus[edit | edit source]
You come to an open outdoor courtyard with Xarpus standing in the center. Once you enter, it is a good idea for each player to go to opposite side of Xarpus.
Xarpus cannot be damaged for the first part of the fight while healing. Xarpus will spawn small green pools around the arena known as 'Exhumed' and start healing for 10k per tick. If you stand on these pools, it will stop Xarpus from healing. This will be done 4 times before Xarpus can be attacked.
During the damage phase, Xarpus will randomly throw 3x3 pools of acid that can poison the player and can also hit directly with poison damage. If these acid pools spawn, you will need to move off of them.
At 33% HP, Xarpus will stare into a quadrant of the arena. If a player is in the quadrant and attacks Xarpus, they will be hit with high poison damage. It is recommended to move out of this area if necessary and avoiding damaging Xarpus until you are in a new quadrant.
Once defeated, move through the red barrier opposite the one you entered through and enter the large wooden door.
Verzik Vitur[edit | edit source]
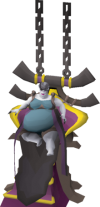
Now, for the final fight of the Theatre of Blood. The fight will not begin until a player speaks to Verzik on her throne. After the conversation, hit Verzik to fully start the fight.
Verzik will come off of her throne and begin attacking the players. She can spawn a purple tornado attack that is capable of dealing very high magic damage. This can avoided, and due to a bug, killed with the use of AoE. It is also possible that she will spawn Nylocas Matomenos that, after a certain amount of time if not killed, will be killed by Verzik and she will be healed for whatever health the Nylocas had left. At 35% HP, she will begin using blood spells that can drain the player's prayer.
Once defeated for the first time, Verzik will transform into a spider hybrid and continue attacking. During this phase, players can be snared through the use of Verzik's webs. A player can be freed from the webs by another player. Once reaching 20% HP, Verzik will spawn a purple tornado for each player that will follow the player around. If the player is hit by this attack, they will be hit for 50% of whatever their current HP is. Finish killing Verzik Vitur to complete the Theatre of Blood.
Once Verzik is dead, click on her throne to be taken to the throne room to receive your rewards.


