| Wave 1 Boss info | |||||||||
|---|---|---|---|---|---|---|---|---|---|
| Name of Boss | Hitpoints | Specialities | Extra Information | ||||||

| |||||||||
 Tekton Tekton
|
12,000,000 | Can only be damaged with Melee | When he is at his anvil, do not attack ! | ||||||
colspan="4"
| |||||||||
 Ice Demon Ice Demon
|
4,500,000 | Weak to Magic and Melee | Attack will only start when the braziers are lit and his shield depletes. Wood is chopped in the beginning of the room. Tinderbox and Hatchet can be found near the trees. | ||||||
colspan="4"
| |||||||||
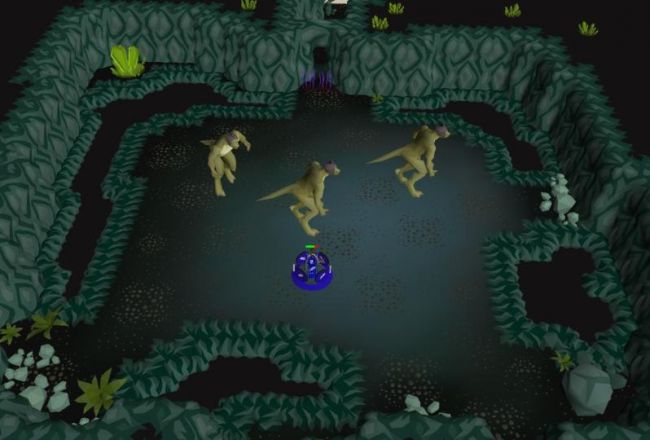
 Lizardman Shaman (x3) Lizardman Shaman (x3)
|
8,000,000 each (24M total) | Attacks with Ranged and Melee | Weakness to Ranged attacks | ||||||
colspan="4"
| |||||||||
 Vanguards (x3) Vanguards (x3)
|
7,500,000 each (22.5M total) | Need the 3 attack styles to complete this room. | Damage dealt must be balanced -> When one or 2 have more HP lost than the others (+40%), they heal to their full health. If a swirling mass circles around you, you've dealt too much damage to one kind. | ||||||
colspan="4"
| |||||||||
 Vespula Vespula
|
10,000,000 | Attacks with Ranged and Melee | When 20% health remains, he needs to be finished with Melee. Advance by killing the Abyssal portal in the back of the room. | ||||||
colspan="4"
| |||||||||
 Vasa Nistirio Vasa Nistirio
|
12,000,000 | Attacks with Magic and Ranged | Weaknesses are Ranged or Melee (Crush). Destroy the crystals around him or he heals. | ||||||
colspan="4"
| |||||||||
 Skeletal Mystics Skeletal Mystics
|
10,000,000 | Attacks with Magic and Melee | N/A | ||||||
colspan="4"
| |||||||||
| 8,000,000 each (24M total) | Attacks with Ranged and Melee | Weakness to Melee attacks | |||||||
| File:Cox Underwater Mutadile.pngUnderwater Mutadile | 15,000,000 each | Attacks with Magic and Melee | Weakness is Magic and Ranged. By chopping down the meat tree, he can no longer heal. | ||||||
colspan="4"
| |||||||||
 The Great Olm The Great Olm
|
Phase 1 & 2: 12M Hp per hand Phase 3 (Final): 12.5M Hp Per hand & 50M Hp on The Great Olm himself. |
Full information can be found here | You need Magic & Melee to defeat Olm | ||||||
User:Iron Heph/Sandbox: Difference between revisions
Jump to navigation
Jump to search
>Peripheral Vision No edit summary |
>Iron Heph No edit summary |
||
| Line 36: | Line 36: | ||
| scope="col" style="text-align:center;" style="border-bottom:1px solid white"|When he is at his anvil, do not attack ! | | scope="col" style="text-align:center;" style="border-bottom:1px solid white"|When he is at his anvil, do not attack ! | ||
|- | |- | ||
|[[File:Cox 3.png| | |colspan="4"[[File:Cox 3.png|650x650px]] | ||
|- | |- | ||
| scope="col" style="text-align:center;" style="border-bottom:1px solid white"|[[File:Cox Ice Demon.png]]Ice Demon | | scope="col" style="text-align:center;" style="border-bottom:1px solid white"|[[File:Cox Ice Demon.png]]Ice Demon | ||
| Line 43: | Line 43: | ||
| scope="col" style="text-align:center;" style="border-bottom:1px solid white"|Attack will only start when the braziers are lit and his shield depletes. <br> Wood is chopped in the beginning of the room. <br> Tinderbox and Hatchet can be found near the trees. | | scope="col" style="text-align:center;" style="border-bottom:1px solid white"|Attack will only start when the braziers are lit and his shield depletes. <br> Wood is chopped in the beginning of the room. <br> Tinderbox and Hatchet can be found near the trees. | ||
|- | |- | ||
|[[File:Cox 4.jpg| | |colspan="4"[[File:Cox 4.jpg|650x650px]] | ||
|- | |- | ||
| scope="col" style="text-align:center;" style="border-bottom:1px solid white"|[[File:Cox Lizardman Shaman.png]]Lizardman Shaman (x3) | | scope="col" style="text-align:center;" style="border-bottom:1px solid white"|[[File:Cox Lizardman Shaman.png]]Lizardman Shaman (x3) | ||
| Line 50: | Line 50: | ||
| scope="col" style="text-align:center;" style="border-bottom:1px solid white"|Weakness to Ranged attacks | | scope="col" style="text-align:center;" style="border-bottom:1px solid white"|Weakness to Ranged attacks | ||
|- | |- | ||
|[[File:Cox 5.jpg| | |colspan="4"[[File:Cox 5.jpg|650x650px]] | ||
|- | |- | ||
| scope="col" style="text-align:center;" style="border-bottom:1px solid white"|[[File:Cox Vanguard.png]]Vanguards (x3) | | scope="col" style="text-align:center;" style="border-bottom:1px solid white"|[[File:Cox Vanguard.png]]Vanguards (x3) | ||
| Line 57: | Line 57: | ||
| scope="col" style="text-align:center;" style="border-bottom:1px solid white"|Damage dealt must be balanced -> When one or 2 have more HP lost than the others (+40%), they heal to their full health. <br> If a swirling mass circles around you, you've dealt too much damage to one kind. | | scope="col" style="text-align:center;" style="border-bottom:1px solid white"|Damage dealt must be balanced -> When one or 2 have more HP lost than the others (+40%), they heal to their full health. <br> If a swirling mass circles around you, you've dealt too much damage to one kind. | ||
|- | |- | ||
|[[File:Cox 6.jpg| | |colspan="4"[[File:Cox 6.jpg|650x650px]] | ||
|- | |- | ||
| scope="col" style="text-align:center;" style="border-bottom:1px solid white"|[[File:Cox Vespula.png]]Vespula | | scope="col" style="text-align:center;" style="border-bottom:1px solid white"|[[File:Cox Vespula.png]]Vespula | ||
| Line 64: | Line 64: | ||
| scope="col" style="text-align:center;" style="border-bottom:1px solid white"|When 20% health remains, he needs to be finished with Melee. <br> Advance by killing the Abyssal portal in the back of the room. | | scope="col" style="text-align:center;" style="border-bottom:1px solid white"|When 20% health remains, he needs to be finished with Melee. <br> Advance by killing the Abyssal portal in the back of the room. | ||
|- | |- | ||
|[[File:Cox 10.jpg| | |colspan="4"[[File:Cox 10.jpg|650x650px]] | ||
|- | |- | ||
| scope="col" style="text-align:center;" style="border-bottom:1px solid white"|[[File:Cox Vasa Nistirio.png]]Vasa Nistirio | | scope="col" style="text-align:center;" style="border-bottom:1px solid white"|[[File:Cox Vasa Nistirio.png]]Vasa Nistirio | ||
| Line 71: | Line 71: | ||
| scope="col" style="text-align:center;" style="border-bottom:1px solid white"|Weaknesses are Ranged or Melee (Crush). <br> Destroy the crystals around him or he heals. | | scope="col" style="text-align:center;" style="border-bottom:1px solid white"|Weaknesses are Ranged or Melee (Crush). <br> Destroy the crystals around him or he heals. | ||
|- | |- | ||
|[[File:Cox 11.png| | |colspan="4"[[File:Cox 11.png|650x650px]] | ||
|- | |- | ||
| scope="col" style="text-align:center;" style="border-bottom:1px solid white"|[[File:Cox Skeletal Mystics.png]]Skeletal Mystics | | scope="col" style="text-align:center;" style="border-bottom:1px solid white"|[[File:Cox Skeletal Mystics.png]]Skeletal Mystics | ||
| Line 78: | Line 78: | ||
| scope="col" style="text-align:center;" style="border-bottom:1px solid white"|N/A | | scope="col" style="text-align:center;" style="border-bottom:1px solid white"|N/A | ||
|- | |- | ||
|[[File:Cox 8.jpg| | |colspan="4"[[File:Cox 8.jpg|650x650px]] | ||
|- | |- | ||
| scope="col" style="text-align:center;" style="border-bottom:1px solid white"|[[File:Cox Small Mutadile.png]]Small Mutadile | | scope="col" style="text-align:center;" style="border-bottom:1px solid white"|[[File:Cox Small Mutadile.png]]Small Mutadile | ||
| Line 90: | Line 90: | ||
| scope="col" style="text-align:center;" style="border-bottom:1px solid white"|Weakness is Magic and Ranged. <br> By chopping down the meat tree, he can no longer heal. | | scope="col" style="text-align:center;" style="border-bottom:1px solid white"|Weakness is Magic and Ranged. <br> By chopping down the meat tree, he can no longer heal. | ||
|- | |- | ||
|[[File:Cox 12.jpg| | |colspan="4"[[File:Cox 12.jpg|650x650px]] | ||
|- | |- | ||
| scope="col" style="text-align:center;" style="border-bottom:1px solid white"|[[File:The Great Olm.png]]The Great Olm | | scope="col" style="text-align:center;" style="border-bottom:1px solid white"|[[File:The Great Olm.png]]The Great Olm | ||
| Line 107: | Line 107: | ||
! scope="col" style="text-align:center;"|How to complete it | ! scope="col" style="text-align:center;"|How to complete it | ||
|- | |- | ||
|[[File:Cox 2.png| | |colspan="4"[[File:Cox 2.png|650x650px]] | ||
|- | |- | ||
| scope="col" style="text-align:center;" style="border-bottom:1px solid white"|[[File:Cox Jeweled Crab Room.png]]Jeweled Crab Room | | scope="col" style="text-align:center;" style="border-bottom:1px solid white"|[[File:Cox Jeweled Crab Room.png]]Jeweled Crab Room | ||
| Line 147: | Line 147: | ||
How to complete this Puzzle Room -> You need to keep feeding the NPC the Grubs, otherwise it will regenerate. | How to complete this Puzzle Room -> You need to keep feeding the NPC the Grubs, otherwise it will regenerate. | ||
|- | |- | ||
|[[File:Cox 7.png| | |colspan="4"[[File:Cox 7.png|650x650px]] | ||
|- | |- | ||
| scope="col" style="text-align:center;" style="border-bottom:1px solid white"|[[File:Cox Keystone Room.png]]Keystone Room | | scope="col" style="text-align:center;" style="border-bottom:1px solid white"|[[File:Cox Keystone Room.png]]Keystone Room | ||
| Line 154: | Line 154: | ||
Tip: 50x50 Weapons are extremely useful in this room. | Tip: 50x50 Weapons are extremely useful in this room. | ||
|- | |- | ||
|[[File:Cox 9.png| | |colspan="4"[[File:Cox 9.png|650x650px]] | ||
|- | |- | ||
| scope="col" style="text-align:center;" style="border-bottom:1px solid white"|[[File:Cox Guardian Room.png]]Guardian Room | | scope="col" style="text-align:center;" style="border-bottom:1px solid white"|[[File:Cox Guardian Room.png]]Guardian Room | ||
Revision as of 19:36, 3 August 2021
 The Great Olm Awaits! Chambers of Xeric is our newest end-game raid that will be challenging and engaging to players that wish to take it on!
How to Start
Players can get to Chambers of Xeric via the Teleportation Dashboard (Located in Raids tab)
Party Size: 1-10
Suggested Party Size: 2-4
Bosses
The Herblore Potions below are all used with Water-Filled Gourd Vial.
| Herblore (Potions) | |||||||||
|---|---|---|---|---|---|---|---|---|---|
| Potions Name | Potions Effect | Lvl required | Primary item | Secondary item | Experience | ||||
| Kodai (+) | Increase players magic level by 6 + 16% of their base level | 70 | Golpar | Endarkened Juice | 2,500 | ||||
| Twisted (+) | Increases players range level by 6 + 16% of their base level | 70 | Golpar | Cicely | 2,500 | ||||
| Elder (+) | Increases players Attack, Strength, and Defense levels by 6 + 16% of their base level | 70 | Golpar | Stinkhorn Mushroom | 2,500 | ||||
| Revitilisation (+) | Restores your stats and prayer | 75 | Buchu Leaf | Stinkhorn Mushroom | 3,250 | ||||
| Xeric's Aid (+) | Works as Saradomin Brew | 85 | Buchu Leaf | Endarkened Juice | 4,000 | ||||
| Overload (+) | Boosts all the player's combat stats by 6 + 16%, while damaging them for 50 HP. | 99 | Noxifer | Elder (+), Twisted (+) & Kodai (+) | 25,000 | ||||
Getting Points
The best way to gain points is by simply killing the bosses inside of the raid but beware, you will lose 40% of your current points every time you die! So make sure to bring plenty food, potions, and the rest of your healing items ready!
If a unique drop is rolled on the drop table, the player with the most points will have the highest chance of receiving the drop.
Example of a 5-Man Team:
- Player A: 600M - 60% chance of receiving the unique
- Player B: 200M - 20% chance of receiving the unique
- Player C : 25M - 2.5% chance of receiving the unique
- Player D : 10M - 1.0% chance of receiving the unique
- Player E: 150M - 15% chance of receiving the unique
Rewards
Item Quantity Rarity File:Herbs And Secondaries.png Herbs And Secondaries 10,000−100,000 Unknown 
Pure Essence 1 Unknown 
Rainbow Fish 10−50 Unknown 
Super Magic Compost 1 Unknown 
Magic Compost 1 Unknown 
Herblore Supply Crate 1 Unknown 
Black Diamond Box 1 Unknown 
Diamond Bag 1 Unknown 
Royal Luxe Box 1 Unknown 
Perfect Enchantment Stone 1 Unknown 
Upgrade Protection Card 1 Unknown 
2K21 Box 1 Unknown 
Box of Testaments 1 Unknown 
Box of Totems 1 Unknown 
Mega Lottery Box 1 Unknown 
Ultra Pet Box 1 Unknown
Item Quantity Rarity 
Gold Coin 5,000,000 0 
Infinity Aura 1 0 
Dragon Hunter Crossbow 10−50 0 
Twisted Buckler 1 0 File:Twisted Hat (T1).png Twisted Hat (T1) 1 0 File:Twisted Coat (T1).png Twisted Coat (T1) 1 0 File:Twisted Trousers (T1).png Twisted Trousers (T1) 1 0 File:Twisted Boots (T1).png Twisted Boots (T1) 1 0 
Twisted Ancestral Hat 1 0 File:Twisted Ancestral Robe.png Twisted Ancestral Robe 1 0 File:Twisted Ancestral Bottom.png Twisted Ancestral Bottom 1 0 
Twisted Bow 1 0 
Kodai Insignia 1 0 
Olmlet Pet 1 0


