User:Rayquaza17/sandbox: Difference between revisions

From Redemption Wiki
Jump to navigation Jump to search
No edit summary
No edit summary
Line 1: Line 1:
<center>
<center>
{{MainArticle|Vulcan}}
[[File:Executive Title.png|1000px]]


This is an informative guide on the mechanics of [[Vulcan]], and how to fight it effectively.<br>
<tabber>
|-|Obtaining=
{| class="wikitable" style="text-align:center; width:50%"
|-
! Rank !! How to Obtain
|-
| [[File:Extreme Donator.png|15px]] '''[[Extreme Donator]]''' || Using an Extreme Donator ticket obtained in-game from: [[Vote Box]] or [[Black Market Dealer]].
|}


For starters, in order to kill '''Vulcan''' you will need to have a high damage output, or be in a group with high damage. <br>
|-|Perks=
Vulcan can be killed solo or in a party. <br>
{| class="wikitable" style="text-align:center;width:50%"
 
! Rank !! Elo !! Tribrid Boost !! Daily Reward
Vulcan is a boss that you can alter the 'enrage' of, higher enrage is equal to higher health and a better chance to receive drops. <br>
|-
 
| [[File:Extreme Donator.png|15px]] [[Extreme Donator]] || 1.3 || 10% || Speak to the Extreme Chief for a random reward
===Recommended Gear:===
|}
 
It is ideal to at the very least have a '''Late Game''' setup of one of the fighting styles from the [[Gear Progression]] page or better if you wanted to solo Vulcan. <br>
If you join a Vulcan mass, you need to deal 100M damage in order to receive a drop.<br>
 
 
===Starting the fight:===
 
When you are ready to try out [[Vulcan]], teleport to the area using the teleport interface.<br>
Once you do this, you should be met with an area that looks like this:<br>
 
[[File:Vulcan Area.png|400x400px|center]]
 
 
To begin the fight, you simply need to 'disturb' Vulcan and then attack it. <br>
Be aware, this fight can take a significant amount of time when fought solo or in a high-enrage mass! <br>
 
===Phases:===
 
Vulcan does not have phases, just be aware of the mechanics noted below. <br>
 
===General Mechanics===
 
Mechanic #1:
The South West corner of the arena will be filled with fire following the 'follower of Vulcan' walking to that area.<br>
 
Mechanic #2:
The South East corner of the arena will be filled with fire following the 'follower of Vulcan' walking to that area.<br>
 
Mechanic #3:
The North West corner of the arena will be filled with fire following the 'follower of Vulcan' walking to that area.<br>
 
Mechanic #4:
The North East corner of the arena will be filled with fire following the 'follower of Vulcan' walking to that area.<br>
 
The fire will hit you with intervals of 25 damage, and can kill you very fast! <br>
 
[[File:Vulcan Fire.png|400x400px|center]]
 
The most popular method used at Vulcan, is standing in the North East section of the area - as this avoids the first 3 phases of fire. <br>
 
===Loot available:===
 
Upon completing the Vulcan fight, you will be rewarded with a static prize of [[Gold Coin]]'s. <br>
 
In addition to the Gold Coins, you can receive a variety of Boxes, Gear, Enchantment Stones and a lot more! <br>


The full drop table of Vulcan can be seen below: <br>
|-|Zone=
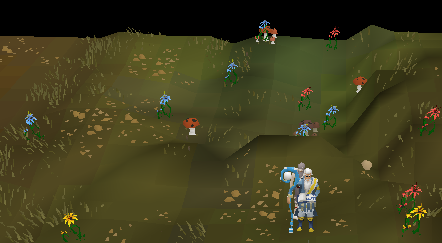
[[File:ExtremeDonatorZone.png|center|500px]]


<center>
{| class="wikitable" style="text-align:center;width:50%"
 
+ Access to the following bosses:
{{#tag:tabber|
|-
{{!}}-{{!}}Mass Mode =
! colspan="2" style="text-align:center;" |Bosses (Best to Worst)
 
! colspan="2" style="text-align:center;" |Points Per Kill
<center>
|-
{{DropsTableHead}}
|style="text-align:center;" |[[File:Sea_Troll_Queen.png|center]]
{{DropsLine|Name = Gold Coin|Quantity = 25-100|Rarity = Always}}
|style="text-align:center;" |[[Sea Troll Queen]]
{{DropsLine|Name = Treasure Hunter Chest|Quantity = 1|Rarity = 1/1,200}}
|style="text-align:center;" |8
{{DropsLine|Name = Dream Enchantment Stone|Quantity = 1|Rarity = 1/1,200}}
|-
{{DropsLine|Name = Mid Tier Gem Box|Quantity = 1|Rarity = 1/1,200}}
|style="text-align:center;" |[[File:Gio's Hoe.png|center|50x50px]]
{{DropsLine|Name = Platinum Coin|Quantity = 1-5|Rarity = 1/1,200}}
|style="text-align:center;" |[[Gio's Hoe]]
{{DropsLine|Name = Owner's Box|Quantity = 1|Rarity = 1/2,000}}
|style="text-align:center;" |10
{{DropsLine|Name = Karma Food|Quantity = 500-2,000|Rarity = 1/2,000}}
|-
{{DropsLine|Name = Platinum Coin|Quantity = 5-10|Rarity = 1/4,000}}
|style="text-align:center;" |[[File:Groudon.png|center|50px]]
{{DropsLine|Name = Volcanic Dye|Quantity = 1|Rarity = 1/4,000}}
|style="text-align:center;" |[[Groudon]]
{{DropsLine|Name = Mid Tier Gem Box|Quantity = 1-3|Rarity = 1/4,000}}
|style="text-align:center;" |10
{{DropsLine|Name = Vulcan's Bident|Quantity = 1|Rarity = 1/8,000}}
|-
{{DropsLine|Name = Vulcan's Helmet|Quantity = 1|Rarity = 1/8,000}}
|style="text-align:center;" |[[File:Icy_skeleton.png|center|51px]]
{{DropsLine|Name = Vulcan's Platebody|Quantity = 1|Rarity = 1/8,000}}
|style="text-align:center;" |[[Icy Skeleton]]
{{DropsLine|Name = Vulcan's Platelegs|Quantity = 1|Rarity = 1/8,000}}
|style="text-align:center;" |10
{{DropsLine|Name = Vulcan's Gloves|Quantity = 1|Rarity = 1/8,000}}
|-
{{DropsLine|Name = Vulcan's Boots|Quantity = 1|Rarity = 1/8,000}}
|style="text-align:center;" |[[File:Phoenix_familiar.png|center|46px]]
{{DropsLine|Name = Zodiac Coin (Scorpio)|Quantity = 1|Rarity = 1/4,000}}
|style="text-align:center;" |[[Phoenix]]
</center>
|style="text-align:center;" |10
{{!}}-{{!}}Solo Mode =
|-
<center>
|style="text-align:center;" |[[File:Chaos_Elemental.png|center|50px]]
'''Drop Rates scale up to 5x as enrage increases to 4,000%'''
|style="text-align:center;" |[[Chaos elemental]]
{{DropsTableHead}}
|style="text-align:center;" |12
{{DropsLine|Name = Gold Coin|Quantity = 25-100|Rarity = Always}}
|-
{{DropsLine|Name = Treasure Hunter Chest|Quantity = 1|Rarity = 1/600}}
|style="text-align:center;" |[[File:Olaf 150.png|center|50px]]
{{DropsLine|Name = Dream Enchantment Stone|Quantity = 1|Rarity = 1/600}}
|style="text-align:center;" |[[Olaf]]
{{DropsLine|Name = Mid Tier Gem Box|Quantity = 1|Rarity = 1/600}}
|style="text-align:center;" |12
{{DropsLine|Name = Platinum Coin|Quantity = 1-5|Rarity = 1/600}}
|-
{{DropsLine|Name = Owner's Box|Quantity = 1|Rarity = 1/1,000}}
|style="text-align:center;" |[[File:Shadow_King-0.png|center|60px]]
{{DropsLine|Name = Karma Food|Quantity = 500-2,000|Rarity = 1/1,000}}
|style="text-align:center;" |[[Shadow King]]
{{DropsLine|Name = Platinum Coin|Quantity = 5-10|Rarity = 1/2,000}}
|style="text-align:center;" |12
{{DropsLine|Name = Volcanic Dye|Quantity = 1|Rarity = 1/2,000}}
|-
{{DropsLine|Name = Mid Tier Gem Box|Quantity = 1-3|Rarity = 1/2,000}}
|style="text-align:center;" |[[File:The Necromancer.png|center|50px]]
{{DropsLine|Name = Vulcan's Bident|Quantity = 1|Rarity = 1/4,000}}
|style="text-align:center;" |[[Necromancer]]
{{DropsLine|Name = Vulcan's Helmet|Quantity = 1|Rarity = 1/4,000}}
|style="text-align:center;" |12
{{DropsLine|Name = Vulcan's Platebody|Quantity = 1|Rarity = 1/4,000}}
{{DropsLine|Name = Vulcan's Platelegs|Quantity = 1|Rarity = 1/4,000}}
{{DropsLine|Name = Vulcan's Gloves|Quantity = 1|Rarity = 1/4,000}}
{{DropsLine|Name = Vulcan's Boots|Quantity = 1|Rarity = 1/4,000}}
{{DropsLine|Name = Zodiac Coin (Scorpio)|Quantity = 1|Rarity = 1/10,000}}
 
</center>
}}
|}
|}
</center>

Revision as of 16:46, 26 November 2023

Executive Title.png

<tabber> |-|Obtaining=

Rank How to Obtain
Extreme Donator.png Extreme Donator Using an Extreme Donator ticket obtained in-game from: Vote Box or Black Market Dealer.

|-|Perks=

Rank Elo Tribrid Boost Daily Reward
Extreme Donator.png Extreme Donator 1.3 10% Speak to the Extreme Chief for a random reward

|-|Zone=

ExtremeDonatorZone.png
+ Access to the following bosses:
Bosses (Best to Worst) Points Per Kill
Sea Troll Queen.png
Sea Troll Queen 8
Gio's Hoe.png
Gio's Hoe 10
Groudon.png
Groudon 10
Icy skeleton.png
Icy Skeleton 10
Phoenix familiar.png
Phoenix 10
Chaos Elemental.png
Chaos elemental 12
Olaf 150.png
Olaf 12
Shadow King-0.png
Shadow King 12
The Necromancer.png
Necromancer 12