Minigames

From Redemption Wiki
Jump to navigation Jump to search
Page-title-minigames.jpg


Arcade Regular Mode.png


Arcade System

The Arcade System offers players a multifaceted gaming experience. It introduces a variety of gameplay modes, each tailored to challenge players at different skill levels and preferences, while rewarding their efforts with a range of items and prizes.

Arcade Modes Overview

Core Arcade Modes

These four modes form the backbone of the Arcade System and revolve around providing players with Cape Slot items as rewards, each mode increasing in difficulty:

Normal Mode: Offers a moderate level of challenge and rewards players with valuable Cape Slot items.

Extreme Mode: Elevates the difficulty level, providing players with prestigious Cape Slot items upon successful completion.

Hell Mode: Presents an even greater challenge, offering exclusive Cape Slot items as rewards.

Extreme Hell Mode: Reserved for the most skilled and daring players, rewarding access to unique and powerful rewards.

Themed Arcade Modes

In addition to the core modes, players can explore themed modes inspired by popular comic book series:

Avengers Arcade Based on the iconic Avengers comic book series, this mode offers a unique gaming experience, rewarding players with Arcade Tokens and other valuable prizes.

DC Arcade: Drawing inspiration from the DC Comics universe, DC Arcade provides another exciting gameplay option. Players can earn Arcade Tokens and even have a chance to obtain coveted DC Arcade boxes as rewards.

Endless Arcade: For those seeking an endless challenge, this mode exclusively rewards Arcade Tokens, which can be exchanged for various in-game items and bonuses. While it doesn't offer Cape Slot items, it provides a constant source of rewards for dedicated players.


Normal Arcade.png

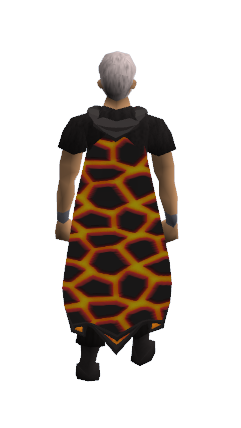
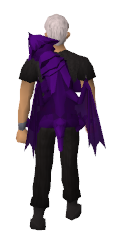
The Normal Mode within the Arcade System offers challenging gameplay accessible to players using starter-level gear. This mode is primarily sought after by those aiming to obtain the Infernal Cape upon successful completion.

The Infernal Cape is a hybrid cape. Players engaging in Normal Mode also earn Arcade Tokens during the arcade minigame.

In Normal Mode, players receive one Arcade Token per wave number they complete, accumulating tokens progressively as they advance through the waves.

To join, please read each interface. Do not select "Yes" from the first. This will place the player in Duo mode and they will be unable to proceeed.


For clarification, consider the following illustration:

  • Wave 1: Yields 1 token.
  • Wave 2: Results in the acquisition of 1 token plus 2 more, totaling 3 tokens.
  • Wave 3: Yields 1 token, in addition to the 3 previously earned tokens, resulting in a total of 6 tokens, and so forth.

The Arcade's wave system is categorized into several sections, each awarding bonus tokens upon successful completion:

  • Beginner Waves (Waves 1-20).
  • Experienced Waves (Waves 21-30).
  • Advanced Waves (Waves 31-40).
  • Dream Waves (Waves 41-50).

These distinct sections provide a structured progression path and bonus tokens, contributing to the comprehensive reward system of Normal Mode gameplay.

Gear

Players should equip Magic or Ranged gear from Early-Mid Game. It is recommended to use an Area of Effect (AoE) weapon to efficiently eliminate multiple monsters at once. Additionally, a pet that provides healing and prayer restoration, as detailed in the Pet section, should be utilized.

Poison Mechanic

A poison gas mechanic is in place that slowly drains the player's hitpoints if they remain stationary for too long. To prevent this, players must Normally move within the area. If affected by the gas, simply moving will halt its effects.

Clearing Waves

Wave section does not matter in how they are cleared. Waves do get more difficult as they progress, however the method of completion does not change unless the player is or is not using Area of Effect (AoE).

No AoE

When clearing waves without an AoE weapon, positioning in a corner of the room while ensuring Normal movement to avoid the poison gas is advisable. NPCs should be attacked as they approach. Without AoE, it may be necessary to carry some food items such as Rainbow Fish or Special Bandages from Dreamland. It is strongly recommended to have healing and prayer restoration gear equipped.

AoE

If the player possesses an AoE weapon, Normal Mode Arcade becomes much simpler. The option to stand in a corner or in the middle of the room is available. As waves of monsters approach, waiting for them to group up before attacking them collectively is advisable. Carrying Special Bandages from Dreamland in case hitpoints become low is recommended. Additionally, ensuring the presence of healing and prayer restoring gear is essential for added sustain.


Beginner: Waves 1-19
Wave Enemies
Wave 1 5x Luigi
Wave 2 5x Mario
Wave 3 5x luigi & 5x Mario
Wave 4 5x Pikachu
Wave 5 5x Charmander
Wave 6 5x Charmander & 5x Pikachu
Wave 7 2x Pacman Ghost
Wave 8 4x Pacman Ghost
Wave 9 1x Pacman
Wave 10 1x Pacman & 2x Pacman Ghost
Wave 11 1x Pacman & 4x Pacman Ghost
Wave 12 1x Tetris Piece
Wave 13 2x Tetris Piece
Wave 14 4x Tetris Piece
Wave 15 1x Space Invader
Wave 16 2x Space Invader
Wave 17 4x Space Invader
Wave 18 1x Pacman, 4x Pacman Ghost, & 4x Space Invader
Wave 19 4x Tetris Pieces & 4x Space Invader
Experienced: Waves 20-29
Wave Enemies
Wave 20 1x Pacman, 4x Pacman Ghost, 4x Space Invaders, & 4x Tetris Pieces
Wave 21 1x Sonic
Wave 22 1x Knuckles
Wave 23 1x Sonic and 1x Knuckles
Wave 24 4x Sonic & 4x Knuckles
Wave 25 1x Frogger
Wave 26 2x Frogger
Wave 27 4x Frogger
Wave 28 1x Crash Bandicoot
Wave 29 1x Crash Bandicoot & 1x Sonic & 1x Knuckles
Advanced: Waves 30-39
Wave Enemies
Wave 30 1x Crash Bandicoot, 1x Sonic, 1x Knuckles, & 4x Frogger
Wave 31 1x Police Car
Wave 32 2x Police Car
Wave 33 2x Police Car & 4x Frogger
Wave 34 4x Police Car
Wave 35 1x Helicopter
Wave 36 1x Helicopter & 2x Police Cars
Wave 37 1x Donkey Kong
Wave 38 1x Donkey Kong & 1x Helicopter
Wave 39 1x Donkey Kong & 1x Helicopter & 2x Police Car
Dream: Waves 40-50
Wave Enemies
Wave 40 1x Donkey Kong, 1x Helicopter, & 4x Police Car
Wave 41 1x Lava Croft
Wave 42 1x Diablo
Wave 43 1x Raiden
Wave 44 1x Dark Raiden
Wave 45 1x Raiden & 1x Dark Raiden
Wave 46 1x Raiden, 1x Dark Raiden, 1x Diablo, & 1x Lava Croft
Wave 47 1x Link
Wave 48 1x Link & 1x Lava Croft
Wave 49 1x Link, 1x Lava Croft, 1x Diablo
Wave 50 1x Link, 1x Lava Croft, 1x Diablo, 1x Dark Raiden, & 1x Raiden


Infernal.png
The infernal Cape is a tribrid cape. It is a reward for completing normal Arcade.

The player is required to sacrifice an Infernal Cape in order to attempt the Extreme Arcade.

Hover over image for type Infernal Cape Equipped.png
Attack-icon.png Attack bonus
White dagger.png White scimitar.png White warhammer.png Magic-icon.png Ranged-icon.png
+200 +200 +200 +200 +200
Defence-icon.png Defence bonus
White dagger.png White scimitar.png White warhammer.png Magic-icon.png Ranged-icon.png
+500 +500 +500 +500 +500
Other bonuses Slot
Strength-icon.png RangedStrength-icon.png MagicDamage-icon.png Prayer-icon.png

Cape slot.png

+2,500 +2,500 +2,500 +0
Bonus Stats Item Class
Hit Count Icon.png AoE Icon.png Drop Rate Icon.png Double Drop Rate Icon.png

Hybrid

N/A N/A 0% ?
Strength Boost Icon.png Ranged Boost Icon.png Magic Boost Icon.png Hit Distance Icon.png
5% 5% 5% N/A


Extreme Arcade.png

To access the challenging Extreme Mode, players must sacrifice an Infernal Cape before commencing each run. The first 50 waves of the Extreme Arcade mirror those of the Regular Arcade, with the addition of five extra mobs or bosses at the end of this sequence.

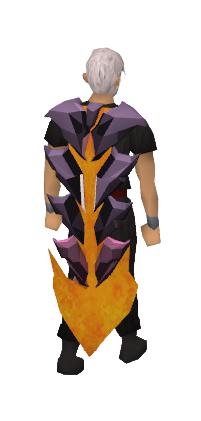
Upon successful completion of the Extreme Arcade, players are rewarded with one of three capes: the Infernal Melee Cape, Infernal Range Cape, or Infernal Mage Cape. Importantly, the distribution of these capes is random, and player preference does not influence the outcome.

Players who collect all three cape styles have the opportunity to combine them, creating the Tribrid Infernal Cape.

In addition to capes, players receive tokens as a reward for conquering the Extreme Mode. The quantity of tokens granted depends on the player's donated rank, following this formula:

Regular-Extreme: 3,300 Tokens

Sponsor: 4,060 Tokens

Executive: 4,800 Tokens

Platinum: 6,275 Tokens

In the unfortunate event of a player's death before completing the Extreme Arcade, token rewards align with the same formula as those in the regular mode, ensuring fairness and consistency in the reward system.

Gear

Players should equip Magic or Ranged gear from Mid-Game Gear or better. It is recommended to use an Area of Effect (AoE) weapon to efficiently eliminate multiple monsters at once. Additionally, a pet that provides healing and prayer restoration, as detailed in the Pet section, should be utilized.

Poison Mechanic

A poison gas mechanic is in place that slowly drains the player's hitpoints if they remain stationary for too long. To prevent this, players must regularly move within the area. If affected by the gas, simply moving will halt its effects.

Clearing Waves

Wave section does not matter in how they are cleared. Waves do get more difficult as they progress, however the method of completion does not change unless the player is or is not using Area of Effect (AoE).

No AoE

When clearing waves without an AoE weapon, positioning in a corner of the room while ensuring regular movement to avoid the poison gas is advisable. NPCs should be attacked as they approach. Without AoE, it may be necessary to carry some food items such as Rainbow Fish or Special Bandages from Dreamland. It is strongly recommended to have healing and prayer restoration gear equipped.

AoE

If the player possesses an AoE weapon, Regular Mode Arcade becomes much simpler. The option to stand in a corner or in the middle of the room is available. As waves of monsters approach, waiting for them to group up before attacking them collectively is advisable. Carrying Special Bandages from Dreamland in case hitpoints become low is recommended. Additionally, ensuring the presence of healing and prayer restoring gear is essential for added sustain.

Beginner: Waves 1-19
Wave Enemies
Wave 1 5x Luigi
Wave 2 5x Mario
Wave 3 5x luigi & 5x Mario
Wave 4 5x Pikachu
Wave 5 5x Charmander
Wave 6 5x Charmander & 5x Pikachu
Wave 7 2x Pacman Ghost
Wave 8 4x Pacman Ghost
Wave 9 1x Pacman
Wave 10 1x Pacman & 2x Pacman Ghost
Wave 11 1x Pacman & 4x Pacman Ghost
Wave 12 1x Tetris Piece
Wave 13 2x Tetris Piece
Wave 14 4x Tetris Piece
Wave 15 1x Space Invader
Wave 16 2x Space Invader
Wave 17 4x Space Invader
Wave 18 1x Pacman, 4x Pacman Ghost, & 4x Space Invader
Wave 19 4x Tetris Pieces & 4x Space Invader
Experienced: Waves 20-29
Wave Enemies
Wave 20 1x Pacman, 4x Pacman Ghost, 4x Space Invaders, & 4x Tetris Pieces
Wave 21 1x Sonic
Wave 22 1x Knuckles
Wave 23 1x Sonic and 1x Knuckles
Wave 24 4x Sonic & 4x Knuckles
Wave 25 1x Frogger
Wave 26 2x Frogger
Wave 27 4x Frogger
Wave 28 1x Crash Bandicoot
Wave 29 1x Crash Bandicoot & 1x Sonic & 1x Knuckles
Advanced: Waves 30-39
Wave Enemies
Wave 30 1x Crash Bandicoot, 1x Sonic, 1x Knuckles, & 4x Frogger
Wave 31 1x Police Car
Wave 32 2x Police Car
Wave 33 2x Police Car & 4x Frogger
Wave 34 4x Police Car
Wave 35 1x Helicopter
Wave 36 1x Helicopter & 2x Police Cars
Wave 37 1x Donkey Kong
Wave 38 1x Donkey Kong & 1x Helicopter
Wave 39 1x Donkey Kong & 1x Helicopter & 2x Police Car
Dream: Waves 40-50
Wave Enemies
Wave 40 1x Donkey Kong, 1x Helicopter, & 4x Police Car
Wave 41 1x Lava Croft
Wave 42 1x Diablo
Wave 43 1x Raiden
Wave 44 1x Dark Raiden
Wave 45 1x Raiden & 1x Dark Raiden
Wave 46 1x Raiden, 1x Dark Raiden, 1x Diablo, & 1x Lava Croft
Wave 47 1x Link
Wave 48 1x Link & 1x Lava Croft
Wave 49 1x Link, 1x Lava Croft, 1x Diablo
Wave 50 1x Link, 1x Lava Croft, 1x Diablo, 1x Dark Raiden, & 1x Raiden
Extreme: Waves 51-55
Wave Enemies
Wave 51 2x Links

1x Lara Croft

Wave 52 2x Lara Croft

4x Diablo

Wave 53 2x Link

2x Lara Croft

Wave 54 3x Link
Wave 55 2x Link

2x Lara Croft

2x Diablo

2x Raiden

2x Dark Raiden


Infernal Melee1.png

The Infernal Melee Cape is a reward from the Extreme Arcade.

The player will receive one of 3 capes from completing the Extreme Arcade. This is random. The other capes are the Infernal Range Cape and the Infernal Mage Cape.

To enter the Extreme Arcade, an Infernal Cape must be sacrificed.


Hover over image for type Infernal Melee Cape Equipped.png
Attack-icon.png Attack bonus
White dagger.png White scimitar.png White warhammer.png Magic-icon.png Ranged-icon.png
+200 +200 +200 +200 +200
Defence-icon.png Defence bonus
White dagger.png White scimitar.png White warhammer.png Magic-icon.png Ranged-icon.png
+500 +500 +500 +500 +500
Other bonuses Slot
Strength-icon.png RangedStrength-icon.png MagicDamage-icon.png Prayer-icon.png

Cape slot.png

+5,000 +0 +0 +0
Bonus Stats Item Class
Hit Count Icon.png AoE Icon.png Drop Rate Icon.png Double Drop Rate Icon.png

Melee

N/A N/A 0% 0%
Strength Boost Icon.png Ranged Boost Icon.png Magic Boost Icon.png Hit Distance Icon.png
5% 0% 0% N/A


Item Upgrade

Upgrade Materials
Upgrade Location Chance
Inventory 100%
Item Quantity
Infernal Melee Cape.png
Infernal Melee Cape 1
Infernal Mage Cape.png
Infernal Mage Cape 1
Infernal Range Cape.png
Infernal Range Cape 1
Results in
Tribrid Infernal Cape.png
Tribrid Infernal Cape


Hell Arcade Title.png

Hell Mode represents the third level within the Arcade System, offering a challenging gameplay experience. To access this mode, players must sacrifice a Tribrid Infernal Cape earned from the Extreme Arcade.

This mode consists of 55 waves that players must navigate.

As players progress through Hell Mode, they are rewarded with Arcade Tokens. The player will also receive a Tribrid Inferno Cape for completing the Hell Arcade. This is needed to complete the Extreme Hell Arcade.

Upon completing Hell Mode, the player will receive 1 of 3 Dragon Capes. All 3 of these capes can be combined at the Draconic Forge to create the Elite Dragon Cape This reward is random and the player can receive more than one of the same.

Construction.png
This Article Is Currently Under Construction.

The articles content is missing, incomplete or not fully accurate. Please refrain from editing it in order to avoid edit conflicts.


Gear

Players should equip Magic or Ranged gear from Late-Mid Game. It is recommended to use an Area of Effect (AoE) weapon to efficiently eliminate multiple monsters at once. Additionally, a pet that provides healing and prayer restoration, as detailed in the Pet section, should be utilized.

Poison Mechanic

A poison gas mechanic is in place that slowly drains the player's hitpoints if they remain stationary for too long. To prevent this, players must regularly move within the area. If affected by the gas, simply moving will halt its effects.

Clearing Waves

Wave section does not matter in how they are cleared. Waves do get more difficult as they progress, however the method of completion does not change unless the player is or is not using Area of Effect (AoE).

No AoE

When clearing waves without an AoE weapon, positioning in a corner of the room while ensuring regular movement to avoid the poison gas is advisable. NPCs should be attacked as they approach. Without AoE, it may be necessary to carry some food items such as Rainbow Fish or Special Bandages from Dreamland. It is strongly recommended to have healing and prayer restoration gear equipped.

AoE

If the player possesses an AoE weapon, Regular Mode Arcade becomes much simpler. The option to stand in a corner or in the middle of the room is available. As waves of monsters approach, waiting for them to group up before attacking them collectively is advisable. Carrying Special Bandages from Dreamland in case hitpoints become low is recommended. Additionally, ensuring the presence of healing and prayer restoring gear is essential for added sustain.


Construction.png
This Article Is Currently Under Construction.

The articles content is missing, incomplete or not fully accurate. Please refrain from editing it in order to avoid edit conflicts.


After successful completion of the Hell Arcade, the player will receive 1 of 3 Dragon Capes at random.

After recieving all 3, the player can craft the Elite Dragon Cape at the Draconic Forge.


Dragon Cape (Magic).png

The Dragon Cape (Magic) is a reward from the Hell Arcade. It can be upgraded in to an Elite Dragon Cape by combining it with the Dragon Cape (Melee), Dragon Cape (Ranged), and 250,000 Arcade Token at the Draconic Forge.

Hover over image for type Dragon Cape (Magic) Equipped.png
Attack-icon.png Attack bonus
White dagger.png White scimitar.png White warhammer.png Magic-icon.png Ranged-icon.png
+0 +0 +0 +0 +0
Defence-icon.png Defence bonus
White dagger.png White scimitar.png White warhammer.png Magic-icon.png Ranged-icon.png
+0 +0 +0 +0 +0
Other bonuses Slot
Strength-icon.png RangedStrength-icon.png MagicDamage-icon.png Prayer-icon.png

Cape slot.png

+0 +0 +10,000 +0
Bonus Stats Item Class
Hit Count Icon.png AoE Icon.png Drop Rate Icon.png Double Drop Rate Icon.png

Magic

N/A N/A 0% 0%
Strength Boost Icon.png Ranged Boost Icon.png Magic Boost Icon.png Hit Distance Icon.png
0% 0% 15% N/A


Upgrading

Upgrade Materials
Upgrade Location Chance
Draconic Forge 31.5%
Item Quantity
Dragon Cape (Melee).png
Dragon Cape (Melee) 1
Dragon Cape (Magic).png
Dragon Cape (Magic) 1
Dragon Cape (Ranged).png
Dragon Cape (Ranged) 1
Arcade Token.png
Arcade Token 250,000
Results in
Elite Dragon Cape.png
Elite Dragon Cape


Extreme Hell Arcade.png

The Extreme Hell Arcade represents the highest level of challenge within the Arcade System, targeting experienced players seeking an end-game test of their PvM skills.

To gain access to the Extreme Hell Arcade, players must sacrifice either: a Elite Dragon Cape and 100,000 Arcade Tokens or an Arcade Ticket.

The following section provides comprehensive information about the Extreme Hell Arcade, including insights into the mechanics of each monster and wave.

Notably, the first player to successfully complete the Extreme Hell Arcade was Sperm Dibber.

Street Fighter Set
Monster Mechanic Description
Ryu Hadouken Sends an Energy Ball in a straight line till the end of the map, If a player touches the energy ball, you will take 50 damage.
Ken Senpukyaku Ken will do a Spin kick animation in a straight line of 4 Tiles, 3 x 3 area. If a player is in the area of the spin, your are dealt 30 damage per tick.
Chun Li Lightning Kicks Chun Li will do a fury of kicks Infront of her. If a player is standing Infront of her, take 30 damage per tick.
Guile Knee Bazooka Guile will do a quick surge forward with his knee across 4 Tiles.

If you are standing in the area of the surge, you will receive 70 damage.

Cammy Delta Through Cammy will do a quick surge forward with a corkscrew kick, surging forward 6 Tiles. If the player is in range, they will be dealt 70 damage.
M. Bison Psycho Reflect M. Bison will reflect all damage done towards it.

Each HIT splat the NPC receives = 5 damage reflected towards the player. This will stack to do MASSIVE damage.

E. Honda Flying Sumo Press E. Honda will jump towards player dealing damage in a 3 x 3 area. If the player is in the 3 x 3 area, the player will receive 75 damage.
Super Smash Bros Set
Monster Mechanic Description
Meta Knight Mach Tornado Meta Knight will send 3 Tornados in a CONE shape toward the player. If player gets hit by the tornado, player will receive 10 to 40 damage.
King Dedede Super Dedede Jump King Dedede will jump upwards on the same tile damaging in a 4 x 4 area. Players in the area will be stunned for 3 seconds and Prayer overheads will be removed.
Samus Charged Shot Samus will charge up a projectile and fire a cannon shot towards the player, this projectile is not tracking and it will fire in a straight line and can be avoided. If player is hit, they will be hit for 80 damage.
Link Remote Bomb Link will randomly walk around the map and plant remote mines. The mines will remain on the ground for 15 seconds and will explode thereafter. Upon stepping on the mine, the player will take 65 damage.
Falco Fire Bird Falco will summon a phoenix and burn the ground in a 9 x 9 area. The Ground will burn for 15 seconds. If the player is standing in the fire, the player will receive 10 damage every tick.
Captain Falcon Falcon Punch Captain Falcon will channel a punch for 5 seconds, during this 5 seconds phase, the player may dodge it. If the player does not dodge the attack; they are dealt 99 damage.
Fox Fire Fox Fox will set himself ablaze and charge in a straight line for 8 tiles. If the player is hit or stands in the fire trail, they will be dealt 15 damage per tick.
Mewtwo 1. Teleportation Mewtwo will teleport the player Infront of Mewtwo. After 4 ticks, if the player does not move away from that specific tile, player will be dealt for 150 damage.
2. Psystrike Mewtwo will knock back the player 3 tiles and stun the player for 3 seconds. This move can be avoided by hiding behind the pillars if they are still up. On Channeling, the player will receive an alert "Pesky humans Die" and the player will be dealt 0 - 75 damage.
Mortal Kombat Set
Monster Mechanic Description
Scorpion Get Over Here Scorpion will pull the player towards them, stunning them for 1 second and dealing 25 damage.
Sub-Zero (Bender) Freeze Sub-Zero will freeze the player on the same tile and prevent you from healing for 5 seconds. Rainbow fish will only heal for 10 hp during the duration of the freeze.
Goro Ground Slam Goro will do a Ground slam of 3 x 3 Area dealing 0 - 30 damage and stunning the player for 2 ticks within the area.
Kung Lao Teleport Kung Lao will dive underground and pop out Infront of the player, dealing 10-50 damage with an uppercut.
Sonya Blade Flash Blind Sonya will flashbang the player, making the screen fade to black for 2 seconds.
Heartless Summon Bats Quan Chi will summon 1 bat toward the player's last location. Upon reaching the location the bat will explode in a 3 x 3 area dealing 20 - 55 damage.
Kabal Speed dash Kabal will dash around the map randomly, while dashing; he cannot be targetted for 5 seconds.
Shao Kahn 1. Soul Steal Shao Kahn will drain the players stats overtime for 5 seconds at a rate of 10 stats per second. This move cannot be avoided and the stats will be restored after 30 seconds.
2. Ground Smash Shao Khan will jump up and smash the ground giving a quake effect. If the player is not behind a Pillar, their weapon is unequipped and dealt 75 damage.
House of the Dead Set
Monster Mechanic Description
All Monsters in this set have the same Mechanics. They will infect the player when within a 3 x 3 area of themselves, draining your stats for 1 stat every 4 ticks. All damage done toward the Pillars are doubled. On Death, they will explode in a 9 x 9 area dealing 35 damage.
Sam Infect and Explode As mentioned above
Neil Infect and Explode As mentioned above
Cyril Infect and Explode As mentioned above
Kageo Infect and Explode As mentioned above
Bourbon Infect and Explode As mentioned above
Ebitan A Infect and Explode As mentioned above
Ebitan B Infect and Explode As mentioned above
Kage Infect and Explode As mentioned above
Metal Slug Set
Monster Mechanic Description
Marco Rossi Grenade Marco will throw a grenade at the player, on impact it will explode in a 9 x 9 area dealing 0 - 40 damage.
Allen O'Neil Fire fire fire Allen will chain fire his minigun dealing damage in a straight 5 tile line. If the player is in range, they are dealt 15 damage per tick.
Allen Jr Fire Fire fire away Allen Jr will chain fire his minigun dealing damage in a straight 3 tile line. If the player is in range, they are dealt 30 damage per tick.
RootMars Slice and Dice RootMars will claw in a cone dealing 0 - 65 damage.
Avatar of Evil Shadow Clones The Avatar of Evil will spawn between 2 - 5 monsters and teleport to another location. It will then drive into the ground and spawn another 2 - 5 clones with less HP. The Avatar is invulnerable until all monsters have been killed.
Invader King Savage Roar The Invader King will Roar, Fearing the player and causing them to run in Panic. The closer you are to the Invader King, the further you are locked in Fear. You are also dealt 0 - 25 damage.
Unknown Alien Creep Spawn The Alien will spawn a pool of Creep, which can be destroyed. The pool will spawn Lesser Aliens that will attack the player until killed.
Ptolemaios 1. Laser Fireworks Ptolemaios will spawn random lasers will be beamed across the map dealing 0 - 30 damage to the player.
2. Ball of Energy Ptolemaios will be surrounded by rotating Energy balls that will damage the player for 10 damage. This balls will last for 15 seconds, and will then be launched at the player. If the player does not move away, the player will be instantly killed.
TzKal Zuk (Final Wave)
Monster Mechanic Description
Tzkal Zuk
1. The Floor is LAVA The floor will be randomly filled with Lava, with only a few spaces left to stand. If the player is standing on lava, they will receive 5 damage every 2 ticks.
2. Slash Zuk will swing his blade in an 180 angle. If the player is within range, they will receive 0 - 70 damage.
3. Summon Healers At 50% HP, Zuk will summon Rangers to heal him for 250k hp per hitsplat received. The player must draw the aggro to stop healing. The healers will hit between 0 - 25 damage on the player. This is a one time Mechanic.
4. Quake Slam Zuk will slam the ground dealing 10 - 60 damage. The screen will shake for 5 seconds if the player is hit. This attack can be avoided by hiding behind the Pillars.
5. Fire Rain Zuk will Rain down fire across a random portion of the map dealing 15 - 35 damage.
NOTE: Zuk's Regular attacks will heal him for 2500 HP x damage dealt.

Street Fighter Set
Wave Monsters
Wave 1 2x Ryu
Wave 2 2x Ryu, 1x Chun Li
Wave 3 2x Chun Li, 1x Ken
Wave 4 2x Ken, 1x M. Bison
Wave 5 1x Cammy, 1x Guile
Wave 6 2x Ryu, 2x Chun Li, 2x Ken, 2x M. Bison
Wave 7 2x E. Honda, 2x Cammy, 2x Guile
Wave 8 4x Ryu, 4x Chun Li, 4x Ken
Wave 9 4x Cammy, 4x Guile
Wave 10 1x Akuma
Super Smash Bros Set
Wave Monsters
Wave 11 2x Meta Knight
Wave 12 2x King Dedede
Wave 13 3x Meta Knight, 3x King Dedede
Wave 14 4x Samus, 2x Link
Wave 15 2x Falco, 2x Fox
Wave 16 1x Captain Falcon, 2x Falco, 2x Fox
Wave 17 4x Meta Knight, 4x King Dedede, 4x Link
Wave 18 4x Captain Falcon, 4x Falco, 4x Fox
Wave 19 6x Samus, 6x Meta Knight
Wave 20 1x Mewtwo
Mortal Kombat Set
Wave Monsters
Wave 21 2x Scorpion
Wave 22 2x Sub-Zero, 2x Scorpion
Wave 23 4x Goro
Wave 24 3x Kung Lao, 1x Kabal
Wave 25 3x Sonya Blade, 3x Johnny Cage
Wave 26 6x Scorpion
Wave 27 6x Goro
Wave 28 3x Sonya Blade, 3x Johnny Cage, 3x Sub-Zero
Wave 29 4x Kabal, 2x Sub-Zero
Wave 30 1x Shao Kahn
House of the Dead Set
Wave Monsters
Wave 31 2x Sam
Wave 32 2x Sam, 2x Neil
Wave 33 4x Cyril
Wave 34 3x Kageo, 1x Bourbon
Wave 35 3x Ebitan A, 3x Ebitan B
Wave 36 6x Sam
Wave 37 6x Bourbon
Wave 38 3x Kageo, 3x Cyril, 3x Neil
Wave 39 4x Bourbon, 2x Kageo
Wave 40 1x Kage
Metal Slug Set
Wave Monsters
Wave 41 2x Marco Rossi
Wave 42 2x Allen O'Neil, 2x Allen Jr
Wave 43 4x Marco Rossi
Wave 44 3x Allen Jr, 1x Allen O'Neil
Wave 45 3x RootMars, 3x Avatar of Evil
Wave 46 6x Invader King
Wave 47 6x Unknown Alien
Wave 48 3x RootMars, 3x Invader King, 3x Unknown Alien
Wave 49 4x Marco Rossi, 2x Invader King
Wave 50 1x Ptolemaios
Tzkal Zuk
Wave Monsters
Wave 51 1x Tzkal Zuk

Item Rewards
1x Arcade Champion Coin The Arcade Champion Coin can be used on the Extreme Hell Gachapon Machine. This machine will reward the player with various loot.
1x Arcade Ticket The Arcade Ticket will give you a Free Entry to the Extreme Hell Arcade Mode.
500,000x Arcade Token The Arcade Token is an untradeable form of Currency used in the Arcade Reward Shop.
Arcade Champion Coin Loot Table
Platinum Coin.png Platinum Coin 1−5 1/5
Little Zuk Pet.png Little Zuk Pet 1 1/5
Tribrid Inferno Cape.png Tribrid Inferno Cape 1 1/5
Obsidian Blade.png Obsidian Blade 1 1/30
Magma Core.png Magma Core 1 1/30
Ancient Hilt.png Ancient Hilt 1 1/30
Zekkil Gauntlet.png Zekkil Gauntlet 1 1/35
Zodiac Coin (Scorpio).png Zodiac Coin (Scorpio) 1 1/20

Avengers Arcade.png

The Avengers Mode

The Avengers Mode is one of the newest and most popular arcade modes. In this raid, the player will face characters from the Avengers Universe. They each have unique abilities, making this a true challenge.


Total Tokens After Each Wave
Note: Tokens are affected by Donator Rank and Wednesday's Arcade Event. The following values in the drop don below are the total token rewards, they do not add up cumulatively.
Waves
Wave 1: Black Panther Use soulsplit for this wave or if you have Sponsor+ prayer it's better to use Fury or Cyclone for more damage.
Wave 2: Drax the Destroyer Same strategy as Black Panther, but when Drax the Destroyer says "argggghhhh" your prayer will be drained to 0 so it's recommended to bring a super restore potion, Captain America Shield, or a pet that restores prayer such as the Helicopter Pet.
Wave 3: Vision Same strategy as Black Panther.
Wave 4: Dr Strange Same stategy as Black Panther but sometimes he will teleport under you.
Wave 5: Ant Man When Ant Man says "Haha" he will turn small and any damage that you deal to him will heal him. He also will say "Haha" again when he returns to normal size and then you can deal damage.
Wave 6: Captain America


Same strategy as Black Panther, but he does have soulsplit so watch your prayer points and bring super restore potions,Captain America Shield, or a pet that restores prayer such as the Helicopter Pet or Diablo Jr incase.
Wave 7: Iron Man


Note: Iron Man is immune to Range and Melee

If you are using range or melee, then bring a switch to mage and continue killing, swap back to range or melee after. If you are only using Mage then you are fine.

Wave 8: Spiderman


Same strategy as Black Panther, but can freeze you for 3 seconds, and can do a lot of damage with his combos so be aware of your HP.
Wave 9: Hulk


Do not stand right next to his spawn because when he says "SMASH" he will deal 75 damage so be aware of your HP. Using Soulsplit, or another form of healing will make this boss much easier.
Wave 10: Thanos and Ultron


For this wave, start next to Thanos and attack him. Be aware that he switches his protection prayer randomly, so be ready to switch styles. Ultron will walk over and, if you have an AOE weapon, then you will be able to heal from the hits on Ultron. Watch your HP because Thanos can create combos with his hits and poison.
Token Reward by Wave
Wave Reward
Wave 1 20 tokens
Wave 2 40 tokens
Wave 3 60 tokens
Wave 4 80 tokens
Wave 5 100 tokens
Wave 6 125 tokens
Wave 7 150 tokens
Wave 8 250 tokens
Wave 9 350 tokens
Wave 10 500 tokens


DC Raid.png

The DC Raid can be found in the Game's Room (::arcade) along with all of the other arcade modes.
The raid consists of 5 waves in which you fight Batman, The Joker, Wonder Woman, Superman, and Flash.

Wave Breakdown
Wave 1: Batman HP: 1,500,000 , Attack Style: Range, Ability: A very rare chance Batman will stun you with his batterang for 3 seconds
Wave 2: The Joker HP: 1,600,000, Attack Style: Range, Ability: Laughing Gas : Joker will poison the area around your player
Wave 3: Wonder Woman HP: 1,700,000, Attack Style: Melee ,Ability: Taunt, Wonder Woman will pull you towards her and stun you for a few seconds.
Wave 4: Superman HP: 1,800,000, Attack Style: Melee,Ability:Super Strength, just hits..really really...hard. Superman has a cyanide punch that does 15 damage per tick
Wave 5: Flash HP: 3,000,000, Attack Style: Melee, Ability: Super Speed: Randomly runs around the room dodging your attacks

Suggested Gear

Recommended Mage Gear
Equipment

Gear

Mid-Gear End-Game Gear
Aura Auras.png Mystic Lvl 3-4 Kaiser Aura.png Kaiser Aura
Pocket Stone of Power.png Stone of Power Book of Heaven.png Book of Heaven Book of Hell.png Book of Hell
Necklace Trix Amulet (i).pngTrix Amulet (i) Kaiser Necklace.png Kaiser Necklace
Helmet Space Virtus Helm.png Space Virtus Helm Artic Guardian Hat.png Artic Guardian Hat
Body Space Virtus Body.png Space Virtus Body Artic Guardian Robe Top.png Artic Guardian Robe Top
Legs Space Virtus Legs.png Space Virtus Legs Artic Guardian Robe Bottoms.png Artic Guardian Robe Bottoms
Belt Sigil of Power.png Sigil of Power
Mainhand Sanguinesti Staff (i).png Sanguinesti Staff (i) Staff of Awakening.png Staff of Awakening
Offhand Ancient Wyvern Shield.png Ancient Wyvern Shield SharkFist Mage Offhand.png SharkFist Mage Offhand
Cape Tribrid Infernal Cape.png Tribrid Infernal Cape Demon Cape.png Demon Cape
Arrow Thepowerstone.png The Power Stone Elemental Ward Fury.png Elemental Ward Fury
Boots Ultimate Mage Boots.png Ultimate Mage Boots Draconic Magic Boots.png Draconic Mage Boots
Gloves Ultimate Mage Gloves.png Ultimate Mage Gloves Ultimate Cerberus Gloves.png Ultimate Cerberus Gloves
Ring Brimstone Ring Equipped.png Brimstone Ring Kaiser Ring.png Kaiser Ring
Pet(s) File:Thanos Pet Icon.png Thanos Pet Shadow Drake.png Shadow Drake
Recommended Melee Gear
Equipment Mid-Gear End-Game Gear
Aura Auras.png Berserker Lvl 3-4 Kaiser Aura.png Kaiser Aura
Pocket Stone of Power.png Stone of Power
Book of Heaven.png Book of Heaven Book of Hell.png Book of Hell
Necklace Trix Amulet (i).png Trix Amulet (i) Kaiser Necklace.png Kaiser Necklace
Helmet Justiciar faceguard.png Justiciar faceguard Silent Death Helm
Body Justiciar chestguard.png Justiciar chestguard Silent Death Body
Legs Justiciar legguards.png Justiciar legguards Silent Death Legs
Belt Sigil of Power.png Sigil of Power
Mainhand Arrav Sword.png Arrav Sword Slayer Master Hammer (i).png Slayer Master Hammer (i)
Offhand Arrav Shield.png Arrav Shield SharkFist Melee Offhand.png SharkFist Melee Offhand
Cape Tribrid Infernal Cape.png Tribrid Infernal Cape Demon Cape.png Demon Cape
Arrow The Power Fist.png The Power Fist Elemental Ward Fury.png Elemental Ward Fury
Boots Ultimate Melee Boots.png Ultimate Melee Boots Draconic Melee Boots.png Draconic Melee Boots
Gloves Ultimate Brawler Gloves.png Ultimate Brawler Gloves Ultimate Cerberus Gloves.png Ultimate Cerberus Gloves
Ring Brimstone Ring Equipped.png Brimstone Ring Kaiser Ring.png Kaiser Ring
Pet(s) File:Thanos Pet Icon.png Thanos Pet Shadow Drake.png Shadow Drake
Recommended Range Gear
Equipment Mid-Gear End-Game Gear
Aura Auras.png Augury Lvl 3-4 Kaiser Aura.png Kaiser Aura
Pocket Stone of Power.png Stone of Power
Book of Heaven.png Book of Heaven Book of Hell.png Book of Hell
Necklace Trix Amulet (i).png Trix Amulet (i) Kaiser Necklace.png Kaiser Necklace
Helmet Space Pernix Mask.png Space Pernix Hat Doomblade Cowl.png Doomblade Cowl
Belt Sigil of Power.png Sigil of Power
Body Space Pernix Body.png Space Pernix Body Doomblade Spaulders.png Doomblade Spaulders
Legs Space Pernix Legs.png Space Pernix Legs Doomblade Pants.png Doomblade Pants
Mainhand Poison Lotus Crossbow.png Poison Lotus Crossbow Ultimate Raksha Crossbow.png Ultimate Raksha Crossbow
Offhand Poison Lotus Crossbow Offhand.png Poison Lotus Offhand Crossbow SharkFist Range Offhand.png SharkFist Range Offhand
Cape Tribrid Infernal Cape.png Tribrid Infernal Cape Demon Cape.png Demon Cape
Arrow The Power Arrow.png The Power Arrow Elemental Ward Fury.png Elemental Ward Fury
Boots Ultimate Range Boots.png Ultimate Range Boots Draconic Range Boots.png Draconic Range Boots
Gloves Ultimate Ranger Gloves.png Ultimate Ranger Gloves Ultimate Cerberus Gloves.png Ultimate Cerberus Gloves
Ring Brimstone Ring Equipped.png Brimstone Ring Kaiser Ring.png Kaiser Ring
Pet(s) File:Thanos Pet Icon.png Thanos Pet Shadow Drake.png Shadow Drake

Poison Mechanic

The poison mechanic is active for all waves. If the player stands still for too long, they will be hit with rapid poison damage, dealing 5 damage each hit until the player moves at least 1 tile.

Wave 1

Upon entering the raid, it will take a few seconds for Batman to spawn in. It is best to place yourself in the center of the arena to allow you enough room to move around to dodge incoming attacks.

Once Batman has spawned, begin attacking him while being mindful of his stun ability. If you are stunned, keep an eye on your health and rapidly click Batman to begin attacking again as soon as possible. After killing Batman, Wave 2 will begin.

Wave 2

This Wave brings the Joker. He has a chance to spawn a poison cloud on you at the very start of the wave. This cloud hits rapid poison 10s. To avoid this, simply step outside of the cloud and heal. This can happen multiple times during the fight.
Joker Cloud.png
It can be beneficial to use Range/Mage and stay on the move. This is a very effective strategy for the final waves, as they all use melee.

Wave 3

Moving into wave 3, this mode is going to start to get harder.
Wonder Woman can be easily fought using a similar method to the Joker by staying on the move while using Range/Mage gear.

Wonder Woman's ability allows her to pull you in and stun you for several seconds, even if you are moving. Once you are pulled in and stunned, click away from Wonder Woman until you are able to move again. You aren't able to use any consumables while stunned, so as soon as you can move, eat if necessary and continue damaging Wonder Woman.

Wave 4

For the second-to-last wave, you will be fighting Superman. Once again, moving around the arena is the best method for avoiding damage. While you may be able to tank hits from the others, avoiding being hit by Superman is extremely important. Aside from his ability, he deals very high melee damage, and is capable of ending a run without needing his ability.

The only mechanic to take note of aside from the high melee damage is the random poison hit. Superman can hit a 15 damage poison hit that temporarily poisons you. This effect can be instantly removed through the use of Anti-poison potions made with the Herblore skill.

Wave 5

Now, the final wave against The Flash. Similar to Superman, he is capable of dealing very high melee damage, so keeping your distance is highly recommended.

Flash's ability allows him to quickly dash around the arena, avoiding any damage dealt to him while also dealing rapid, high damage hits. To combat this, spam eat while Flash is dashing around. As soon as he stops dashing, you are able to damage him.

After defeating The Flash, you will be moved outside of the Arcade and be given your rewards.
DC Raid Rewards.png

Rewards

Collection Log Rewards
Possible Loot
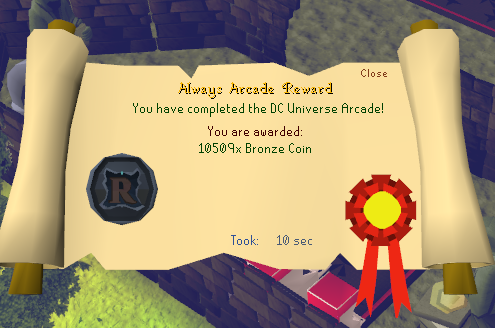
Bronze Coin.png Bronze Coin 10K−15K Always
DC Universe Box.png DC Universe Box 1 1 in 35
DC Universe Box.png DC Universe Box 2 1 in 65
Bronze Coin.png Bronze Coin 20K−30K 1 in 100
Arcade Token.png Arcade Token 1 1 in 100
Rainbow Fish.png Rainbow Fish 10 1 in 100
DC Universe Box.png DC Universe Box 3 1 in 125
DC Universe Box.png DC Universe Box 4 1 in 200
Bronze Coin.png Bronze Coin 35K−50K 1 in 300
Arcade Token.png Arcade Token 2 1 in 300
DC Universe Box.png DC Universe Box 5 1 in 300
Batman Mask.png Batman Mask 1 1 in 750
Batman Body.png Batman Body 1 1 in 750
Batman Legs.png Batman Legs 1 1 in 750
Superman Helmet.png Superman Helmet 1 1 in 750
Superman Body.png Superman Body 1 1 in 750
Superman Legs.png Superman Legs 1 1 in 750
Flash Helmet.png Flash Helmet 1 1 in 750
Flash Body.png Flash Body 1 1 in 750
Flash Legs.png Flash Legs 1 1 in 750
Arcade Token.png Arcade Token 1 1 in 750
DC Universe Box.png DC Universe Box 10 1 in 750
Donator Tabs.png Donator Tabs 3 1 in 750


Endless Header.png

The arcade's Endless Mode is one of, most challenging arcade mode's.


With new debuffs and rewards, this new mode is endlessly rewarding. The endless arcade mode contains enemies from both the regular/extreme modes as well as from the avengers arcade mode.


The first 55 waves of the endless mode are the same as the normal and extreme arcade modes.

New waves, effects, and rewards
Wave Reward
Wave 56 3x Links

3x Lara Croft

Wave 57

4x Diablo

Wave 58 3x Dark Raiden
Wave 59 3x Raiden
Wave 60 4x Lara Croft
Wave 61 4x Links
Wave 62

3 x Link 3 x Lara Croft 3 x Diablo 3 x Dark Raiden 3 x Raiden

Wave 63 4x Dark Raiden

4x Raiden

Wave 64 5x diablo

5x lara croft

Wave 65 6x Lara Croft

After this wave, healing items and soulsplit will only work every other hit, making them 50% as effective.

Wave 66 5x link
Wave 67 5x Dark Raiden

5x Raiden

Wave 68 5x Link

5x Lara Croft 5x Diablo 5x Dark Raiden 5x Raiden

Wave 69 7x lara croft
Wave 70

7x link

After this wave, rocks will begin to fall from the ceiling, dealing 20 damage if they land on you.

Wave 71 6x Raiden
Wave 72 8x link
Wave 73 5x Link

5x Lara Croft 5x Diablo

Wave 74 8x Lara Croft
Wave 75 1x Antman

1x Ironman 1x Black Panther

Reward: if wave 75 is passed, the player receives a Tribrid Infernal Cape and gains the ability to start endless mode at wave 50!

Wave 76 1x Ultron

1x Thanos

Wave 77 1x Ultron

1x Thanos 1x Raiden

Wave 78 9x Link
Wave 79 2x Antman

2x Ironman 2x Black Panther

Wave 80 2x Ultron

2x Thanos

After this wave, healing items and soulsplit will only work every fourth hit, making them 25% as effective.

Wave 81 10x Raiden
Wave 82 10x Link
Wave 83 6x Link

6x Lara Croft 6x Diablo

Wave 84 10x Lara Croft
Wave 85 2x Antman

2x Ironman 2x Black Panther

Wave 86 3x Ultron

3x Thanos

Wave 87 3x Ultron

3x Thanos 3x Raiden

Wave 88 10x Link
Wave 89 3x Antman

3x Ironman 3x Black Panther

Wave 90 4x Ultron

4x Thanos

After this wave, a poison effect takes hold dealing more damage with each wave.

Wave 91 10x Raiden
Wave 92 12x Link
Wave 93 7x Link

7x Lara Croft 7x Diablo

Wave 94 15x Lara Croft
Wave 95 5x Antman

5x Ironman 5x Black Panther

After this wave, explosions start to take place which can 1-hit the player.

Wave 96 5x Ultron

5x Thanos

Wave 97 6x Ultron

6x Thanos 6x Raiden

Wave 98 20x Link
Wave 99 10x Antman

10x Ironman 10x Black Panther

Wave 100 10x Ultron

10x Thanos

The first player to complete wave 100 received a mystery prize!

808Raptor was the first to finish wave 100 and claimed the prize of $1k store credit!


Dreamland Header.png

Welcome to Dreamland!

There are 100 waves total in the Dreamland, each having an increasing level of difficulty. You will need more than just 1 attack style, as this challenge offers NPCs with Protect from Mage/Ranged and Melee.

99 Slayer is required to enter Dreamland, and you will received 25,000 Slayer exp per wave completed.

Start by doing ::dreamland

The NPC, Shop, and Portal to enter is located in the Games Room west of ::home in the North-West corner.

For completing 100 waves in Dreamland, you will be awarded 15150 dream tokens.

Your reward will be reduced if you do not complete the Dreamland

Speak to the Dreamland NPC to switch between modes

Easy Mode: You can access the bank, but get half points Normal Mode: you can't access the bank and get full points


Wave Enemies
Wave 1 4 Penguins
Wave 2 4 Pikachu
Wave 3 4 Charmander
Wave 4 4 Sonic
Wave 5 4 Luigi
Wave 6 4 Knuckles
Wave 7 4 Crash Bandicoots
Wave 8 4 Thugbobs
Wave 9 4 Mario
Wave 10 4 Steroid Penguin
Wave 11 4 Grimlock
Wave 12 4 Optimus Prime
Wave 13 4 Icy Skeleton
Wave 14 4 Phoenix
Wave 15 4 Groudon
Wave 16 4 Shadow King
Wave 17 4 Olaf
Wave 18 4 Necromancer
Wave 19 4 Mage Gray
Wave 20 4 Guardian of Am'morth
Wave 21 4 Chaos Elemental
Wave 22 2 Oblivion Dragons
Wave 23 4 Hanzou
Wave 24 4 Masamune
Wave 25 4 Undead Lancelot
Wave 26 4 Riley Raid
Wave 27 1 of each teletubby
Wave 28 4 Angry Beavers
Wave 29 4 Timon
Wave 30 4 Pumba
Wave 31 4 Dexter
Wave 32 4 DeeDee
Wave 33 4 Courage
Wave 34 4 Perry the Platypus
Wave 35 2 Hades
Wave 36 4 Catdog
Wave 37 4 Rocco
Wave 38 4 Heffer
Wave 39 4 Ed
Wave 40 4 Edd
Wave 41 4 Eddy
Wave 42 4 Ren
Wave 43 4 Stimpy
Wave 44 4 Kim Possible
Wave 45 4 Beavis
Wave 46 4 Butthead
Wave 47 4 Tommy Pickles
Wave 48 4 Chucky
Wave 49 4 Diablo
Wave 50 4 Raiden
Wave 51 4 Undead War Generals
Wave 52 4 Dreadnaut
Wave 53 4 Jimmy Neutron
Wave 54 4 Carl Wheezer
Wave 55 4 Demon Conjurer
Wave 56 4 Tainted Warmaster
Wave 57 4 Helwyr Elf
Wave 58 4 Ancient Guardian
Wave 59 4 Ancient Wizard
Wave 60 4 Ancient Crusader
Wave 61 4 Corrupted Priest
Wave 62 4 Demonic Spell Casters
Wave 63 4 Sully
Wave 64 4 Hormone Monster
Wave 65 4 Hades
Wave 66 Donatello
Wave 67 Michaelangelo
Wave 68 Raphael
Wave 69 Leonardo
Wave 70 Donatello, Michaelangelo, Raphael, Leonardo
Wave 71 4 Link
Wave 72 5 Dark Raiden
Wave 73 4 Lava Croft
Wave 74 8 Diablo
Wave 75 8 Link
Wave 76 8 Lava Croft
Wave 77 8 Sully
Wave 78 8 Hormone Monsters
Wave 79 8 Ancient Guardians
Wave 80 8 Ancient Wizards
Wave 81 8 Ancient Crusaders
Wave 82 Crimson Chin
Wave 83 Slayer Superior - no damage cap
Wave 84 Slayer Superior - no damage cap
Wave 85 Slayer Superior - no damage cap
Wave 86 1 of each Slayer Superior - no damage cap
Wave 87 4 Crimson Chins
Wave 88 Cursed Omen - 50% HP
Wave 89 Poseidon - 50% HP
Wave 90 Masterwork Warrior - 50% HP
Wave 91 Lesser Deacon - 5M HP requires a magic weapon
Wave 92 Lesser Brawler - 5M HP requires a melee weapon
Wave 93 Lesser Demon Executioner - 5M HP requires a ranged weapon
Wave 94 2 Cursed Omen - 50% HP - then regular boss
Wave 95 2 Poseidon - 50% HP - then regular boss
Wave 96 2 Masterwork Warriors - 50% HP than regular boss
Wave 97 Poseidon, Cursed Omen, Masterwork Warrior - 50% HP than regular boss
Wave 98 4 Link 4 Lava Croft
Wave 99 4 Raiden 4 Diablo
Wave 100 King Gio


Tempoross Header.png


Tempoross.png
The Dock


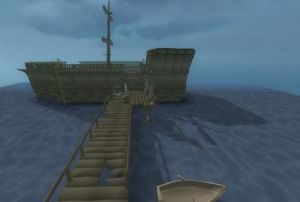
Use the Minigame Teleport, then speak to the captain on the dock. Go through every dialogue and you will then be allowed to board the ship if you meet the minimum fishing level requirement of 60.

Four cannon fire harpoonfish at Tempoross.


As soon as you board the ship a countdown will start. When the timer reaches zero, everyone on the ship will be transported to the Tempoross fight. It is recommended to do tempoross as a group because solo kills are agonizingly slow.

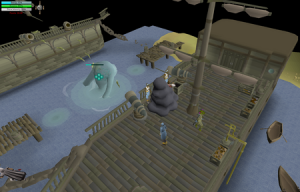
After the ship departs, players will arrive at Tempoross Cove on board one of two ships, both of which are identical in function and role in defeating Tempoross. A selection of equipment, including ropes, buckets, hammers, and harpoons are available from the crates on deck should the player have lost or forgotten any items.

If you've brought your own infernal harpoon it is not really necessary to grab any of the items off of the ship, but if you don't have an infernal harpoon I would grab at least one of everything.

Double harpoonfish!


Players must help the anglers subdue Tempoross by draining its essence to zero. To do this, players must first deplete its energy by firing cannons found on the decks of both ships, using harpoonfish as ammo. The fish are gathered via harpoon spots found in the waters around the island and can optionally be cooked to deal more damage. Occasionally, a fishing spot will have jumping harpoonfish. Fishing at these spots allows for the chance of catching two harpoonfish at a time. Raw harpoonfish drain 10 energy per fish, while cooked fish drain 15 energy per fish.


Submerged


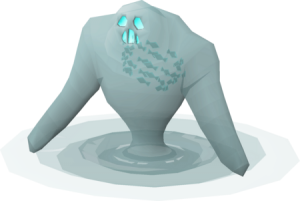
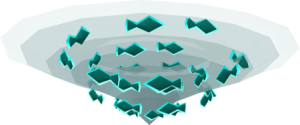
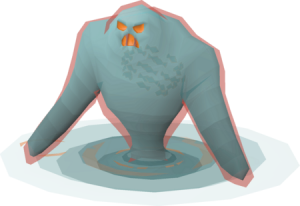
Once its energy is depleted to zero, Tempoross will submerge and the second phase of the fight will begin. During this phase, players must catch the energized fish from Tempoross by fishing at the whirlpool at the end of each dock. Doing so will reduce its essence. If the essence depletes to zero before Tempoross has fully restored its energy, it will retreat and the encounter will be successful. However, if Tempoross fully regains its energy before its essence is fully depleted, it will emerge and the first phase of the fight will repeat again. Any essence depleted from Tempoross in the second phase will remain depleted. This cycle can be repeated up to three times, after which Tempoross will gain too much energy, and the encounter will end unsuccessfully. If the encounter is successful, the player will be automatically sent back to the Ruins of Unkah after approximately 20 seconds. Players can skip the wait by using the right-click leave option on any of the NPCs around the Cove.


Enraged


If the encounter is unsuccessful and the Intensity bar reaches 100% Tempoross will become enraged and the minigame will end sending the player back to the dock.


During the fight, Tempoross will attempt to disrupt the player's efforts by unleashing an array of attacks. These attacks do not deal any damage; rather, they hinder the player's movements and can cause players to lose some of the fish and tools gathered during the encounter. Tool that will not be lost to any attacks is the Infernal Harpoon

A colossal wave closes in...


  • Wave Attack - A huge wave covers the entire cove, pushing players a few tiles away. Players can avoid being swept away by using rope to tether themselves to masts or totem poles found on the ships and islands respectively. Tethered players will be unaffected by the wave attack but will be unable to move for the duration of the wave (though players can freely tether/untether themselves). The wave can also break masts and totem poles, which will need to be repaired with a hammer before they can be used to tether again. The wave will also extinguish any fires started by the lightning attack. The wave attack will not start if Tempoross' energy is 10% or lower.
A strong wind blows as clouds roll in...
  • Lightning Attack - Large grey clouds move over the island and ships, expand, and then emit lightning bolts. Players can put out the fires with buckets of water, but if not done quickly, fires will spread to more tiles. As with the wave attack, the lightning attack will not start if Tempoross' energy is 10% or lower. However, fires will continue to spread.
A zapped cannon
A charged torrent of water surges towards a nearby cannon...
  • Torrent Attack - A swirling pillar of water is launched towards a cannon, which temporarily disables it and stuns any player currently loading the cannon. This can be avoided by quickly stepping away or switching to another cannon onboard. The Torrent Attack will not start if Tempoross' energy is 10% or lower.


  • Fishing harpoonfish (5 points/fish) - Collect raw harpoon fish by fishing at the designated fishing spots.
  • Cooking harpoonfish (10 points/fish) - Cook harpoonfish to increase their damage output when used as ammo.
  • Depositing harpoonfish (raw/cooked) (20/65 points/fish) - Deposit harpoonfish into the crates next to the cannons on the ships. Depositing cooked harpoonfish yields significantly more points.
  • Repairing totems/masts (40 points/repair) - Over time, the totem pollss and masts players tether themselves to will get damaged and need to be repaired with an Imcando or normal hammer. Doing so provides a decent amount of construction experience.
  • Dousing fires (40 points/fire) - Douse the fires created by Tempoross' lightning attack.
  • Surviving the wave (10 points/wave) - Tether to either a totem pole or mast to survive the colossal wave.
  • Harpooning spirit pool (55 points/scatter) - Fish in the whirlpools to drain Tempoross' essence.

Bonus Permits

After a player has completed a session, they will be rewarded with bonus permits. These permits can be used on the "Empty Pool" south of the boardwalk to the enterance.

Permits are given based off of time spent completing the game.

Time to Complete Bonus Permits (Executive and under) Platinum Diamond
Under 5 minutes 20 22 24
Under 8 minutes 10 11 12
Under 10 minutes 5 6 7
Under 15 minutes 1 1 2

Drop Table

Zalcano Banner.png
Zalcano.png

Zalcano Mechanics

While the player is inside the prison, Zalcano has six different attacks that the player must watch out for as they attempt to take on the stone demon. Each of the attacks are performed at random intervals throughout the fight.

Zalcano will stomp on the ground, causing boulders to fall from the ceiling. These are easily avoided by stepping at least one tile away. Boulders can be easily spotted by watching out for the falling pebbles/dirt, which will be followed by the falling boulder. It is also easy to know which tile they are falling onto by the location of their shadow on the ground. Players who are hit by these can take 40+ damage.

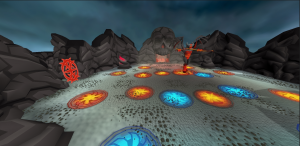
Zalcano will summon blue and orange demonic symbols. If a player is standing on a blue demonic symbol when attacking Zalcano with imbued tephra, it will increase the players accuracy and damage significantly. The orange demonic symbols, however, should be avoided, These will damage the player as well as reduce their run energy if they pass through it or stand in it. Damage is dealt constantly if a player stands within it and can result in a quick death if they are not paying attention.

Zalcano will summon a golem on the edge of the prison. If the golem reaches her, it will restore her armour's health based on the health of the Golem. If the Golem is at full health, it will restore 50 hitpoints towards her armour. It is possible for a player to hurt the golem with the imbued tephra.

Zalcano will fire a red ball of energy at the current glowing red rock formation to deactivate it, changing its location. If a player is standing near the rock formation when this happens, they will take 24+ damage. These can be avoided by walking away from the rock.

After Zalcano has fallen and players have caused her damage, she will rise again. If any players are standing next to her while this occurs, she will create a shockwave push them back, causing the player small amounts of damage. All tephra are destroyed as well.

Throwing imbued tephra while standing under a blue demonic symbol will increase the player's accuracy and damage.

Once Zalcano's armour is broken, players must mine Zalcano while she is down to complete the kill.

(Players will also get damaged if they stand under Zalcano when she has fallen. Damage rate is much less than an orange symbol, dealing around 3-10 damage per tick, and the danger persists until Zalcano begins to rise again)

Requirements

75 Mining
40 Runecrafting

Collection Log Rewards

Collection Log Rewards

Drops (Based on Luck)


Item Quantity Rarity
Gold Coin.png Gold Coin 10−25 Common
Black Diamond Box (Event).png Black Diamond Box (Event) 1 Common
Kismet Box (Event).png Kismet Box (Event) 1 Common
Perfect Enchantment Stone.png Perfect Enchantment Stone 2 Common
Pure Essence.png Pure Essence 100−250 Common
Dream Enchantment Stone.png Dream Enchantment Stone 1 Common
2.5x Damage Card.png 2.5x Damage Card 1 Common
Gold Coin.png Gold Coin 10−50 Common
Royal Mystery Box.png Royal Mystery Box 1−5 Common
Rainbow Fish.png Rainbow Fish 5 Common
Antique Lamp.png Antique Lamp 20 Uncommon
Mr X Teleport.png Mr X Teleport 5 Uncommon
Elemental Fury Goodiebox.png Elemental Fury Goodiebox 1 Uncommon
Box of Treasures.png Box of Treasures 1 Uncommon
1 Day Elo Card.png 1 Day Elo Card 1 Uncommon
Pulse Core.png Pulse Core 1−5 Rare
Ancient Effigy.png Ancient Effigy 1−5 Rare
Herblore Supply Crate.png Herblore Supply Crate 1−5 Rare
Snapdragon.png Snapdragon 25−50 Rare
Cadantine.png Cadantine 25−50 Rare
Lantadyme.png Lantadyme 25−50 Rare
Dwarf Weed.png Dwarf Weed 25−50 Rare
Torstol.png Torstol 25−50 Rare
Samaden.png Samaden 5−15 Rare
Arbuck.png Arbuck 5−15 Rare
Fellstalk.png Fellstalk 5−15 Rare
Argway.png Argway 5−15 Rare
Wergali.png Wergali 5−15 Rare
Snape Grass.png Snape Grass 25−50 Rare
Limpwurt Root.png Limpwurt Root 25−50 Rare
White Berries.png White Berries 25−50 Unknown
Crushed Nest.png Crushed Nest 25−50 Rare
Unicorn Horn Dust.png Unicorn Horn Dust 25−50 Rare
Potato Cactus.png Potato Cactus 25−50 Rare
Red Spider Eggs.png Red Spider Eggs 25−50 Rare
Mort Myre Fungus.png Mort Myre Fungus 25−50 Rare
Wine of Zamorak.png Wine of Zamorak 25−50 Rare
Cardinal Herb.png Cardinal Herb 25−50 Rare
Omega Rune.png Omega Rune 100−250 Rare
Charm Rune.png Charm Rune 100−250 Rare
Power Rune.png Power Rune 100−250 Rare
Harvest Rune.png Harvest Rune 100−250 Rare
Auspice Rune.png Auspice Rune 100−250 Rare
Triad Rune.png Triad Rune 75−150 Rare
Maniacal Rune.png Maniacal Rune 75−150 Rare
Dex Rune.png Dex Rune 75−150 Rare
Mystic Rune.png Mystic Rune 75−150 Rare
Prosperity Rune.png Prosperity Rune 75−150 Rare
Mega Lottery Box.png Mega Lottery Box 1−3 Rare
Royal Mystery Box.png Royal Mystery Box 1−3 Rare
Ultra Pet Mystery Box.png Ultra Pet Mystery Box 1−3 Rare
Gold Coin.png Gold Coin 50−100 Rare
Advanced Pulse Core.png Advanced Pulse Core 1 Very Rare
Ancient Primal Effigy.png Ancient Primal Effigy 1 Very Rare
Purple Haze Seed.png Purple Haze Seed 1−3 Very Rare
Herblore Supply Crate.png Herblore Supply Crate 1−3 Very Rare
Double Slayer Exp Potion.png Double Slayer Exp Potion 1 Very Rare
Double Slayer Point Potion.png Double Slayer Point Potion 1 Very Rare
Box of Testaments.png Box of Testaments 1 Very Rare
Gold Coin.png Gold Coin 100−250 Very Rare
Shadow Pet Goodiebox.png Shadow Pet Goodiebox 1 Very Rare
Baby Yoda Goodiebox.png Baby Yoda Goodiebox 1 Very Rare
Descimator9000 Goodiebox.png Descimator9000 Goodiebox 1 Very Rare
Elemental Fury Goodiebox.png Elemental Fury Goodiebox 1 Very Rare
Executive Totem Goodiebox.png Executive Totem Goodiebox 1 Very Rare
Platinum Coin.png Platinum Coin 1−5 Very Rare
Platinum Coin.png Platinum Coin 5−10 Ultra Rare
Infernal Hatchet.png Infernal Hatchet 1 Dream
Infernal Pickaxe.png Infernal Pickaxe 1 Dream
Infernal Harpoon.png Infernal Harpoon 1 Dream
Zalcano Pet.png Zalcano Pet 1−5 Dream